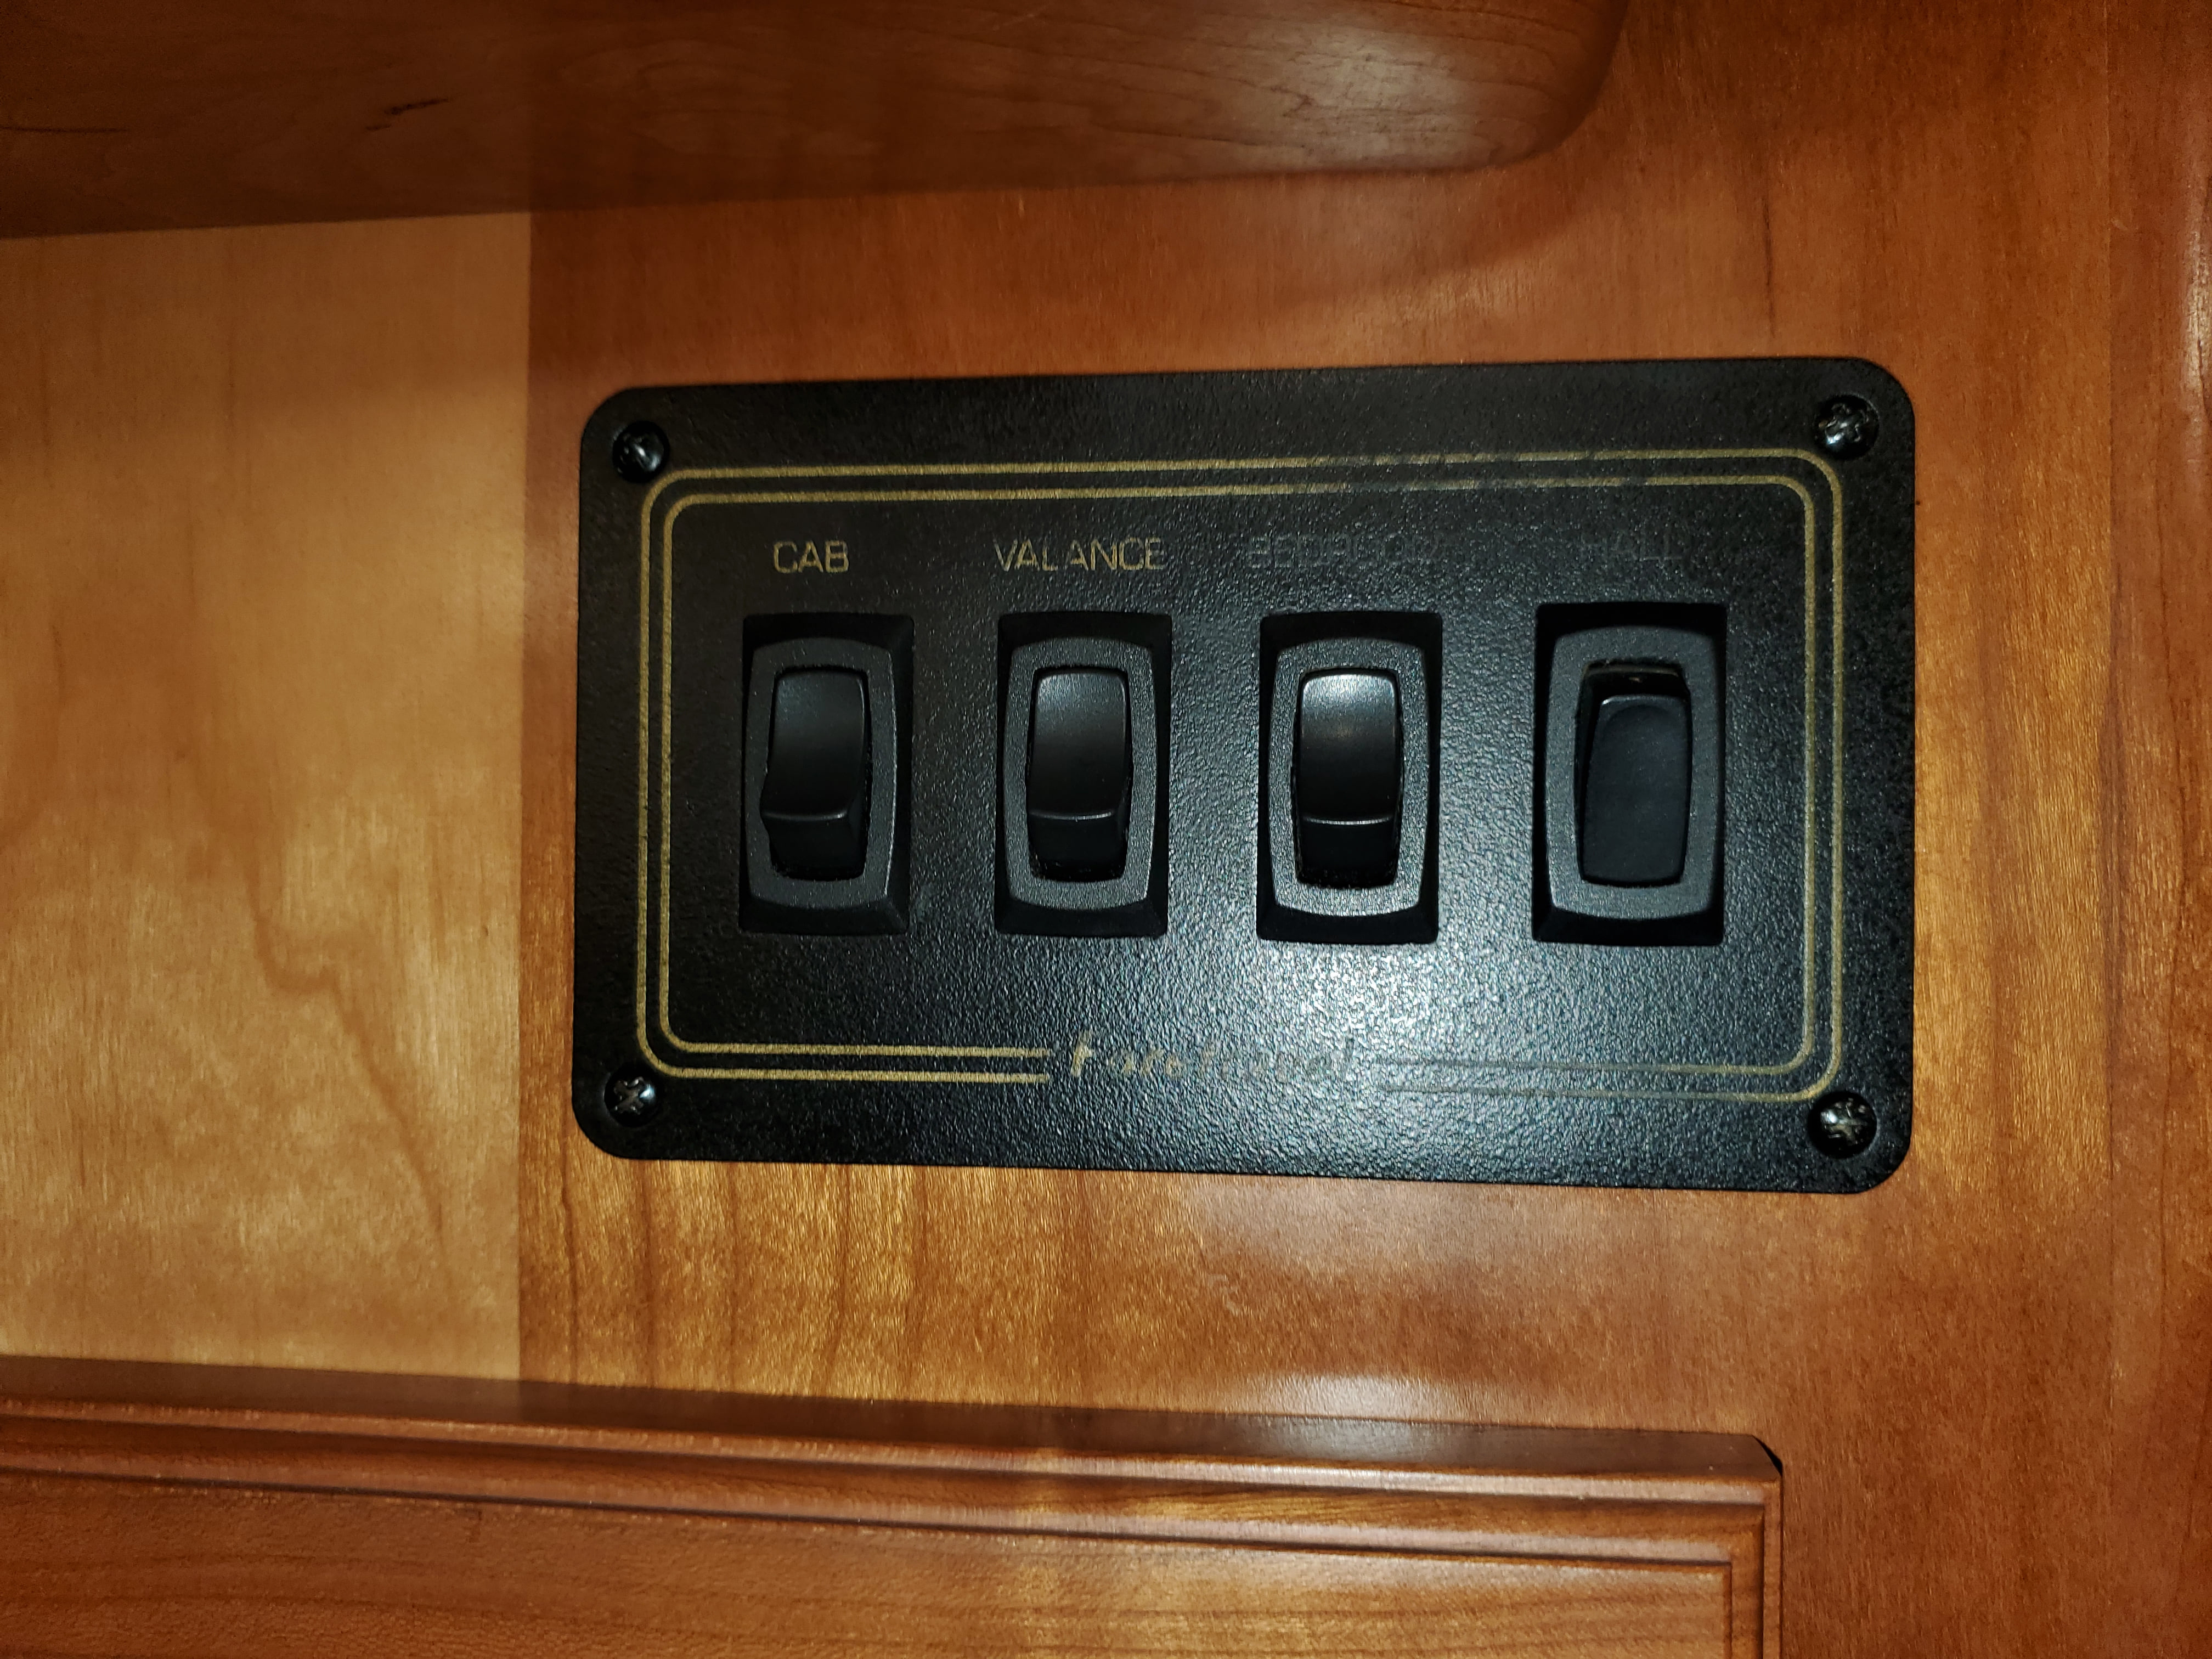
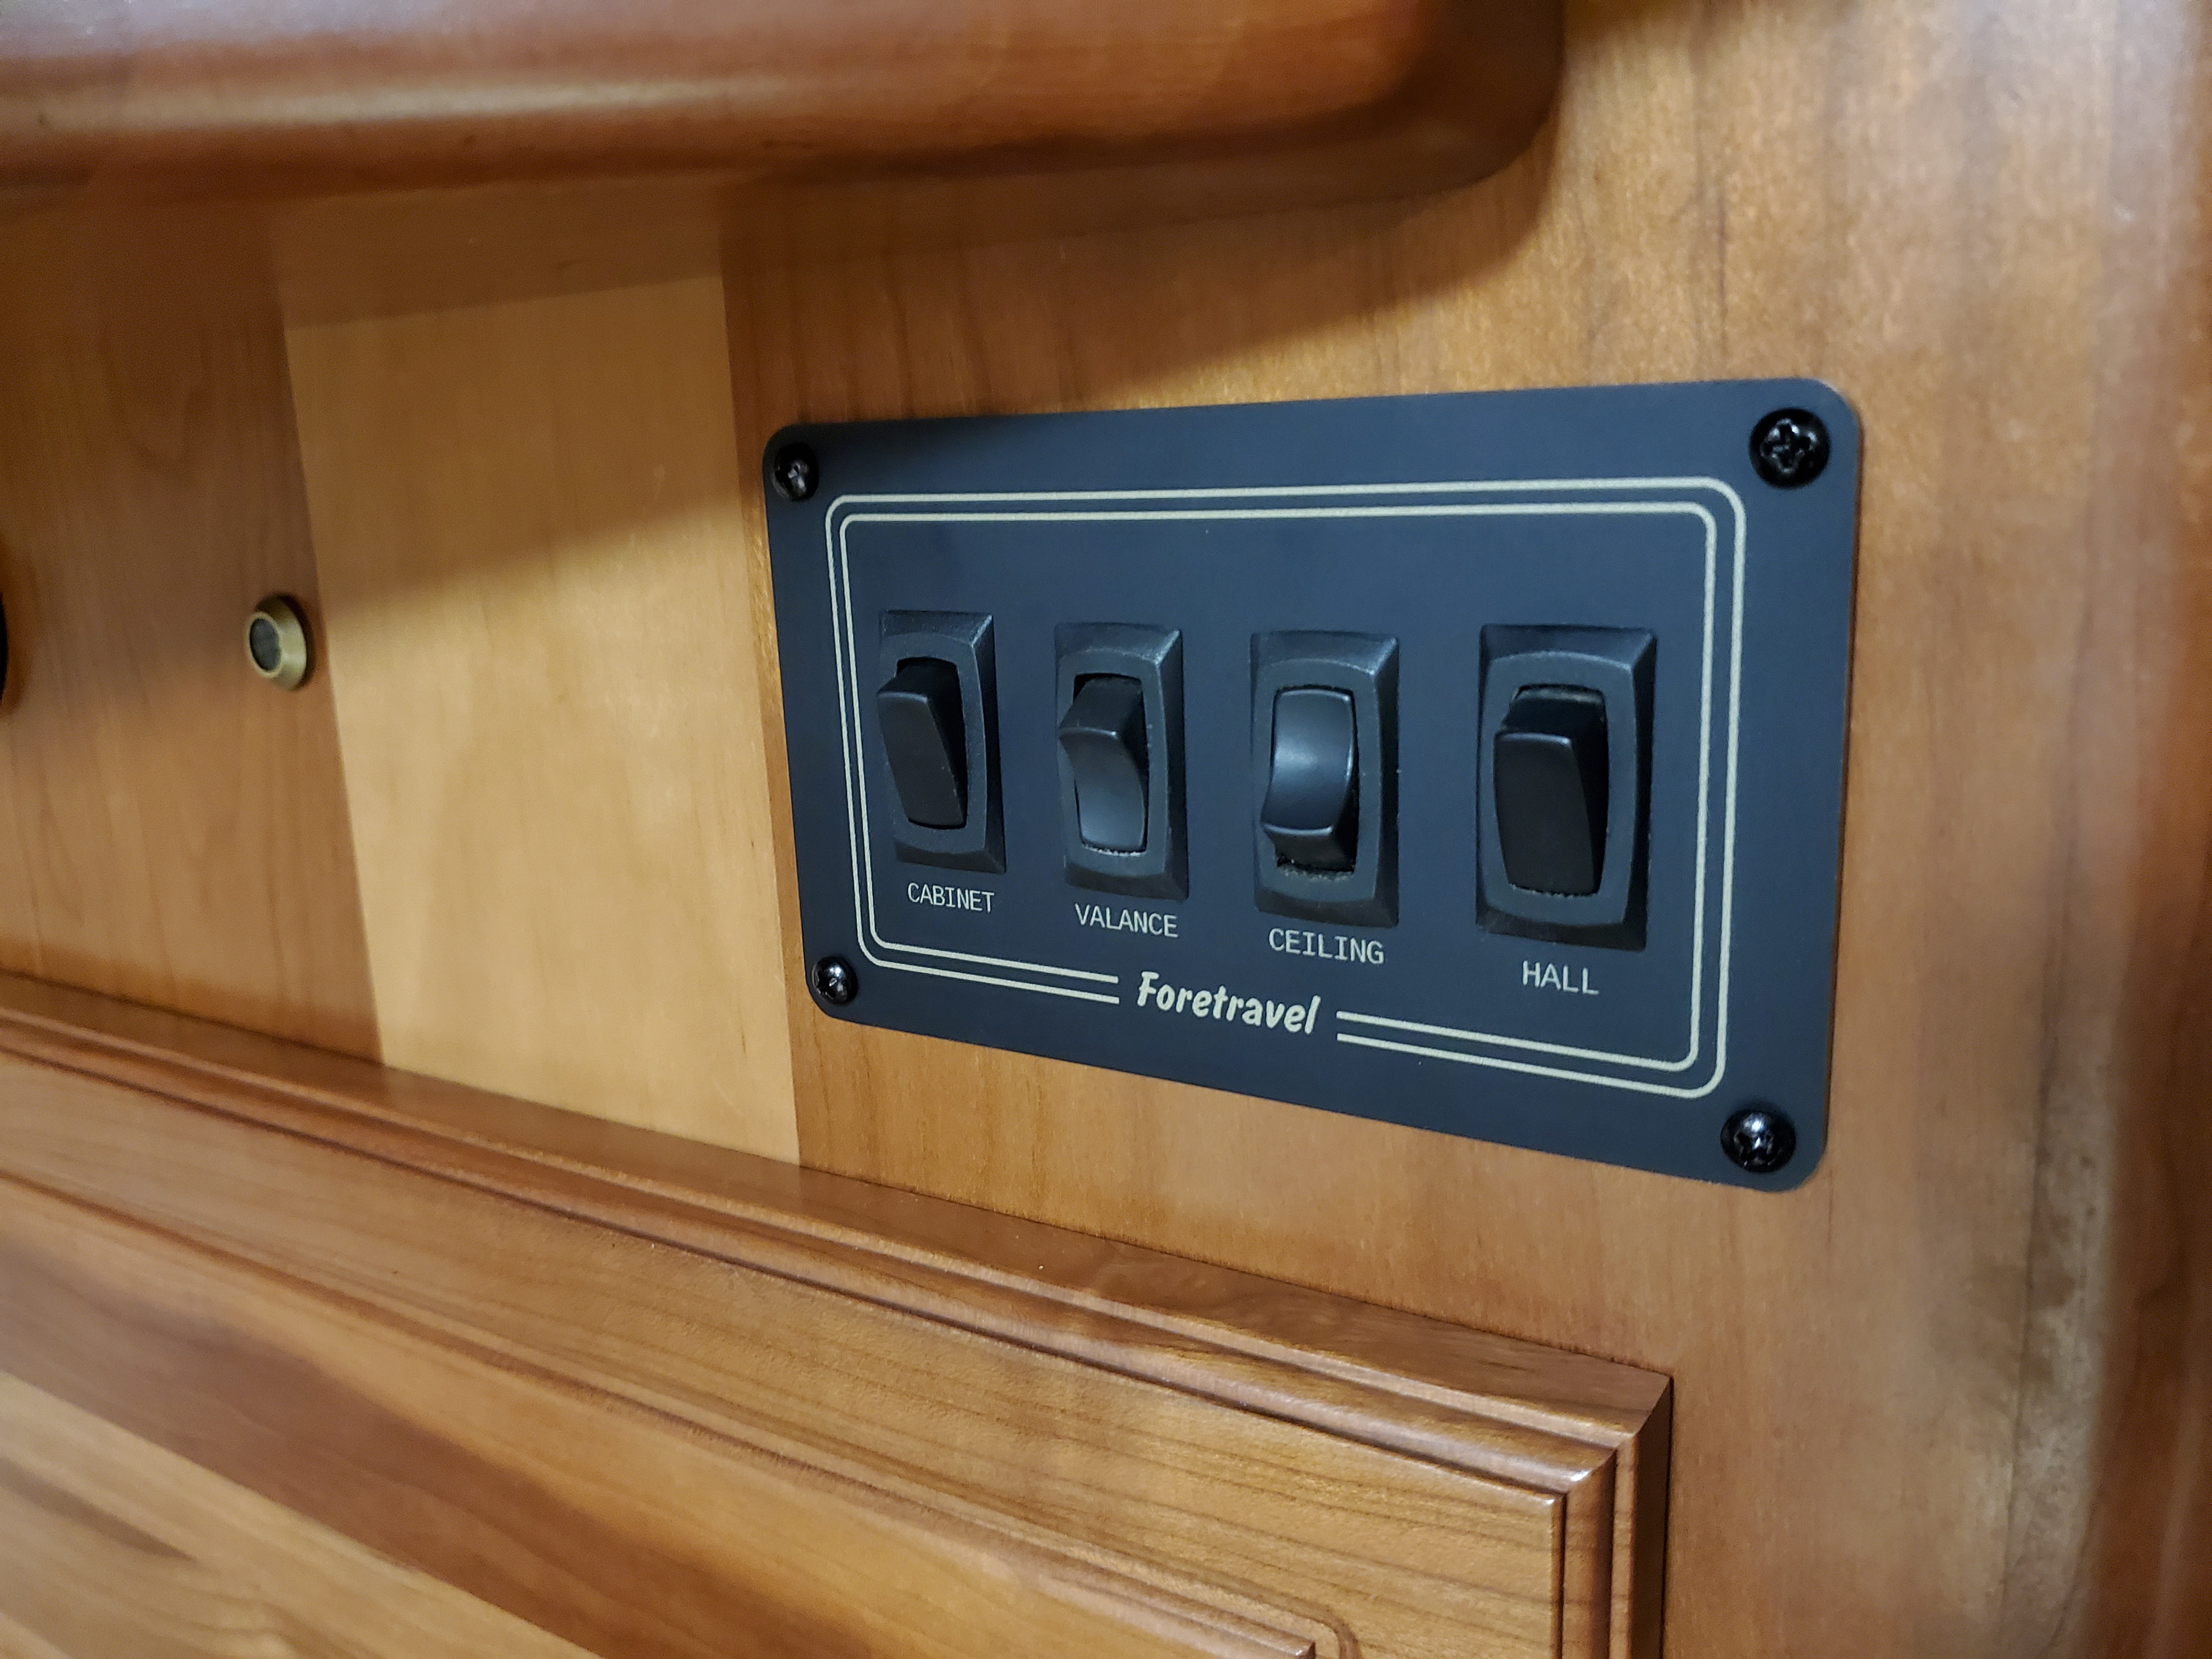
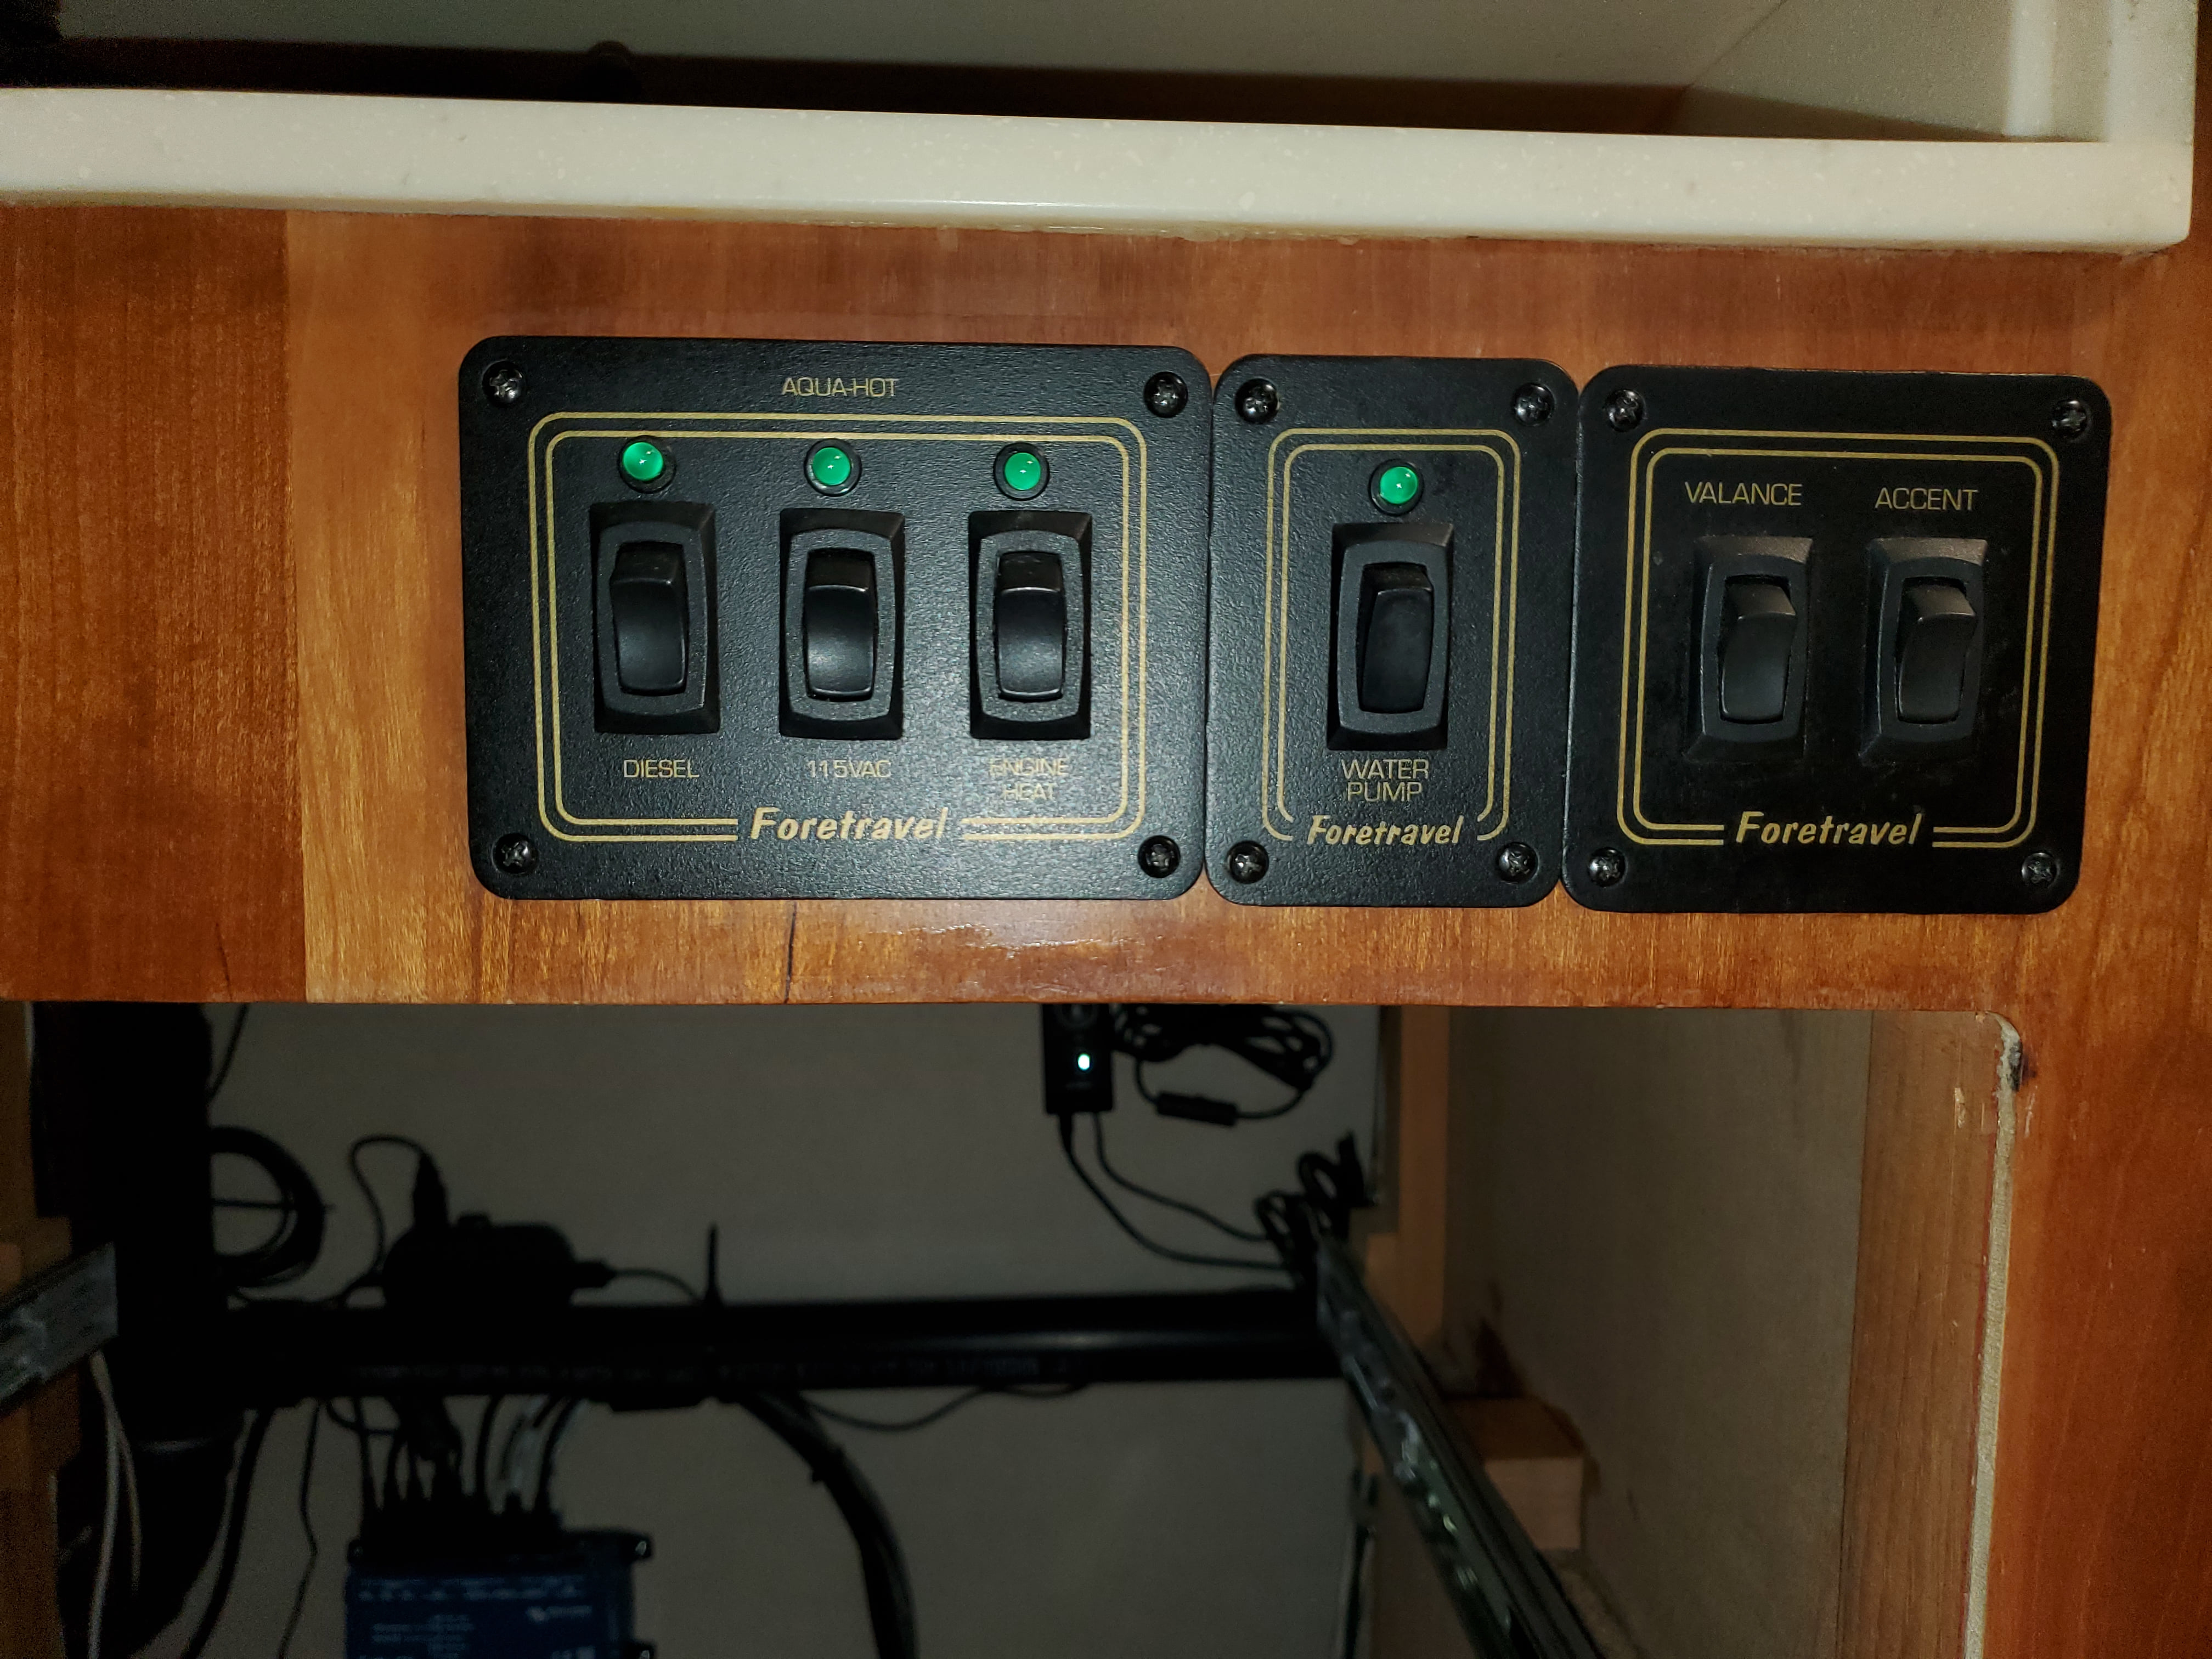
New Switch Plates
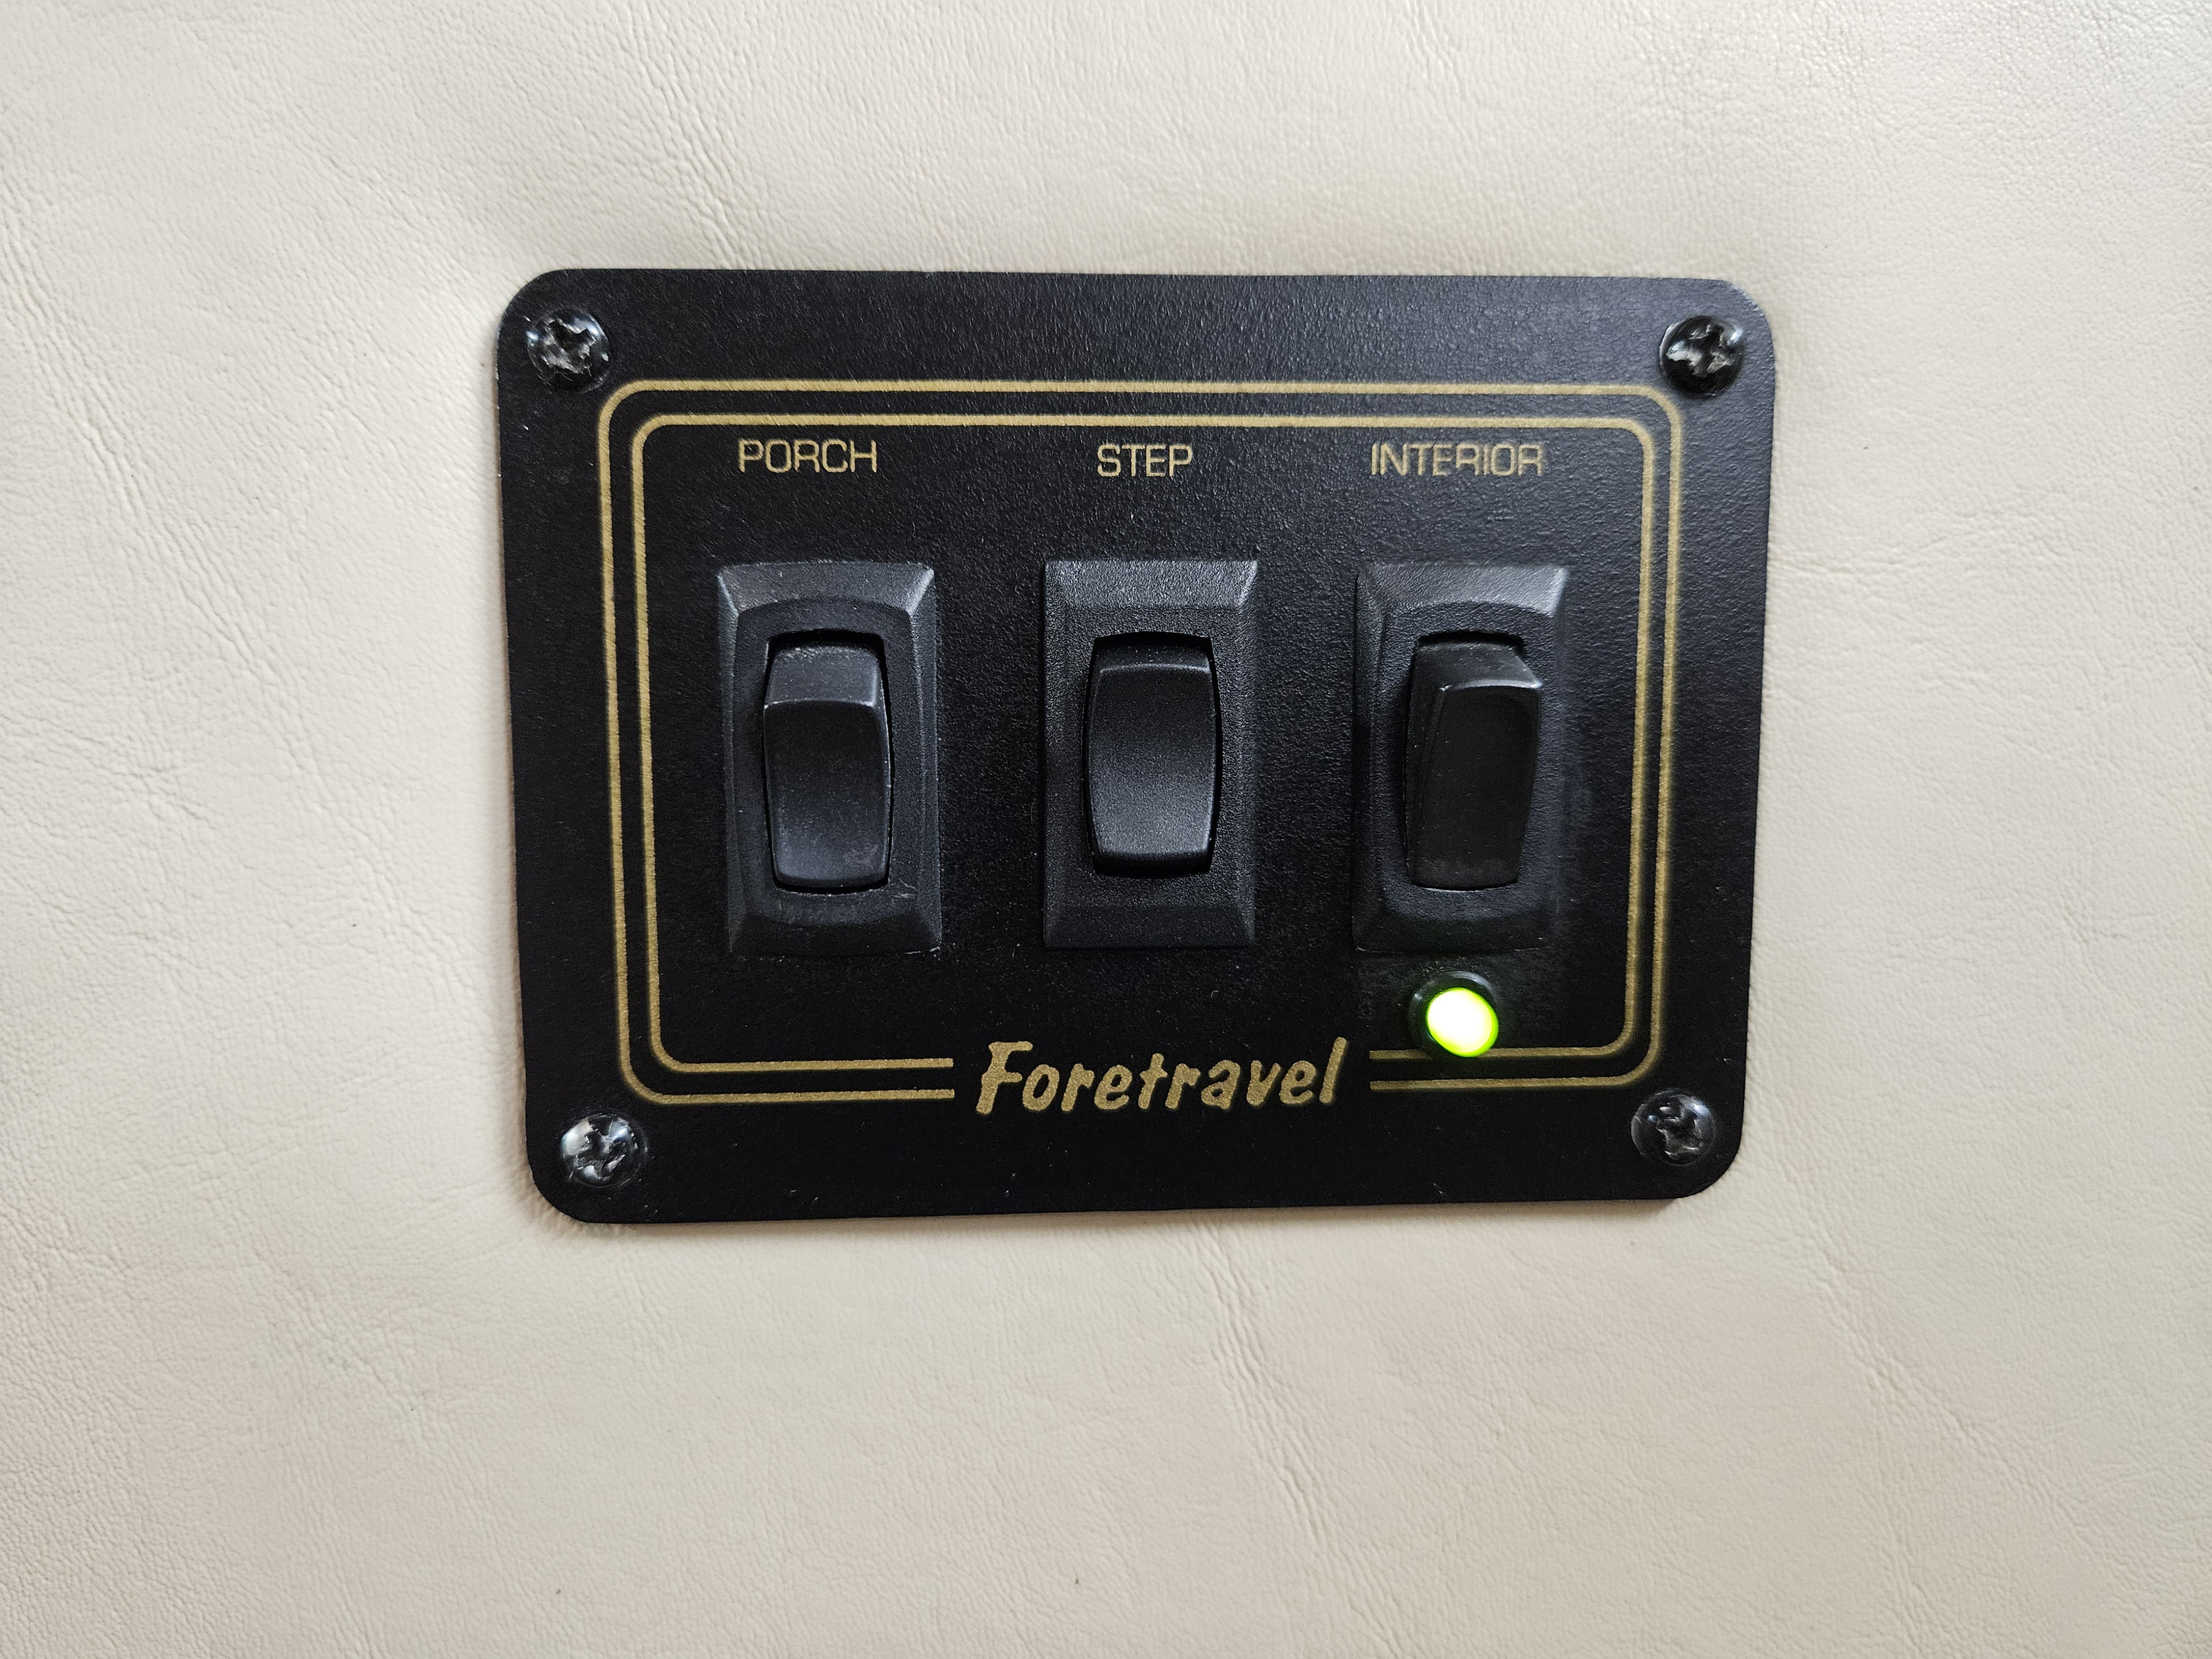
We upgraded the front lock/unlock switch by repurposing an existing one on the front panel. Functionally it worked, but it was mislabeled as “step.”
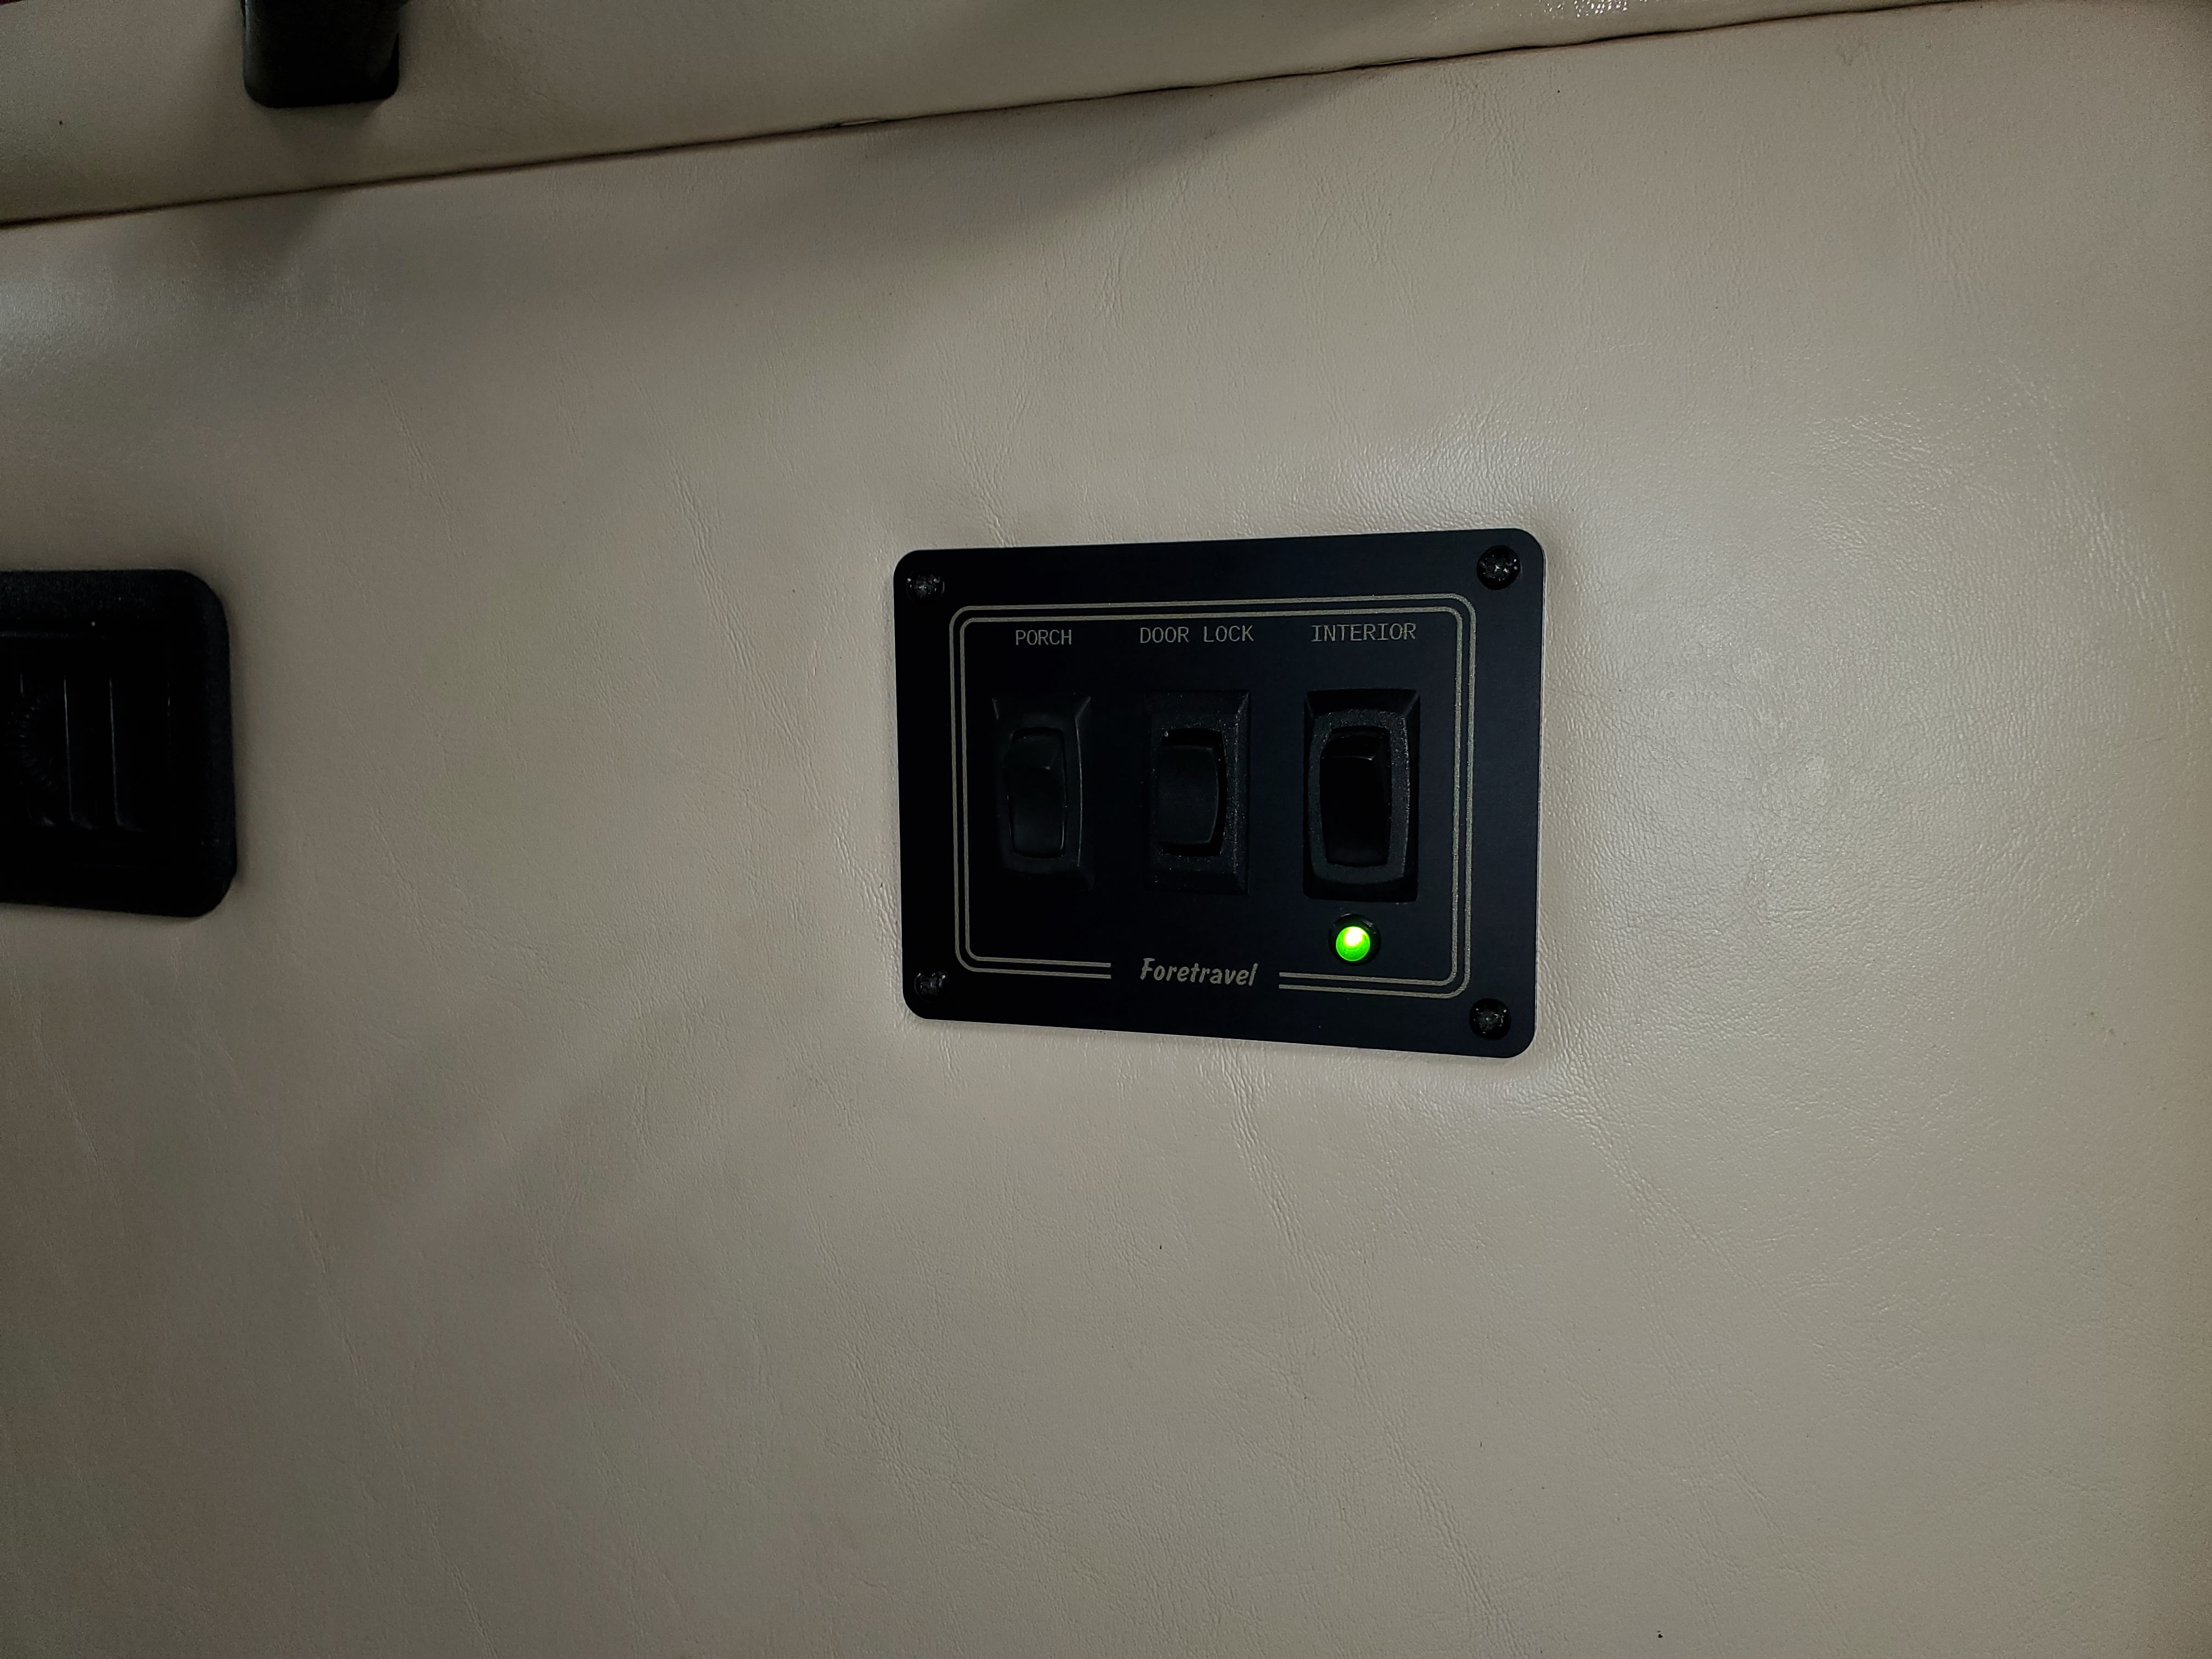
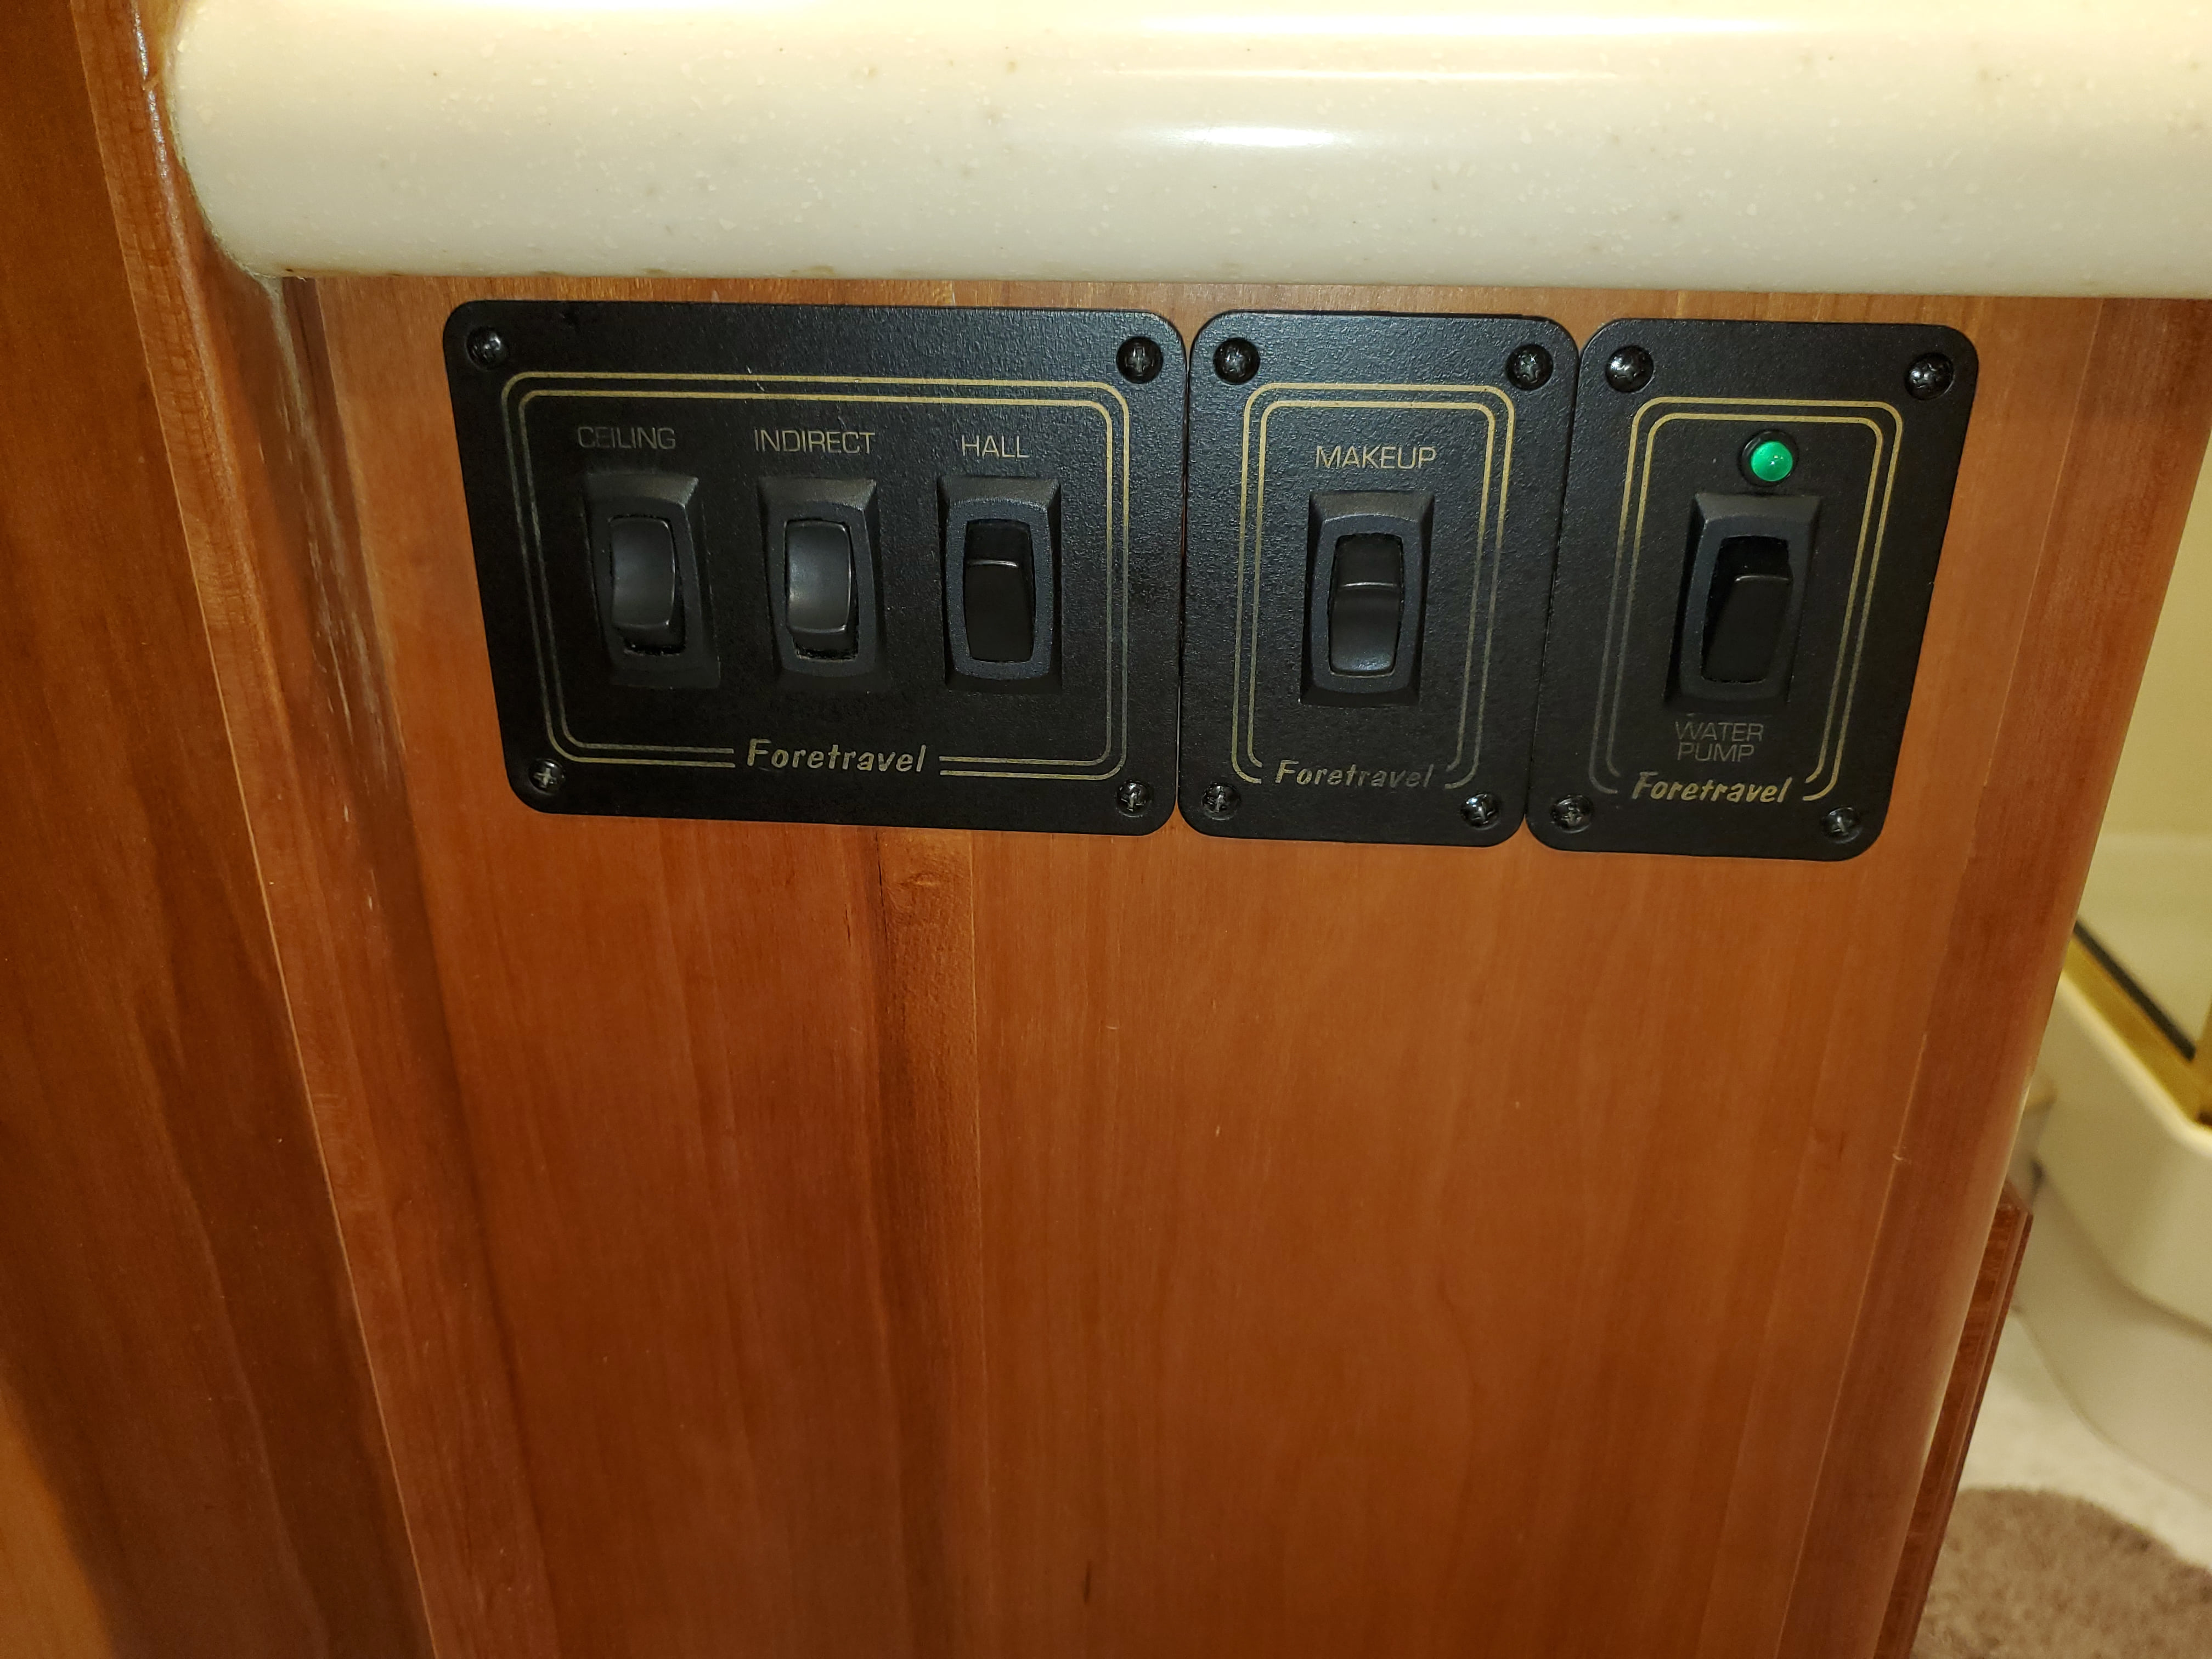
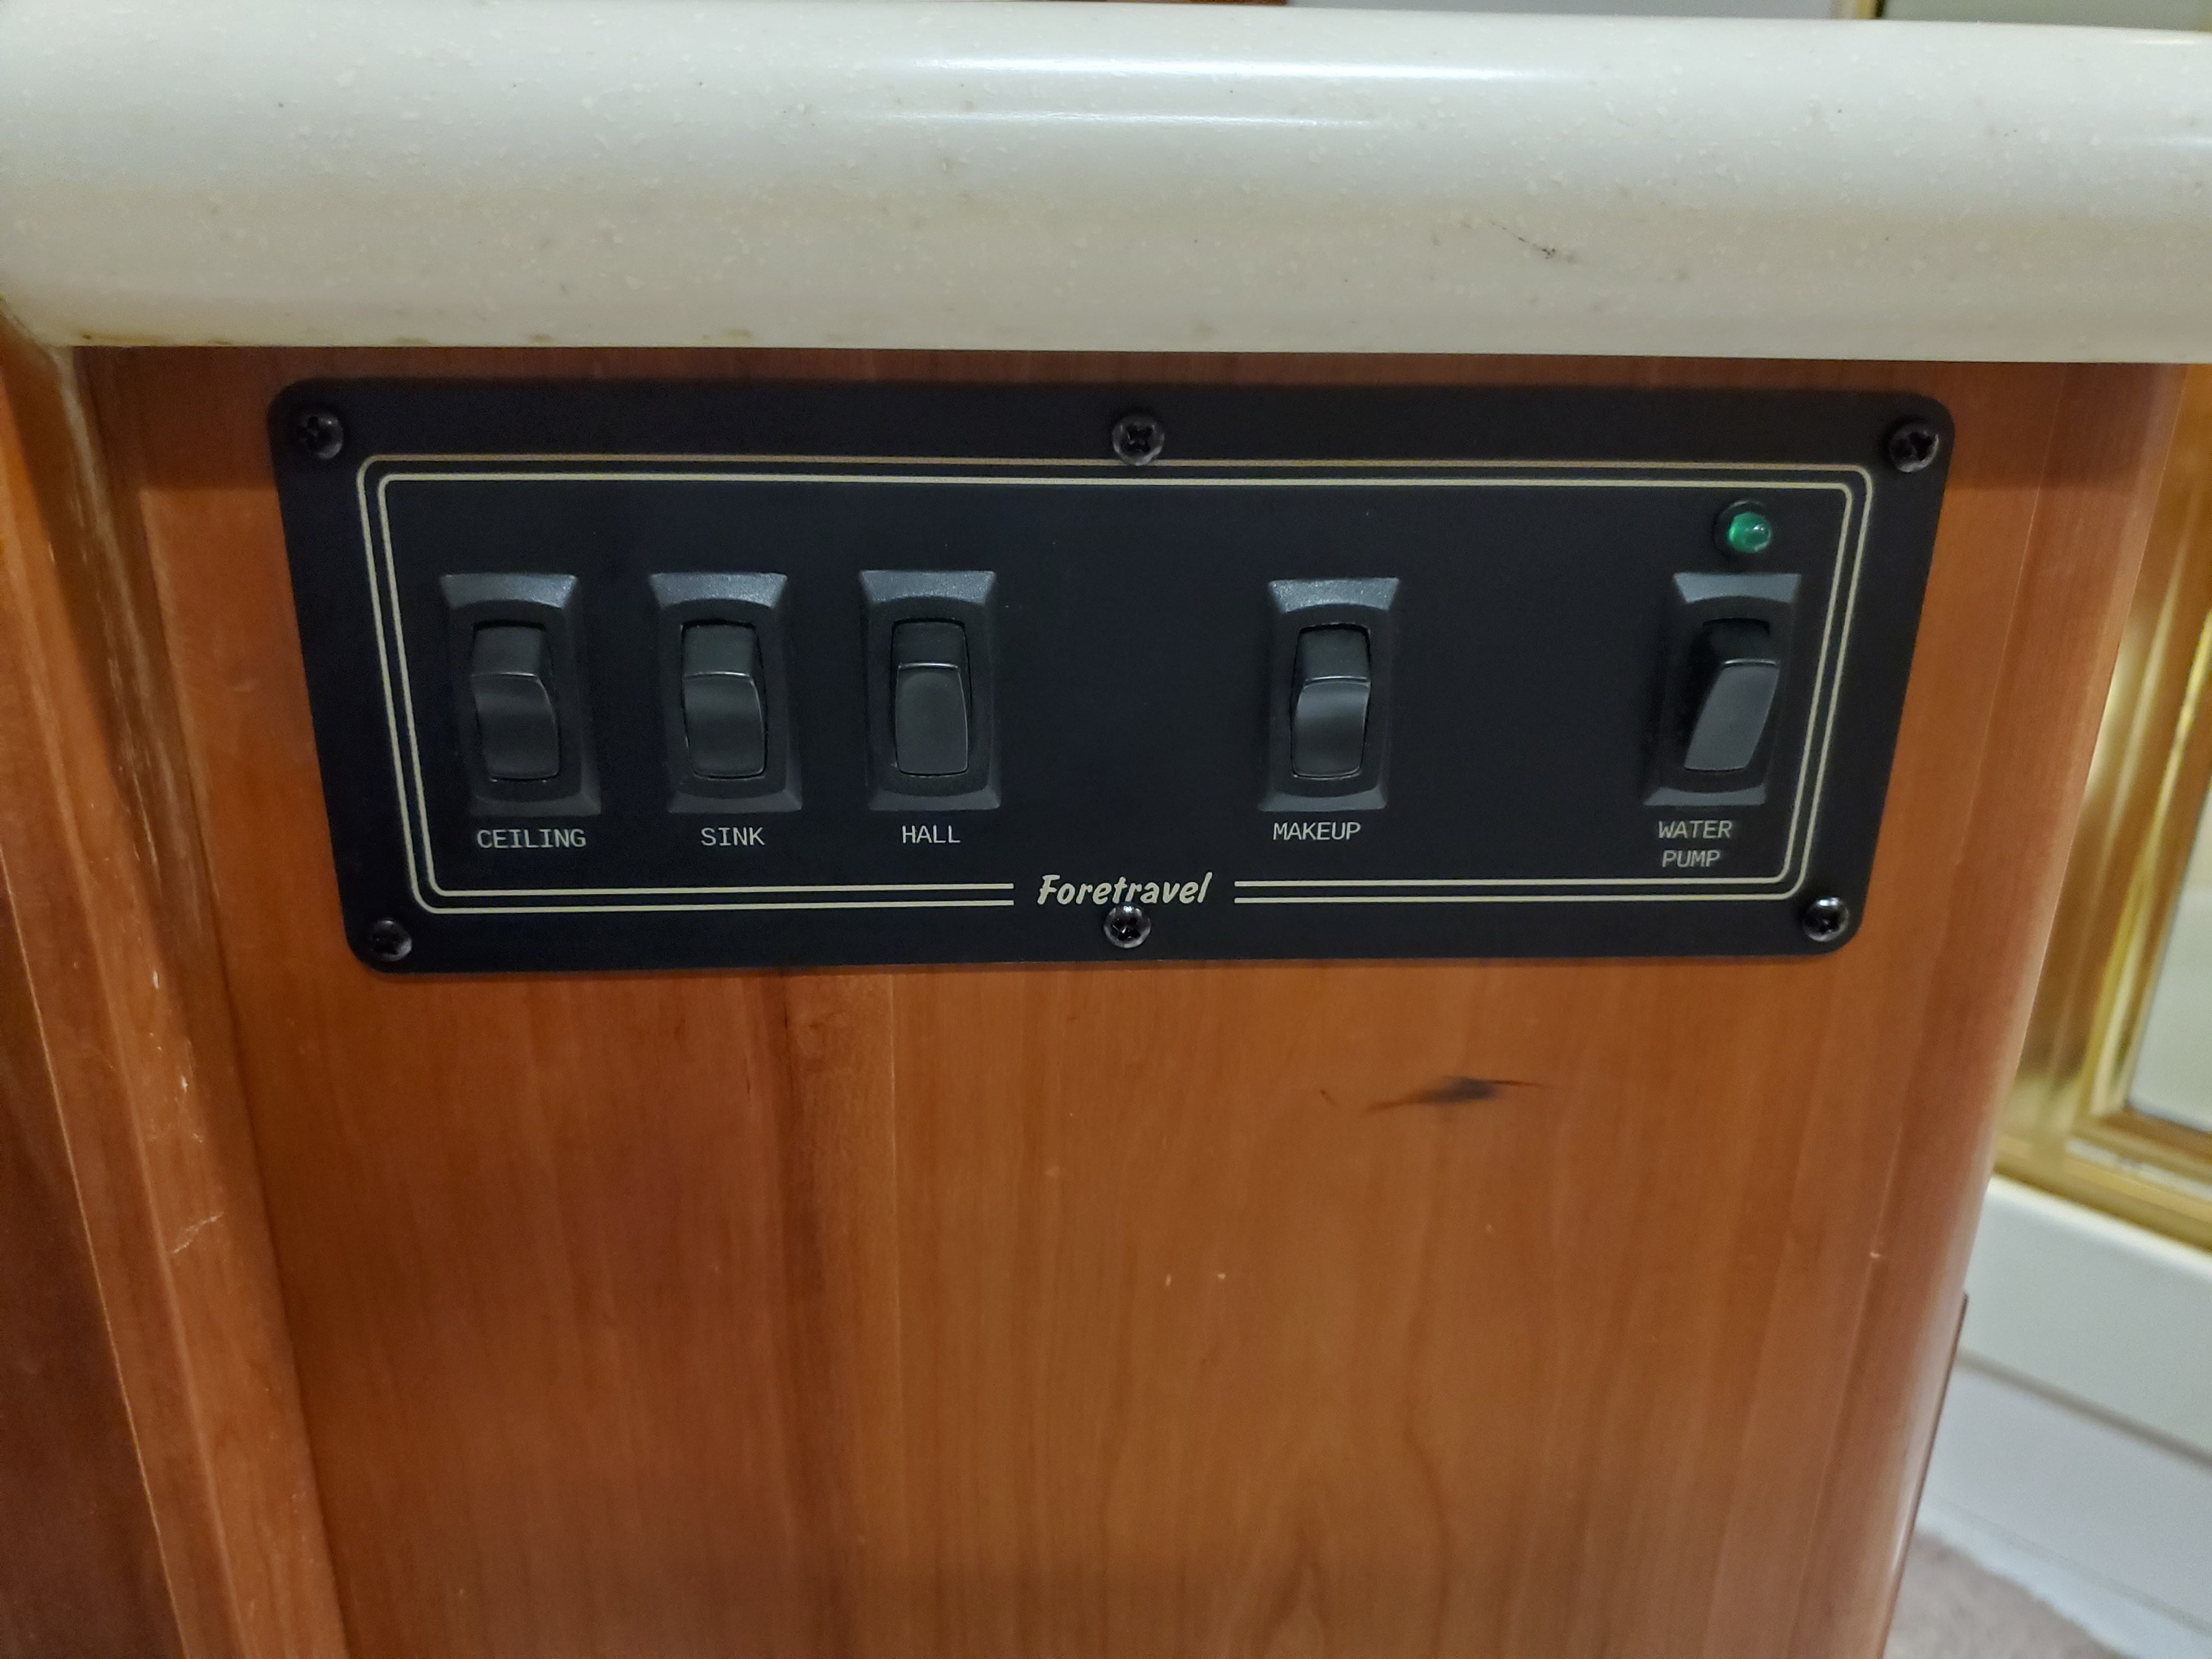
Now the switch has a proper plate, along with several others we replaced due to missing or worn-off labels. We also combined some side-by-side switch groups into single plates for a cleaner look.
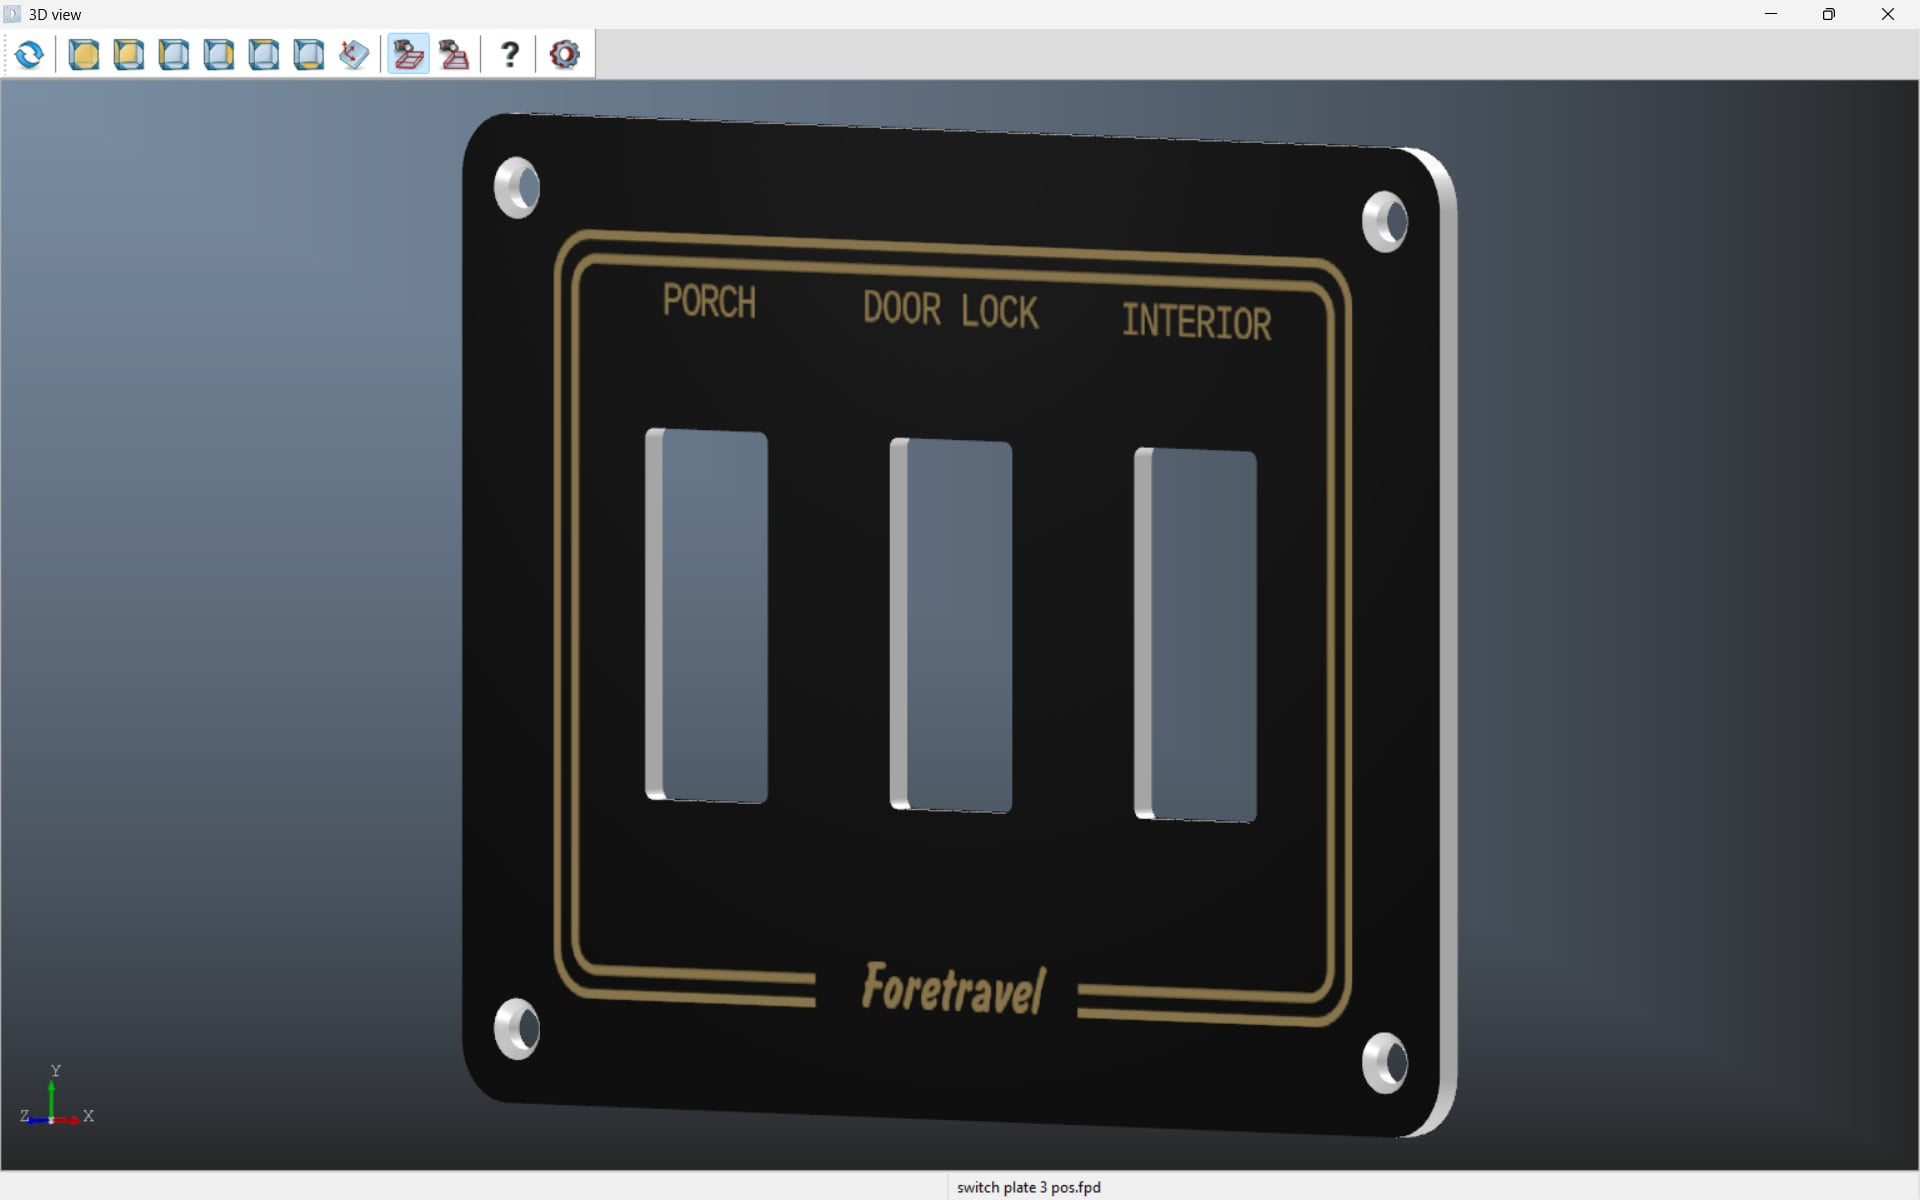
Our original plates were inconsistent in gold tone, font size, letter placement, and even the Foretravel logo itself. I went with a unified style that works across various sized plates with the same logo, graphics, and font size.
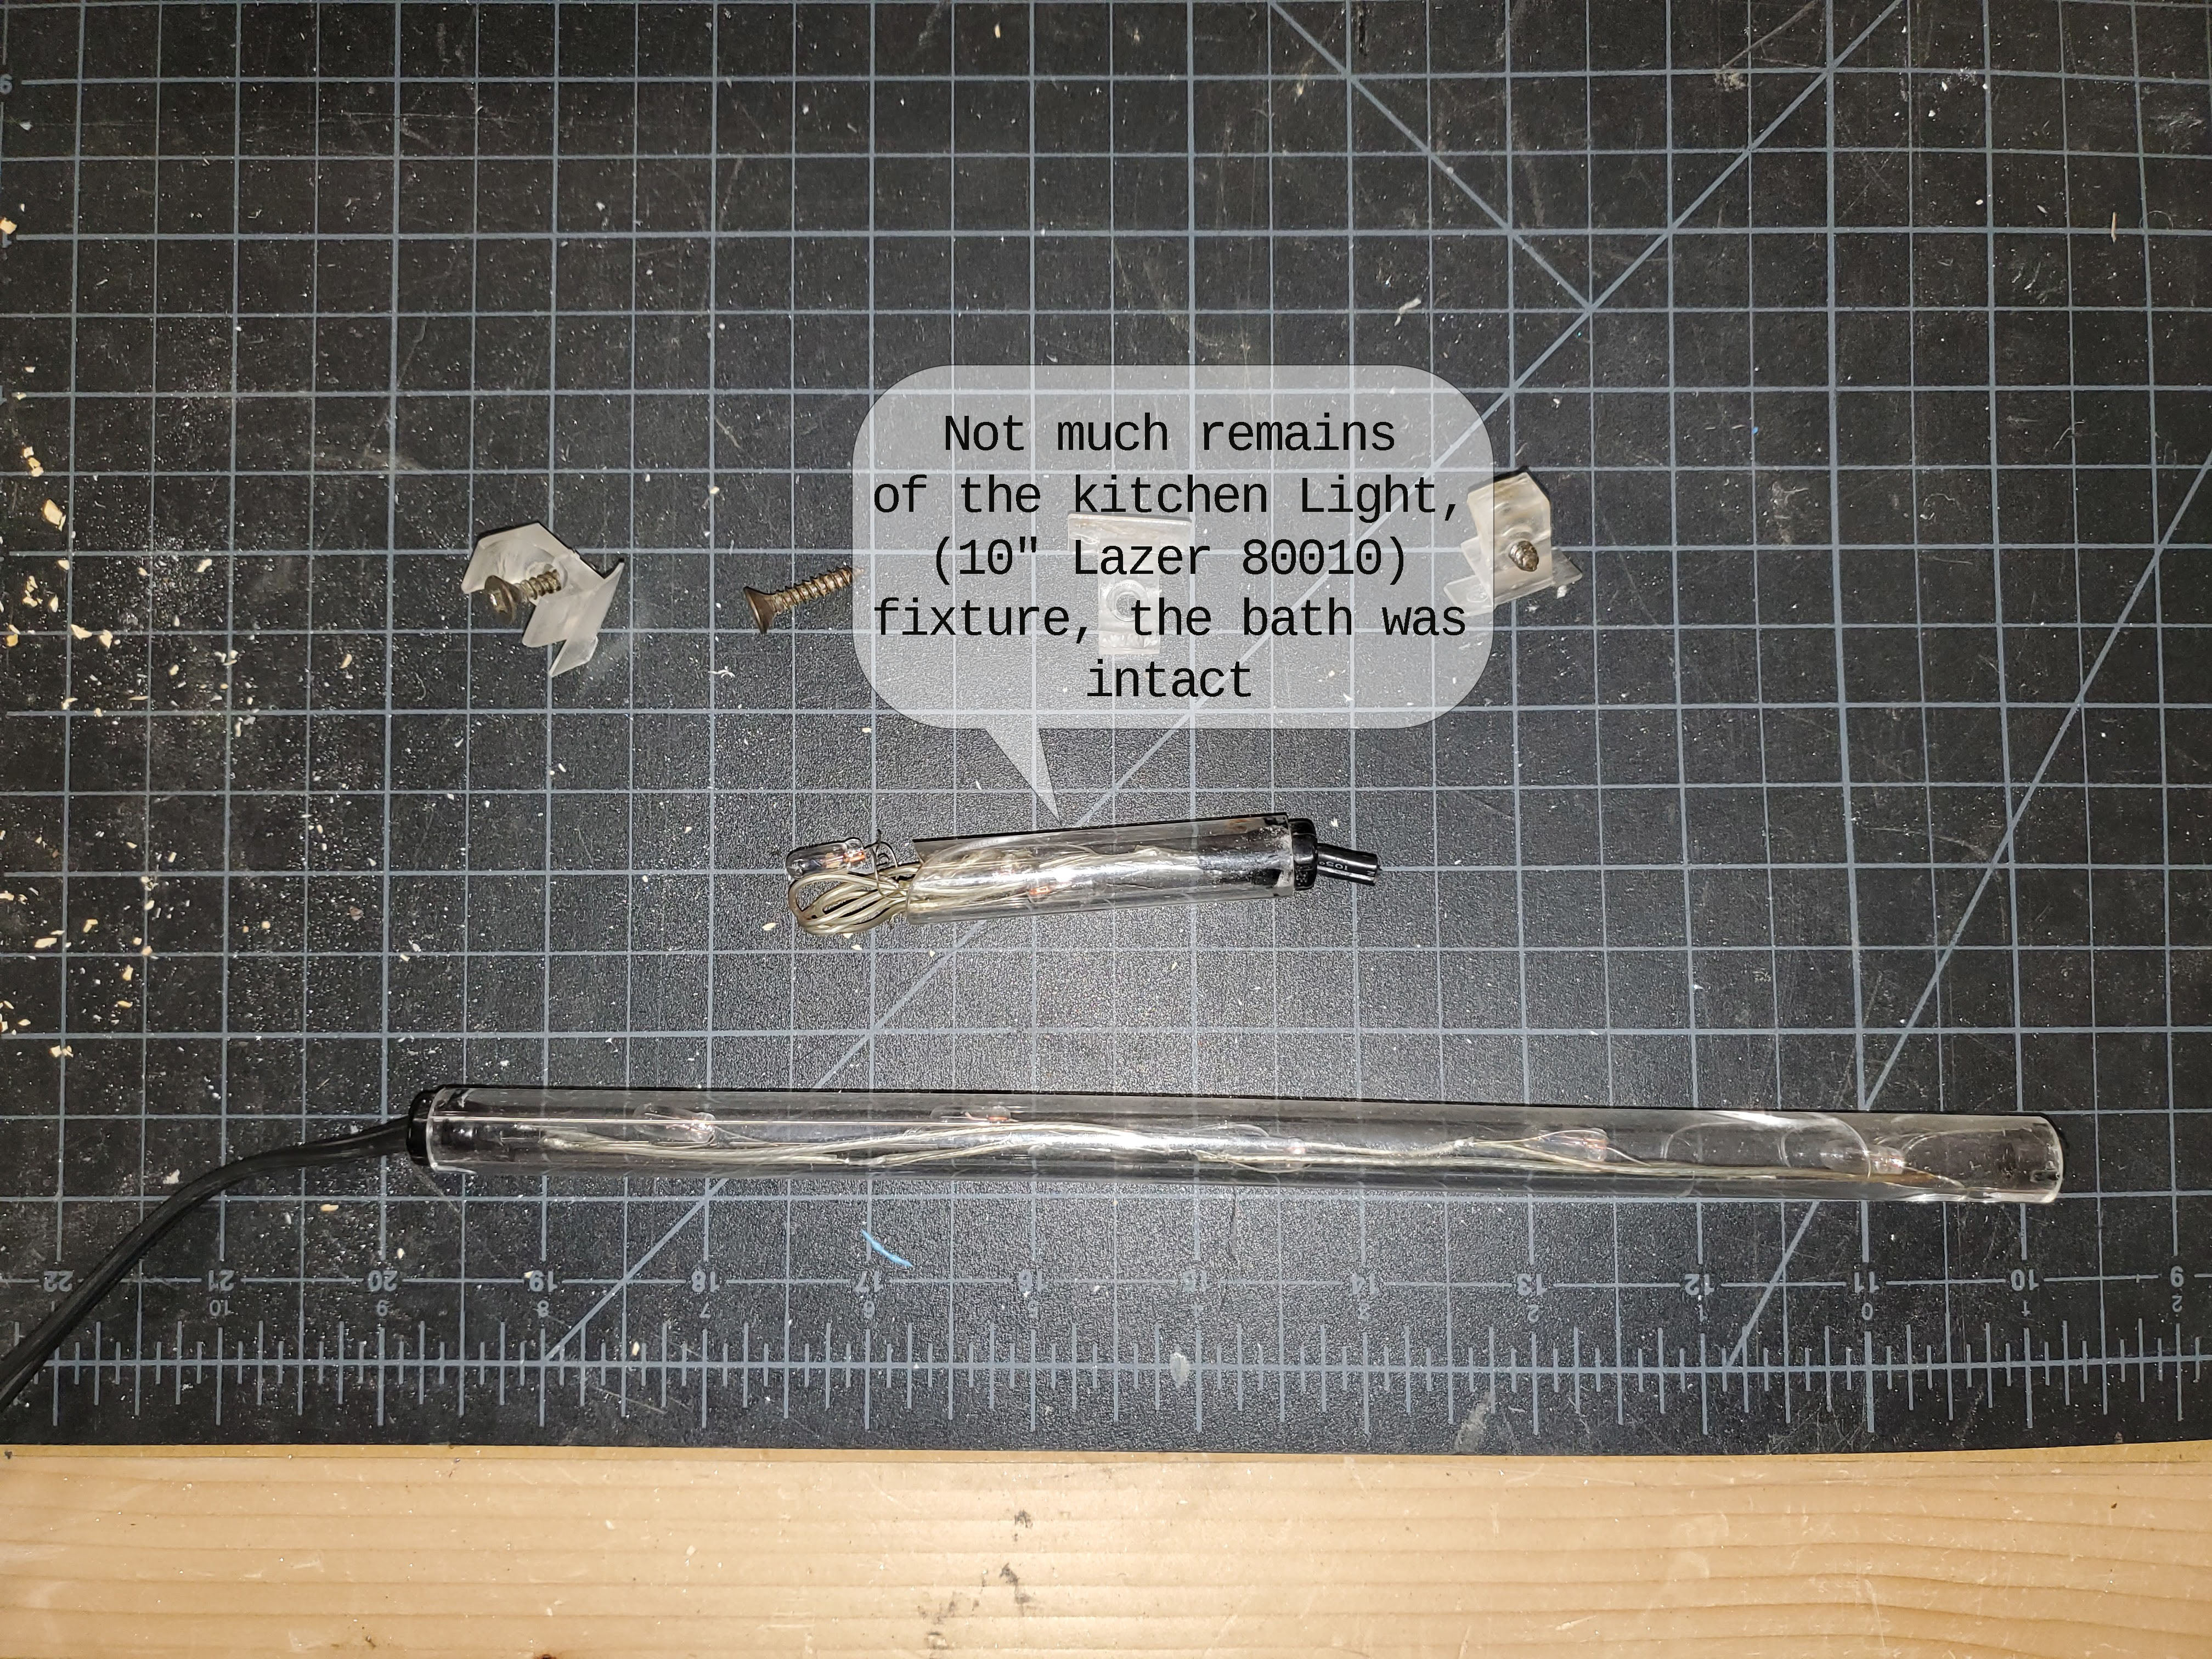
Fabrication was done through Front Panel Express. Their free design software works fine, but I used FreeCAD since I’m familiar with it. Artwork must be a 300 dpi PNG; I made mine in Photoshop, but any graphics program works. The closest font to Foretravel’s that I found is Salsbury
I skipped anodizing, leaving cut edges as raw aluminum. A PaperMate W10 black permanent marker (better than Sharpie’s purple tint) easily darkened the edges. The mounting holes weren’t countersunk; I swapped oval-head screws for pan-heads to match.
After the first plate, I made small tweaks to switch openings and hole sizes.
Cost runs about $60 each, including shipping and tax (around $15 of that). Simple plates without graphics can be had elsewhere for as little as $10 for one or $5.50 each in a batch of ten.
Very happy with how these turned out, they look sharp and make the coach feel factory-fresh.