Updating the wall sconces
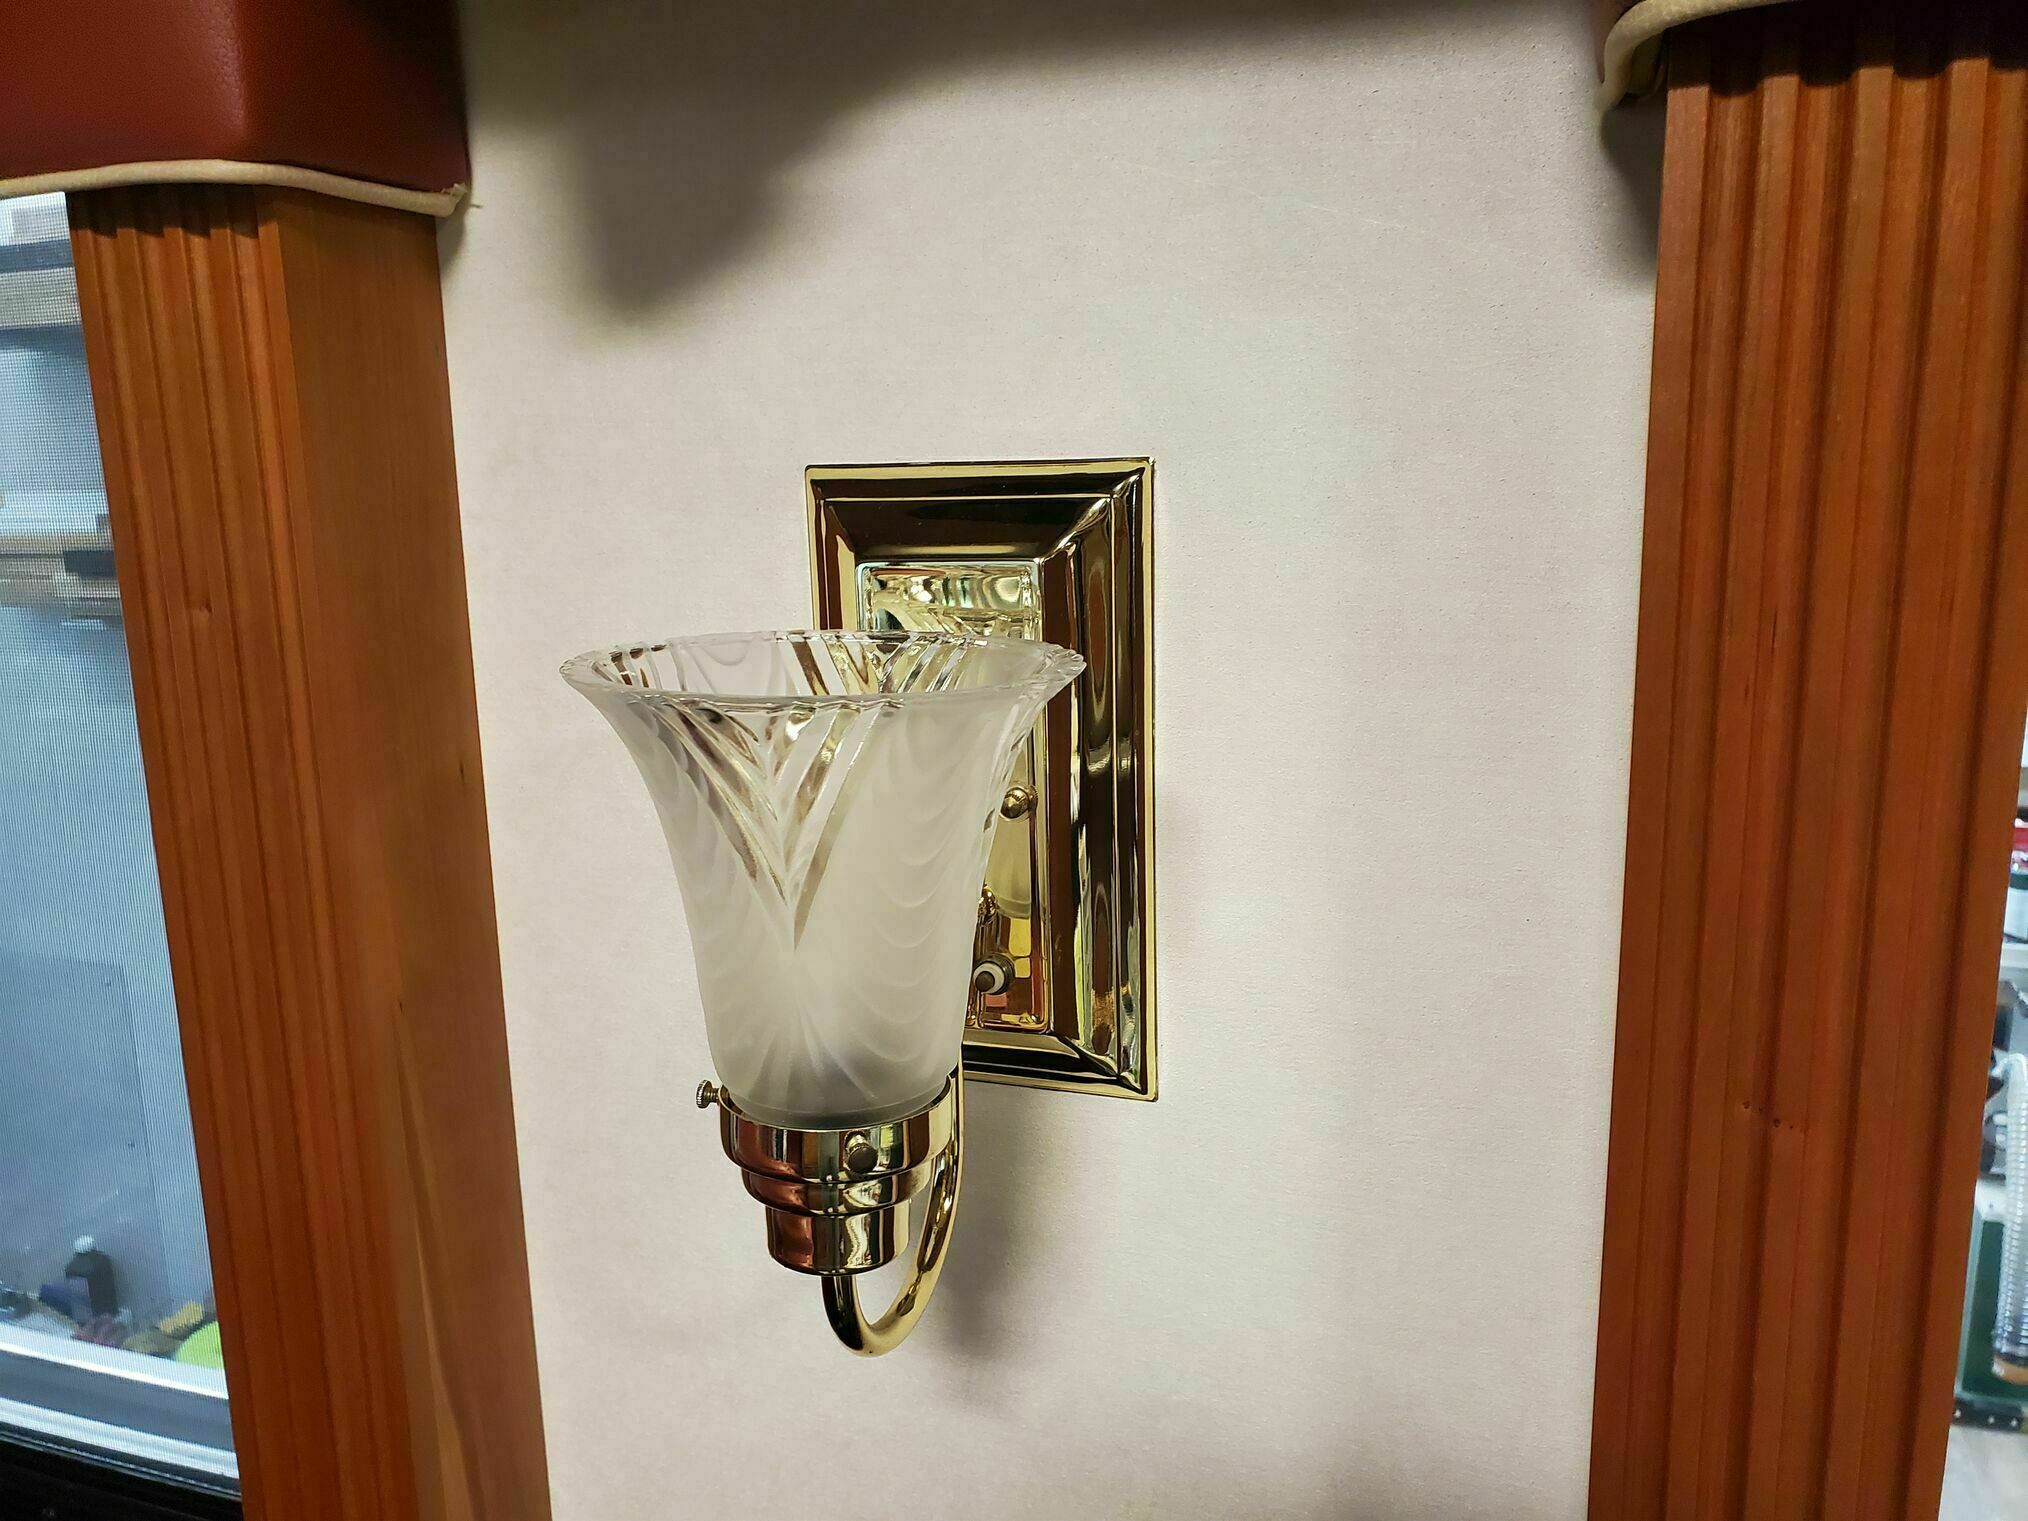
After going back and forth on many different wall sconce designs, NIB options, salvage options, etc., we finally settled on replacements for these two “lovely” original polished brass sconces.
I’d previously repaired one of the LR ones with JB Weld (crack in the base so the shade kept loosening), and one of the BR ones had a sad sag to the arm. They were also a bit “dated” for our taste.
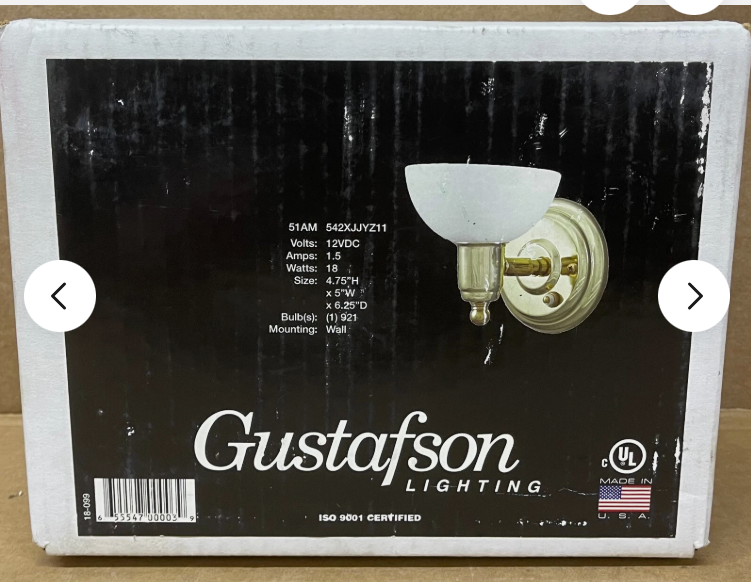
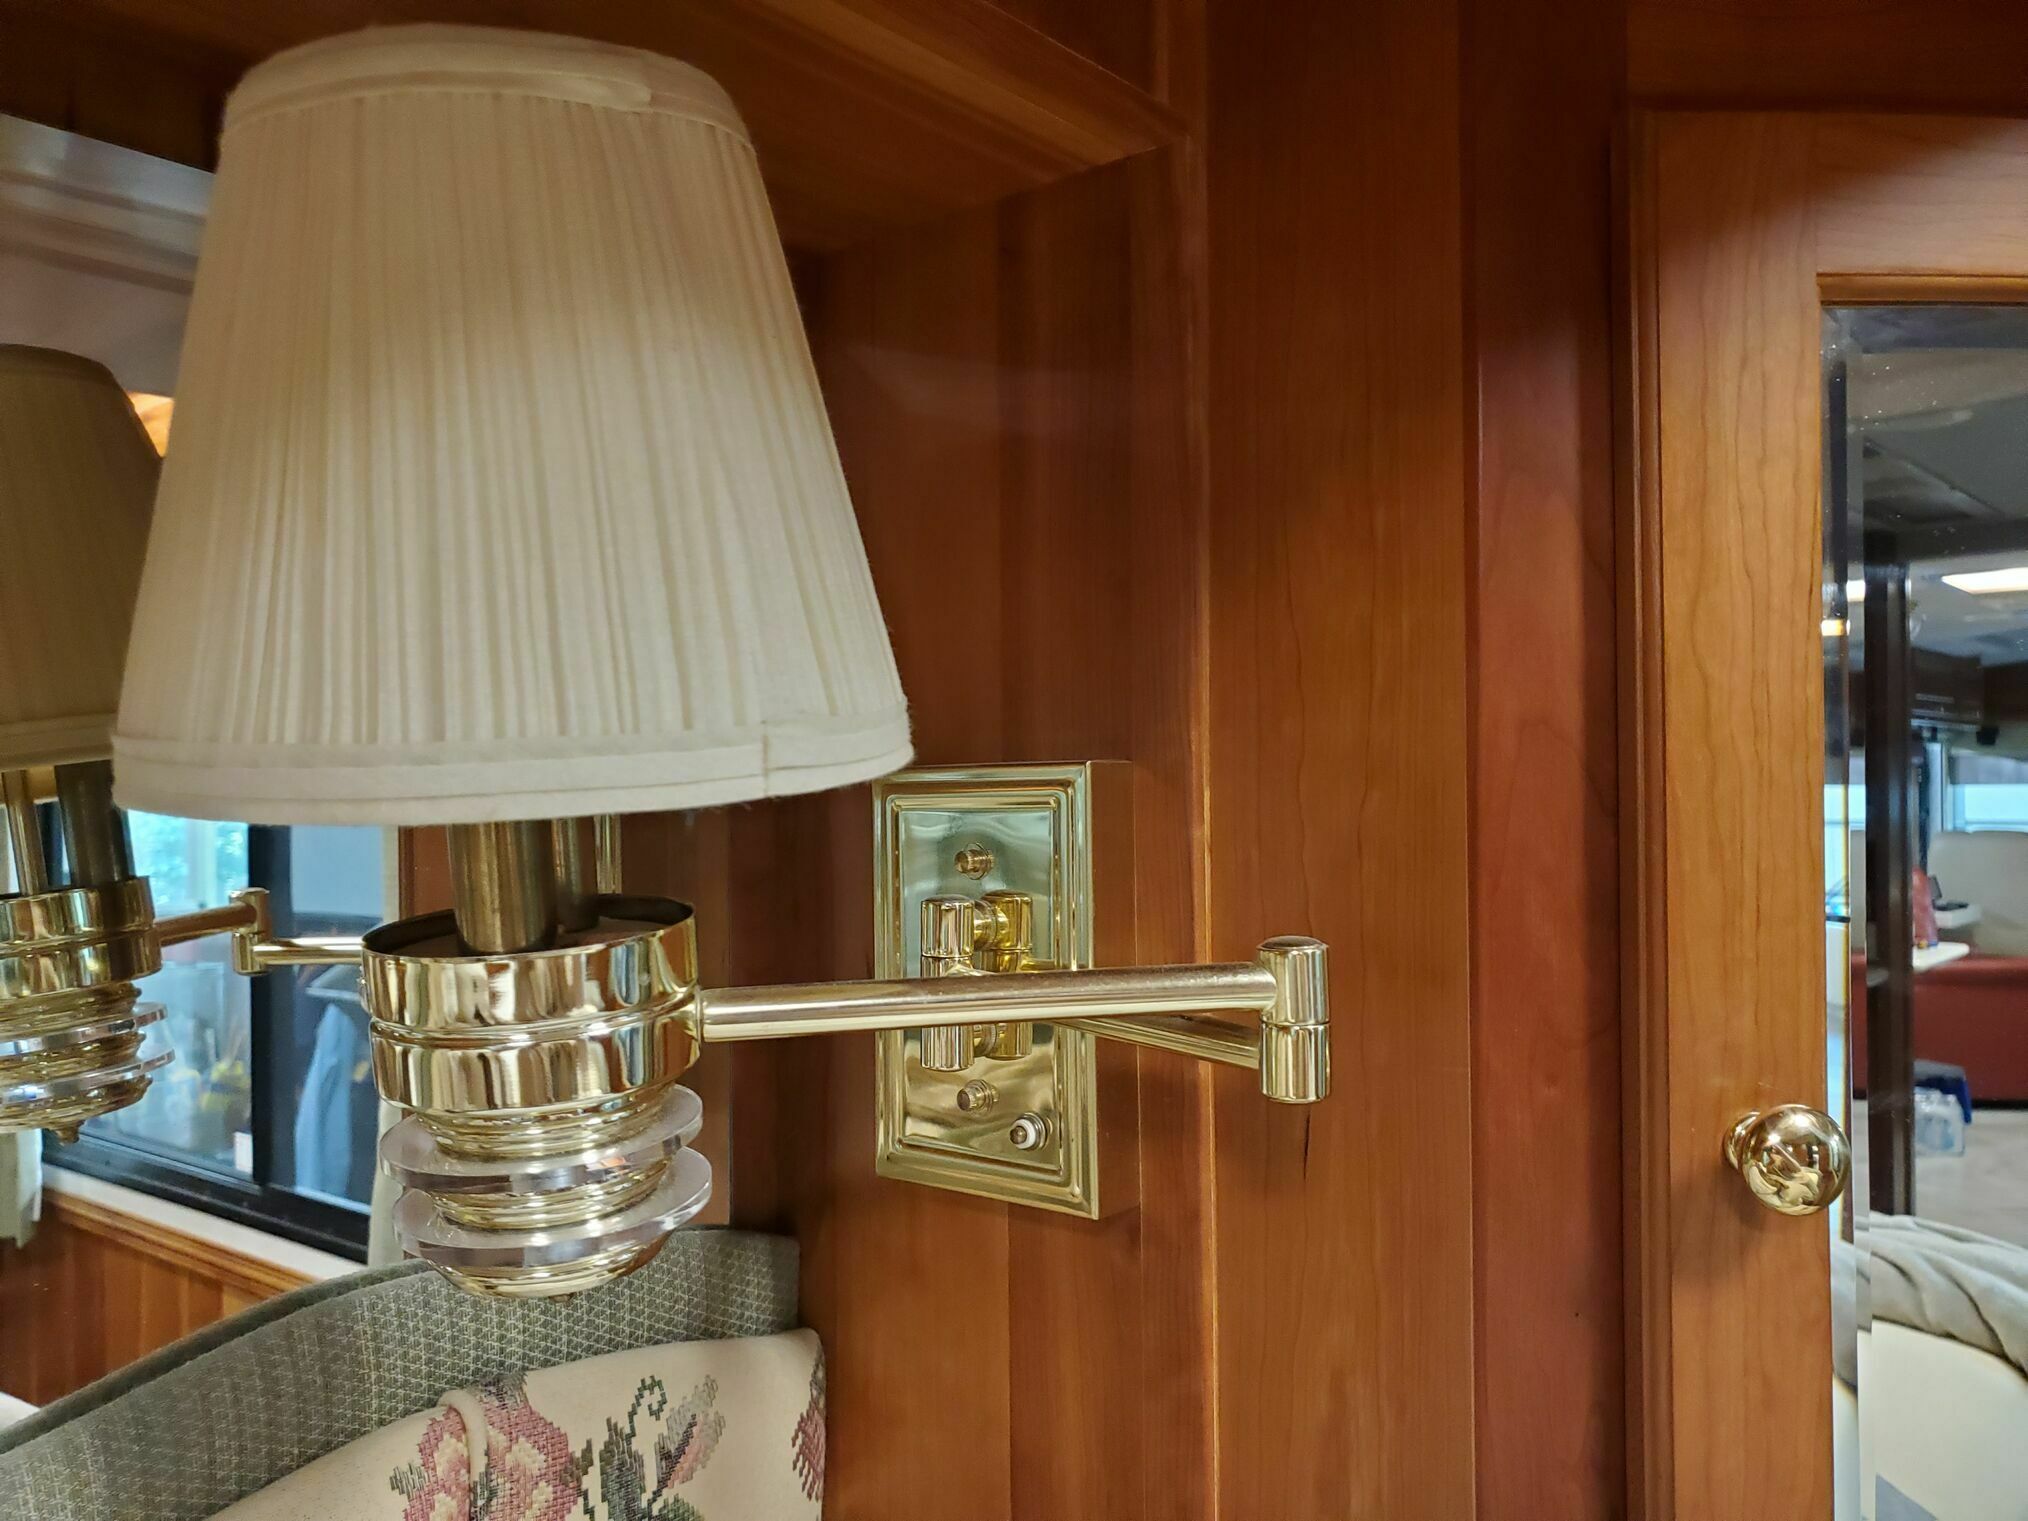
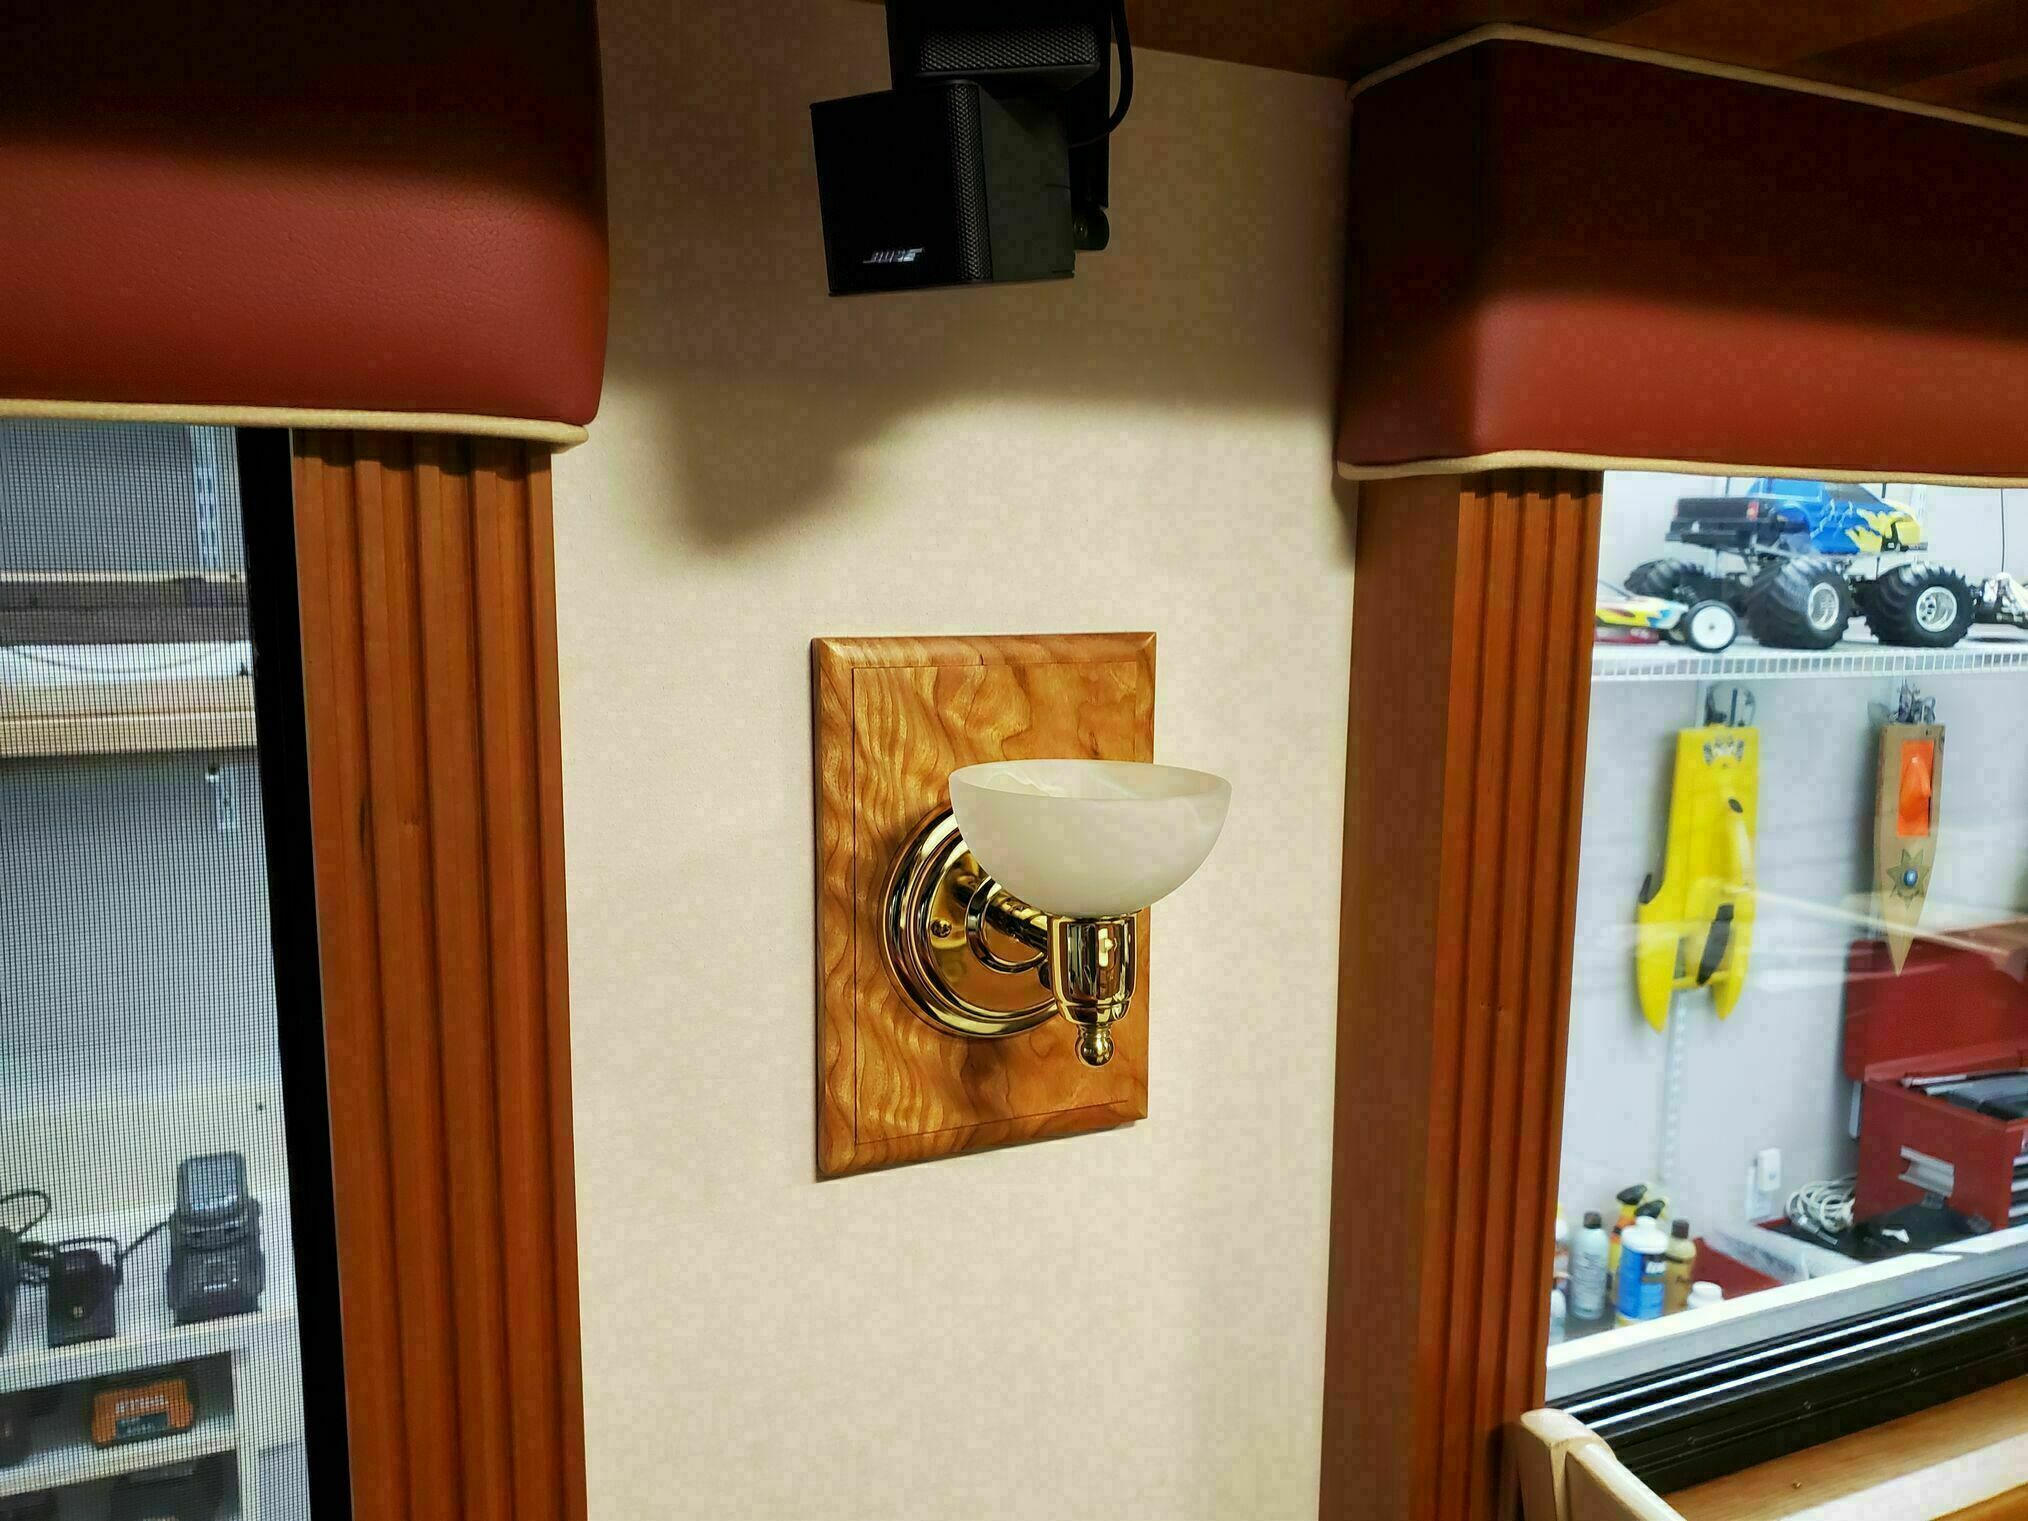
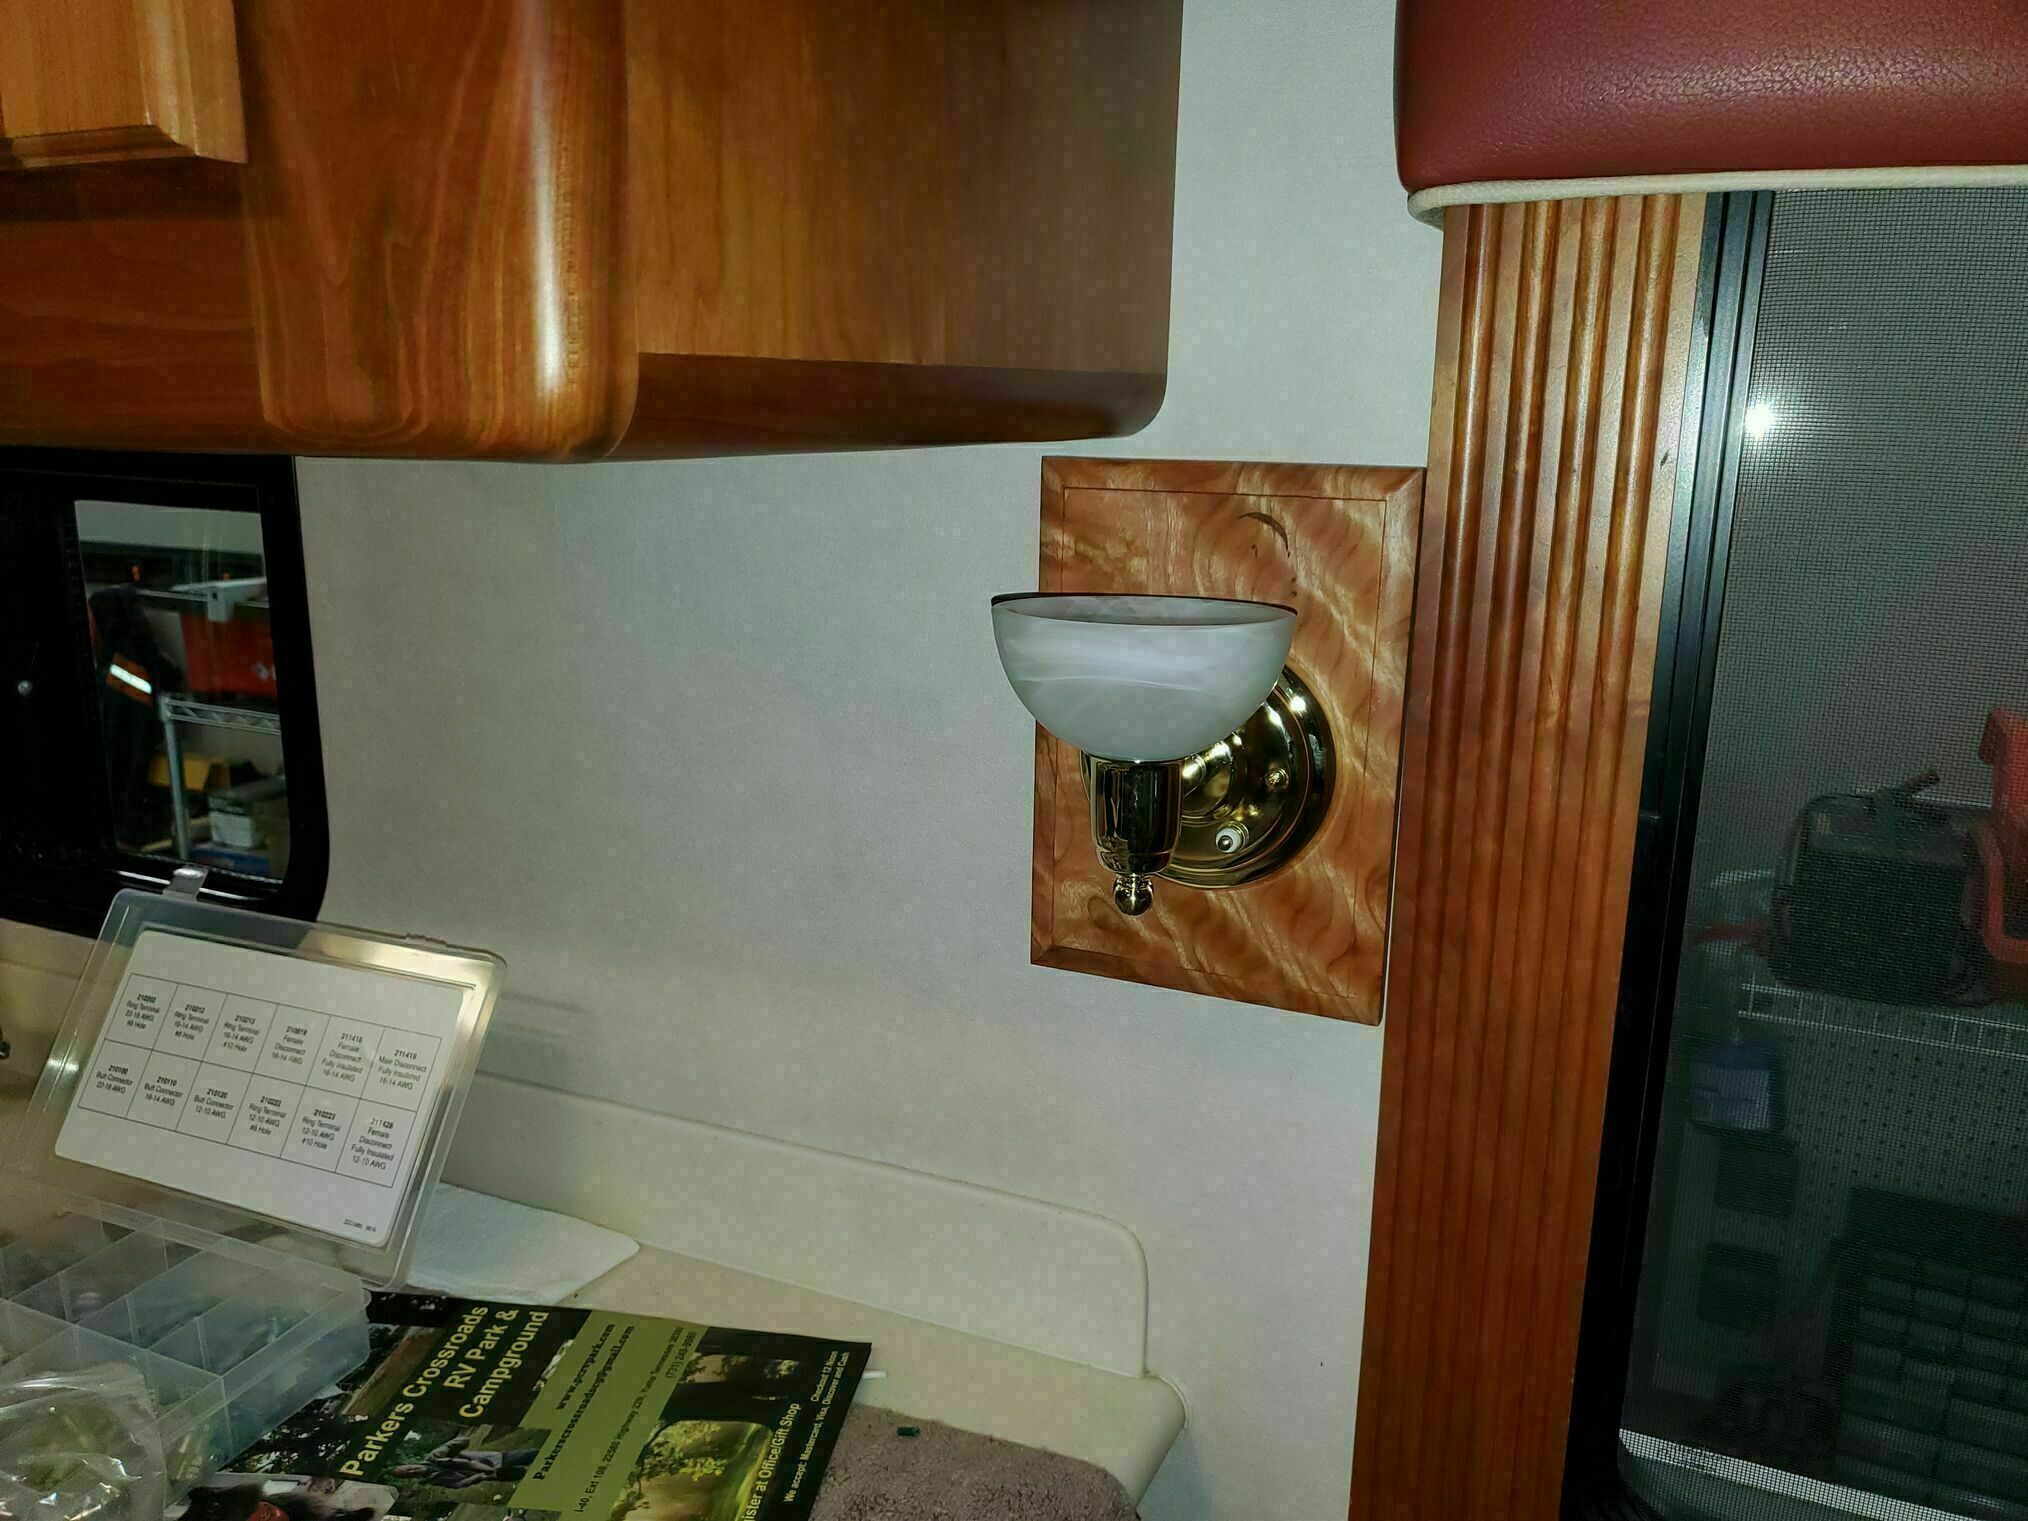
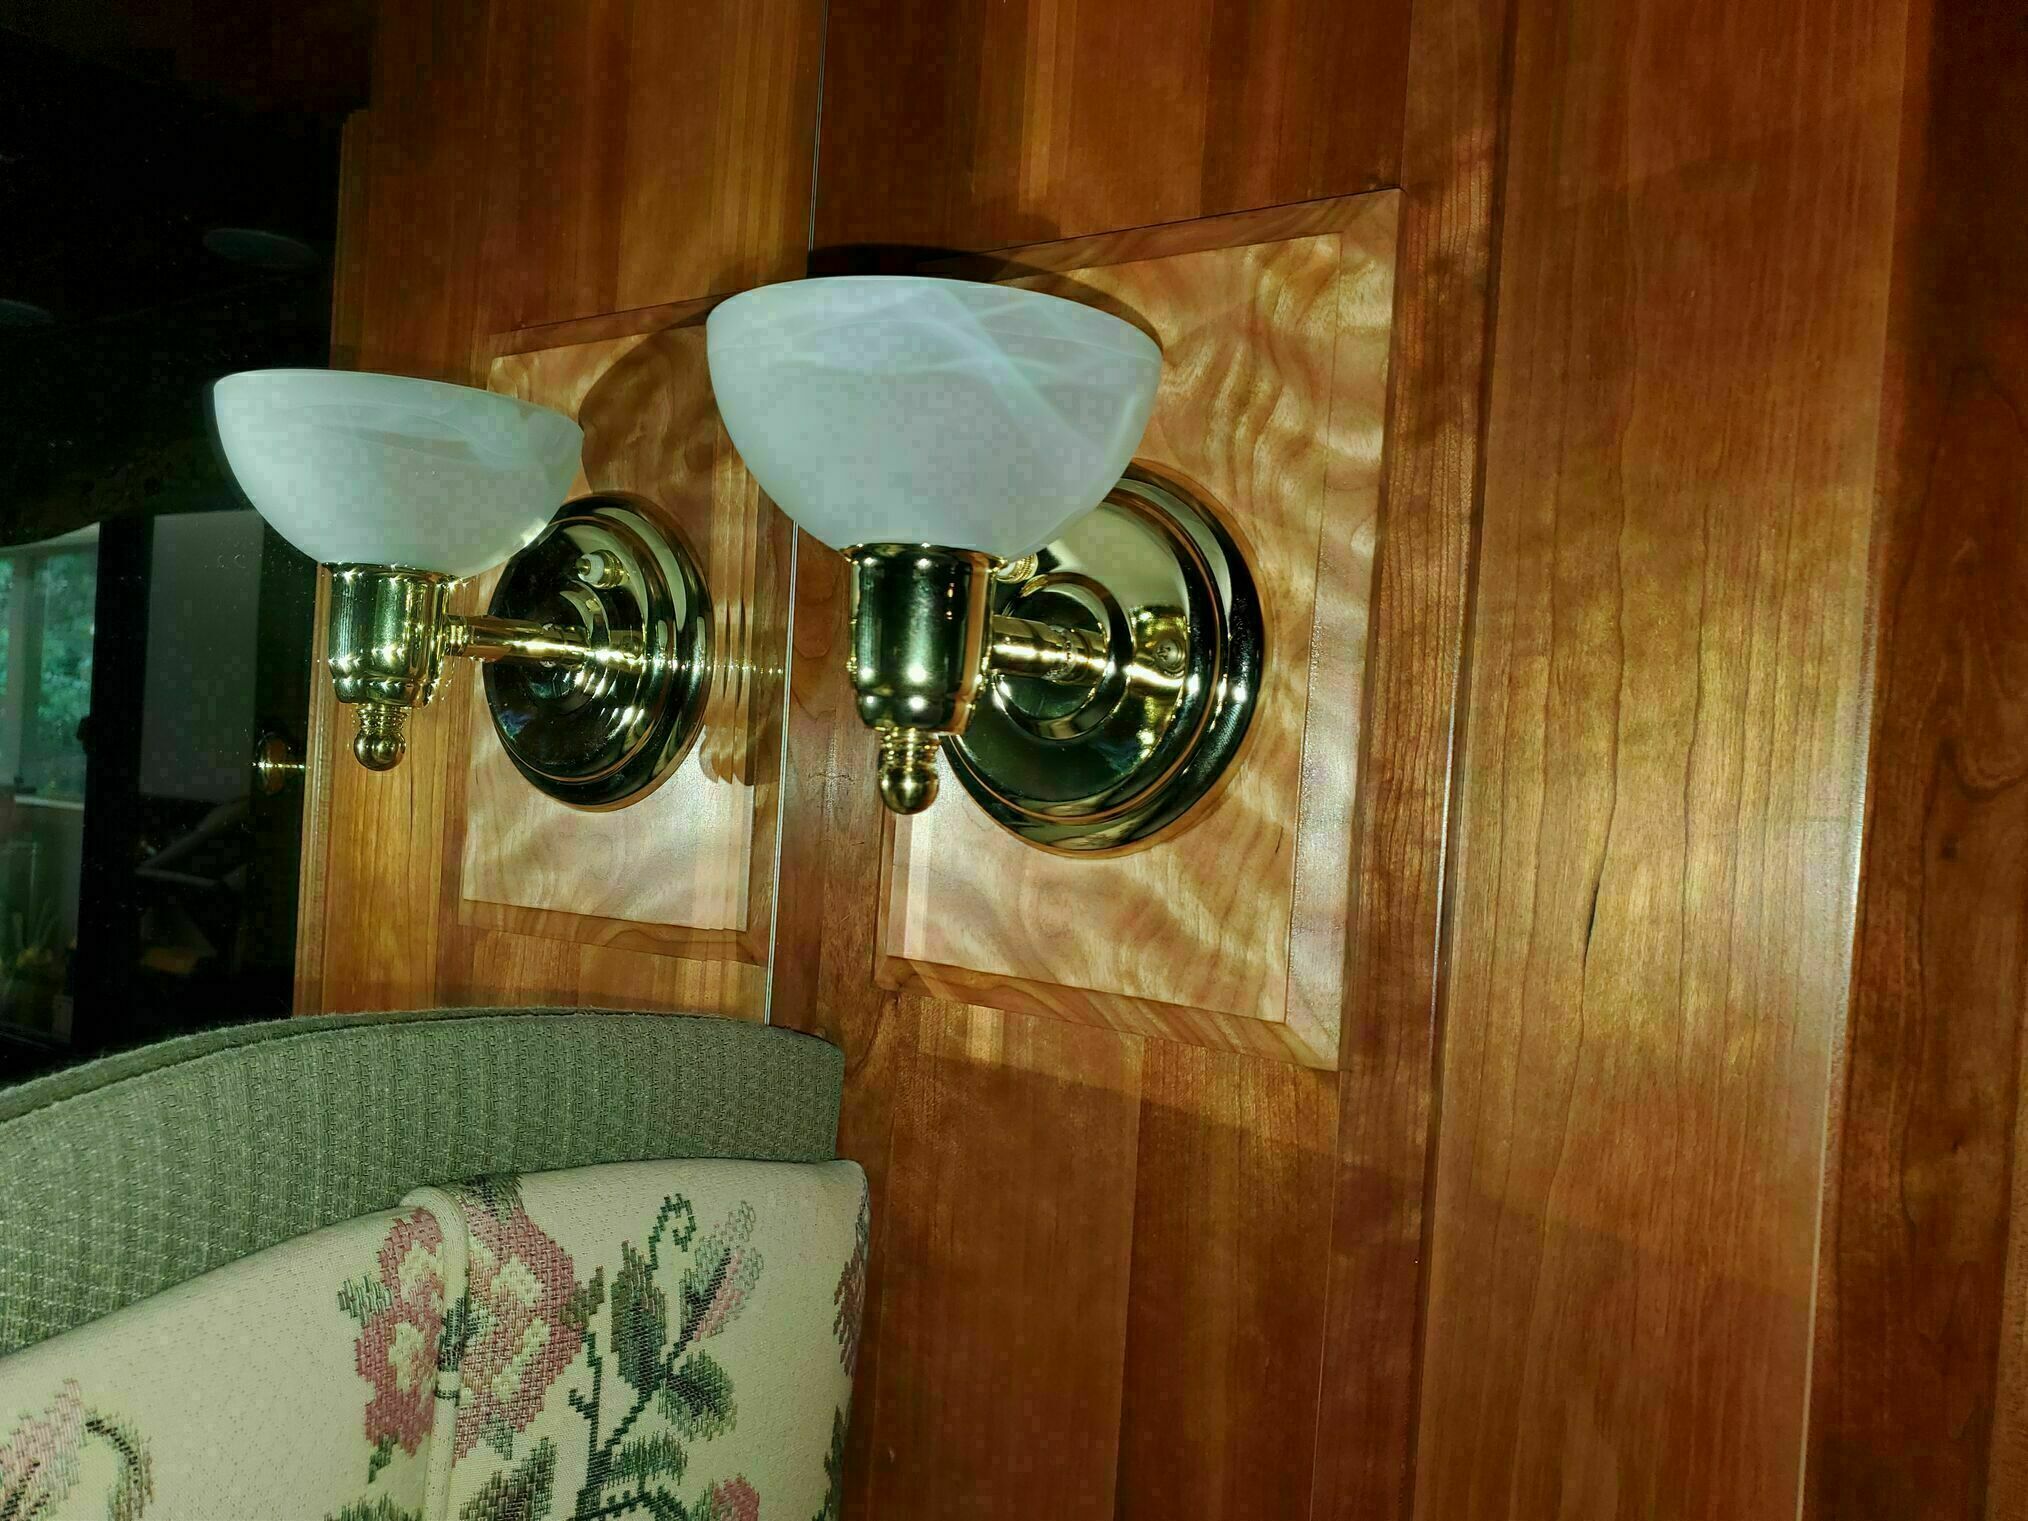
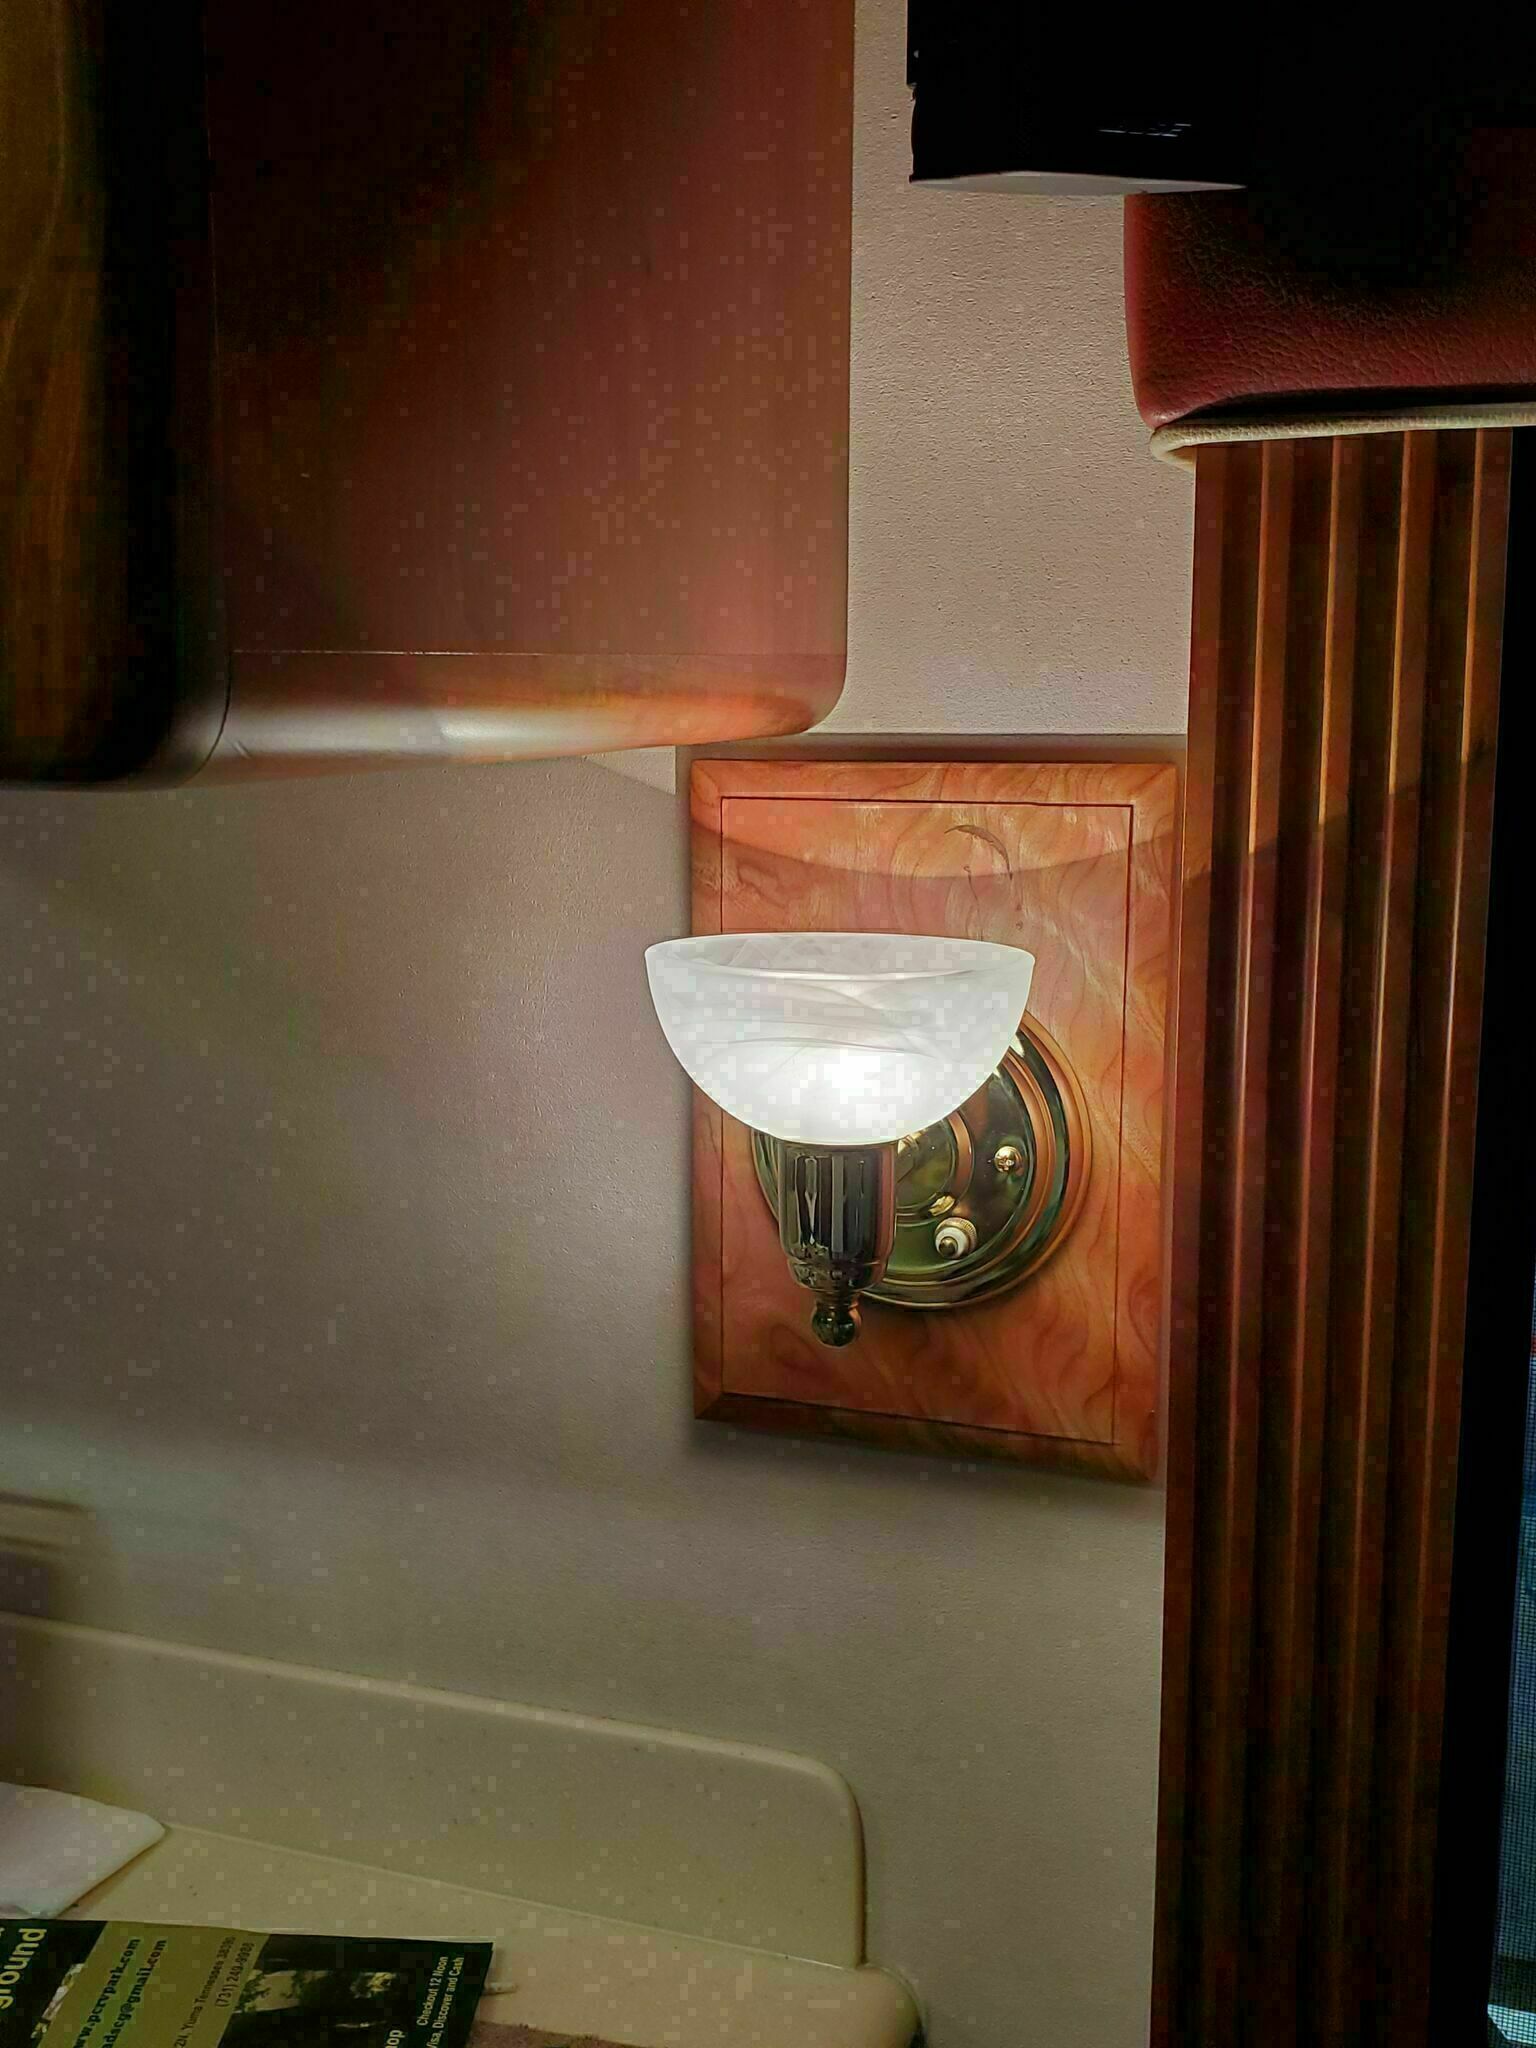
I came across a NIB Gustafson polished brass option from a great eBay seller, Gustafson 51AM-542XJJYZ11 but with the smaller, round mounting plate, Steve needed to come up with a backing plate to cover the original holes and shadows left behind by the original rectangular plates.
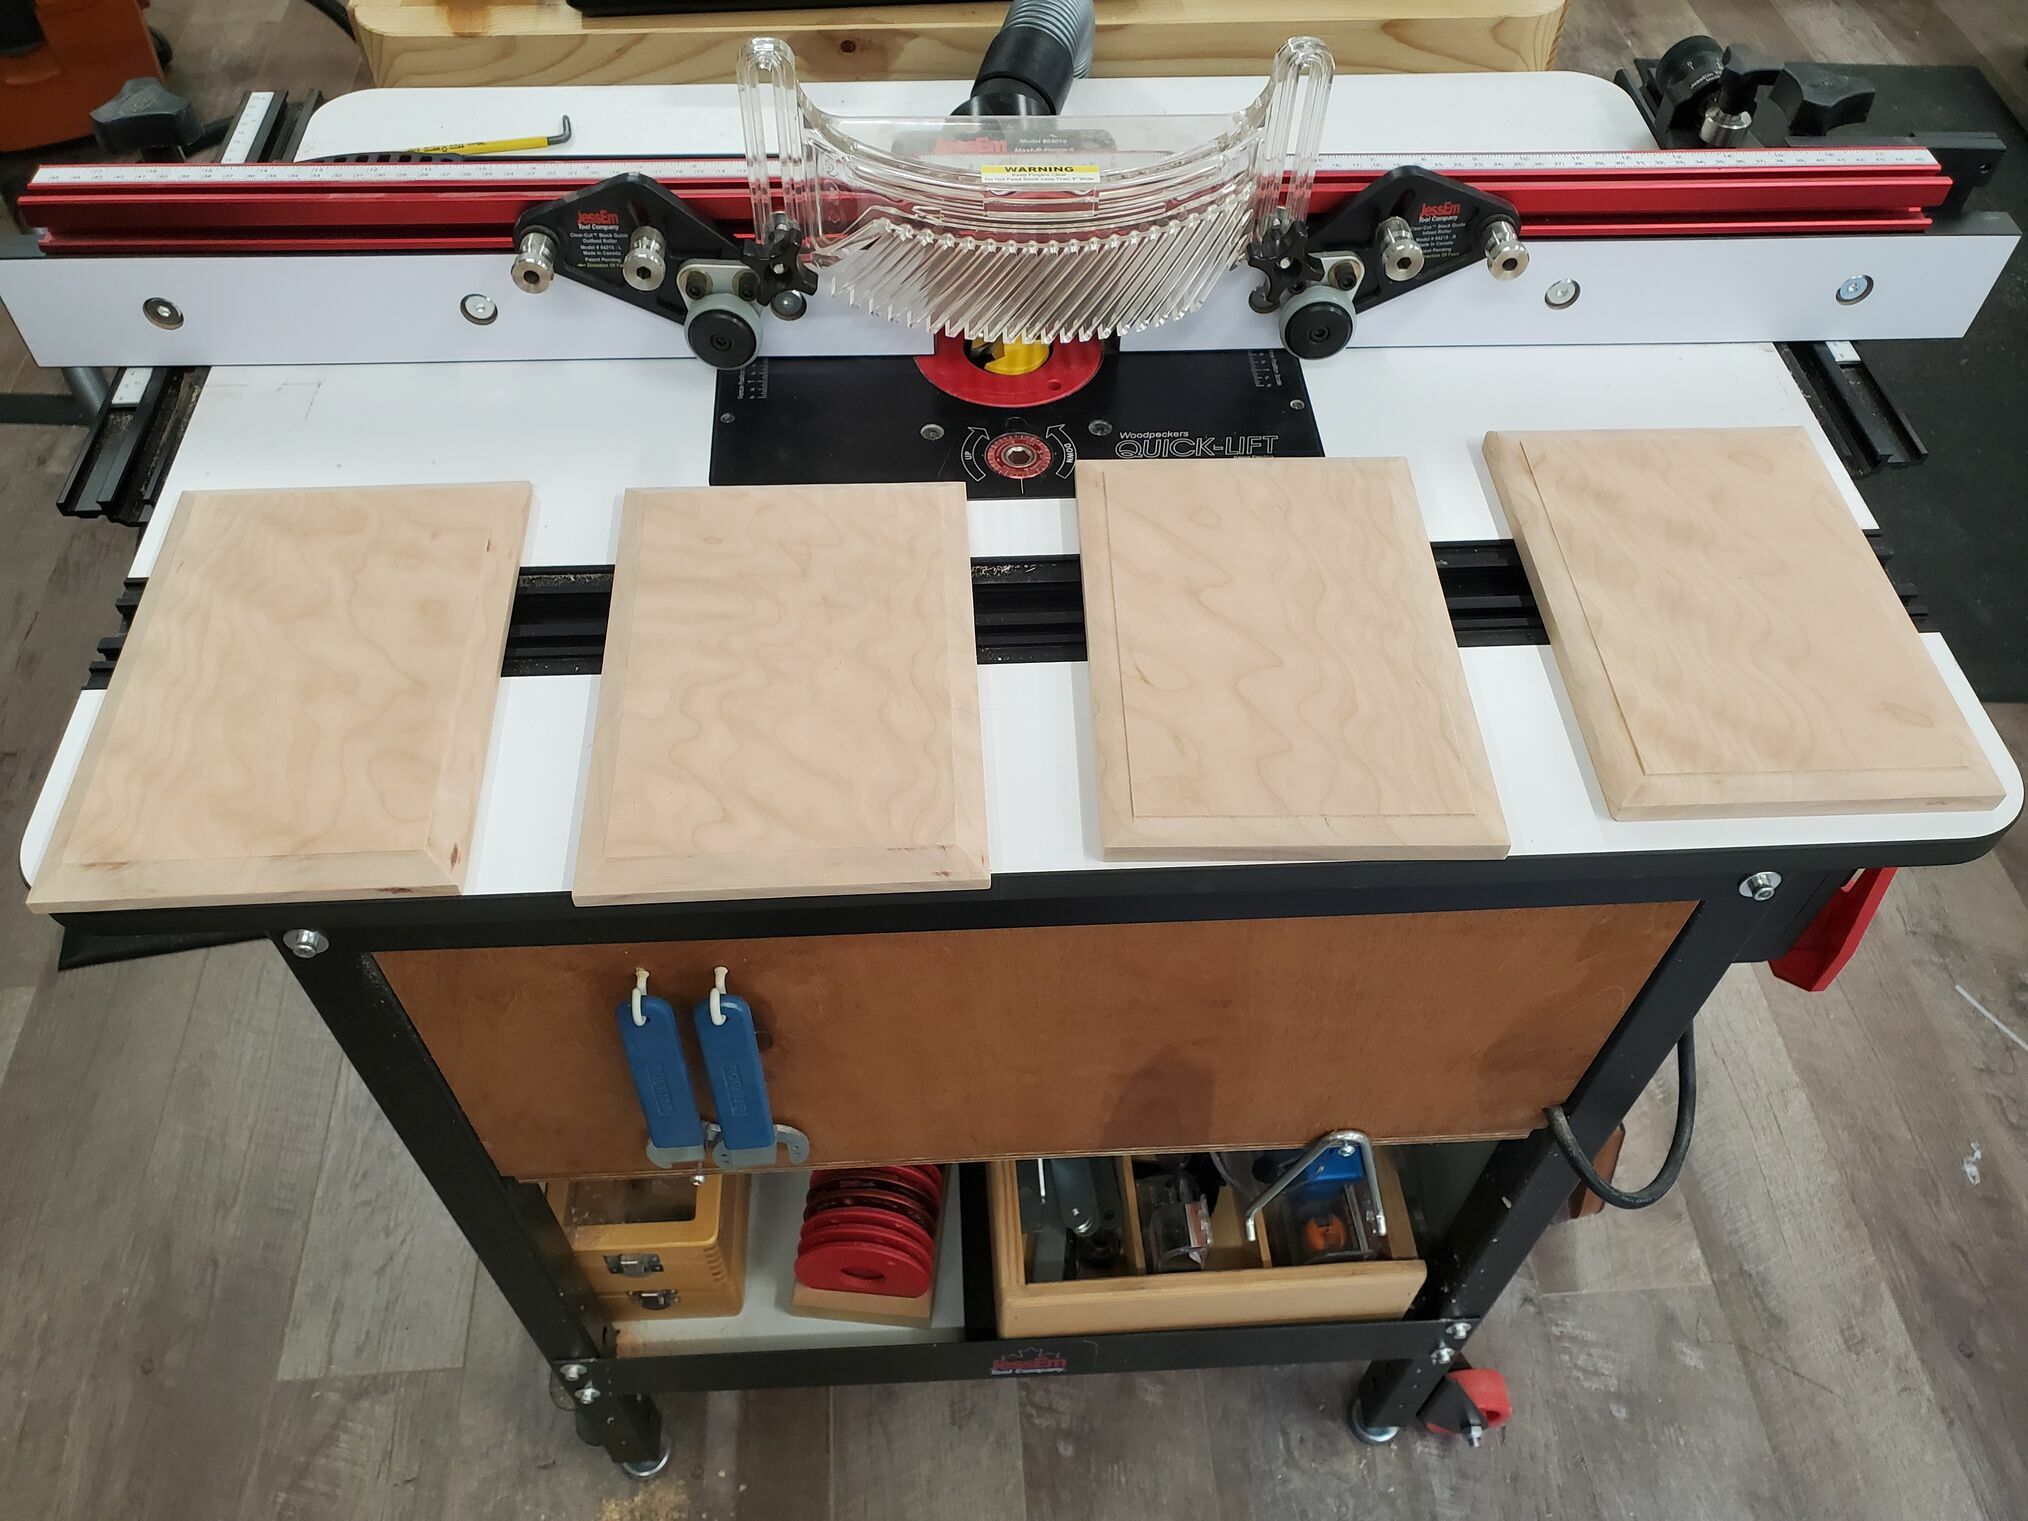
He purchased a gorgeous piece of Figured Curly Cherry Wood 11/16 x 7-1/2 x 40 ~$70 inc shipping and set about making the new backing plates. His first project on the upgraded planer we bought him earlier this year, taking the board to ~9/16”. After figuring out the size and cutting each of the 4 backing plates, the next step was edge profile, so Steve made a couple of different profiles for me to choose from (and got a new router bit as part of the deal.) If you know me, you’ll know I’m a bit “particular”, so that meant one profile for the living room (a rounded edge with a step to go with that on the windowsills) and a different one, a chamfer with a step, for the bedroom where you are seeing the lights more from the edge.
Backing Plate Assembly
Next Steve removed the old lights and marked the relative locations of the existing wiring onto the new plates.

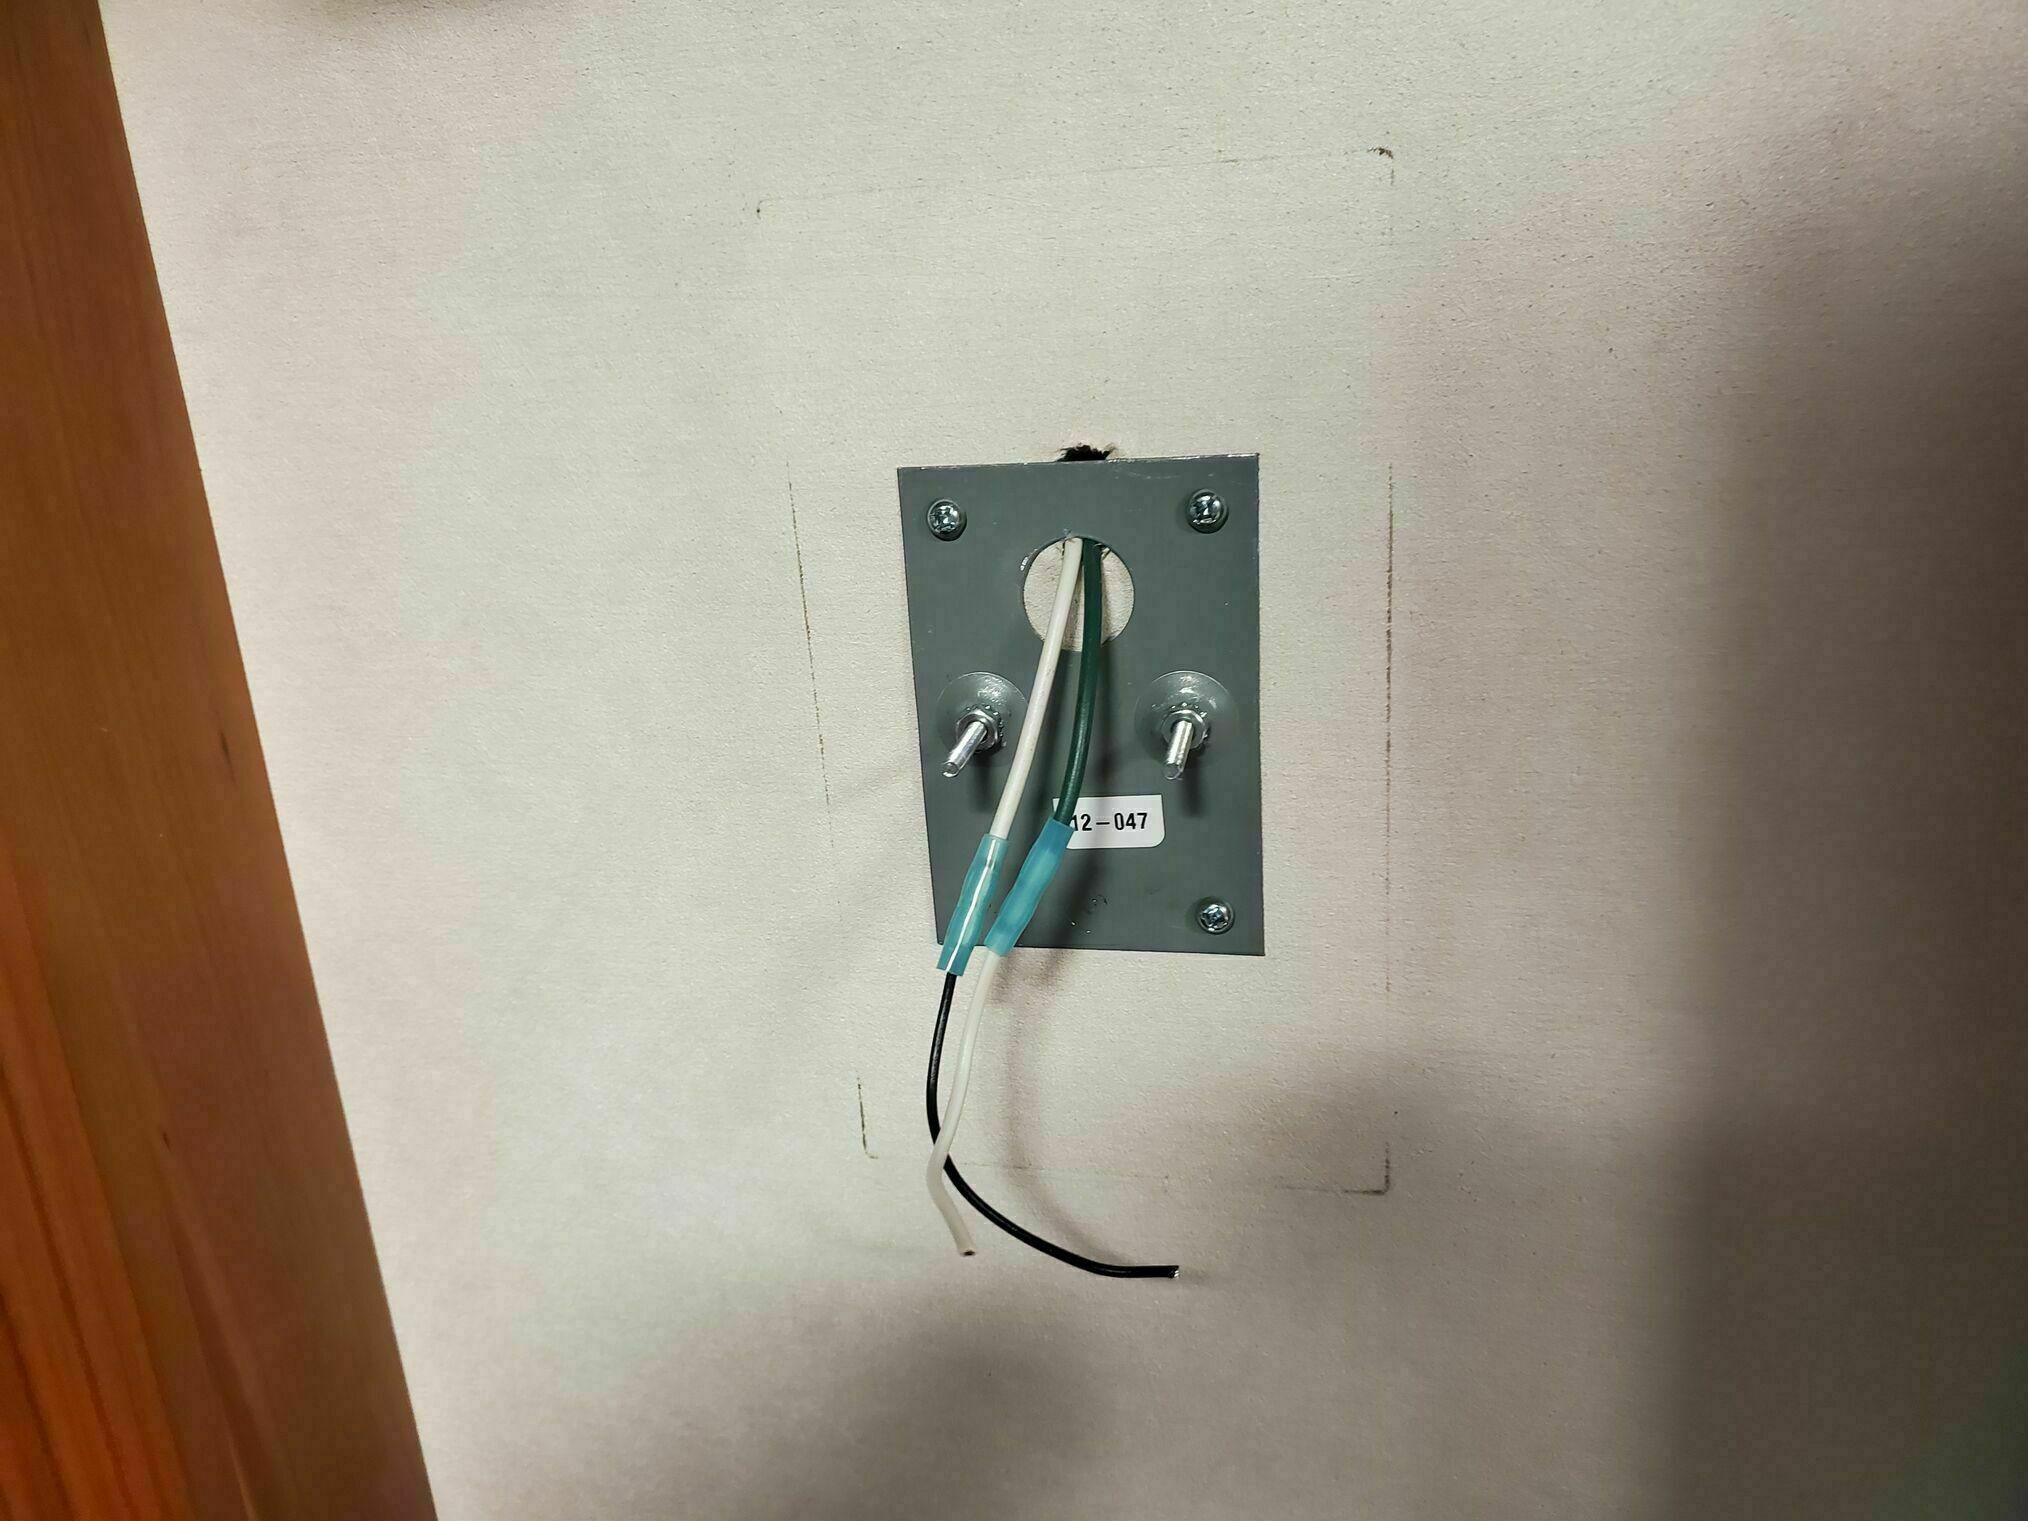
We decided to bias the lights’ round mounting bases a little towards the bottom of the cherry plates so that the overall light appeared centered in the cherry (vs having the fixture plate dead center). The large holes for the wires in the bedroom ones had to be offset to one side as well based on where the wires came through the cabinet side. Steve also pre-drilled and countersunk the holes that the brass screws would go through to mount the new custom fixtures. In the next set of photos, the plates are shown rotated 180 degrees -
Backing Plate Finishing
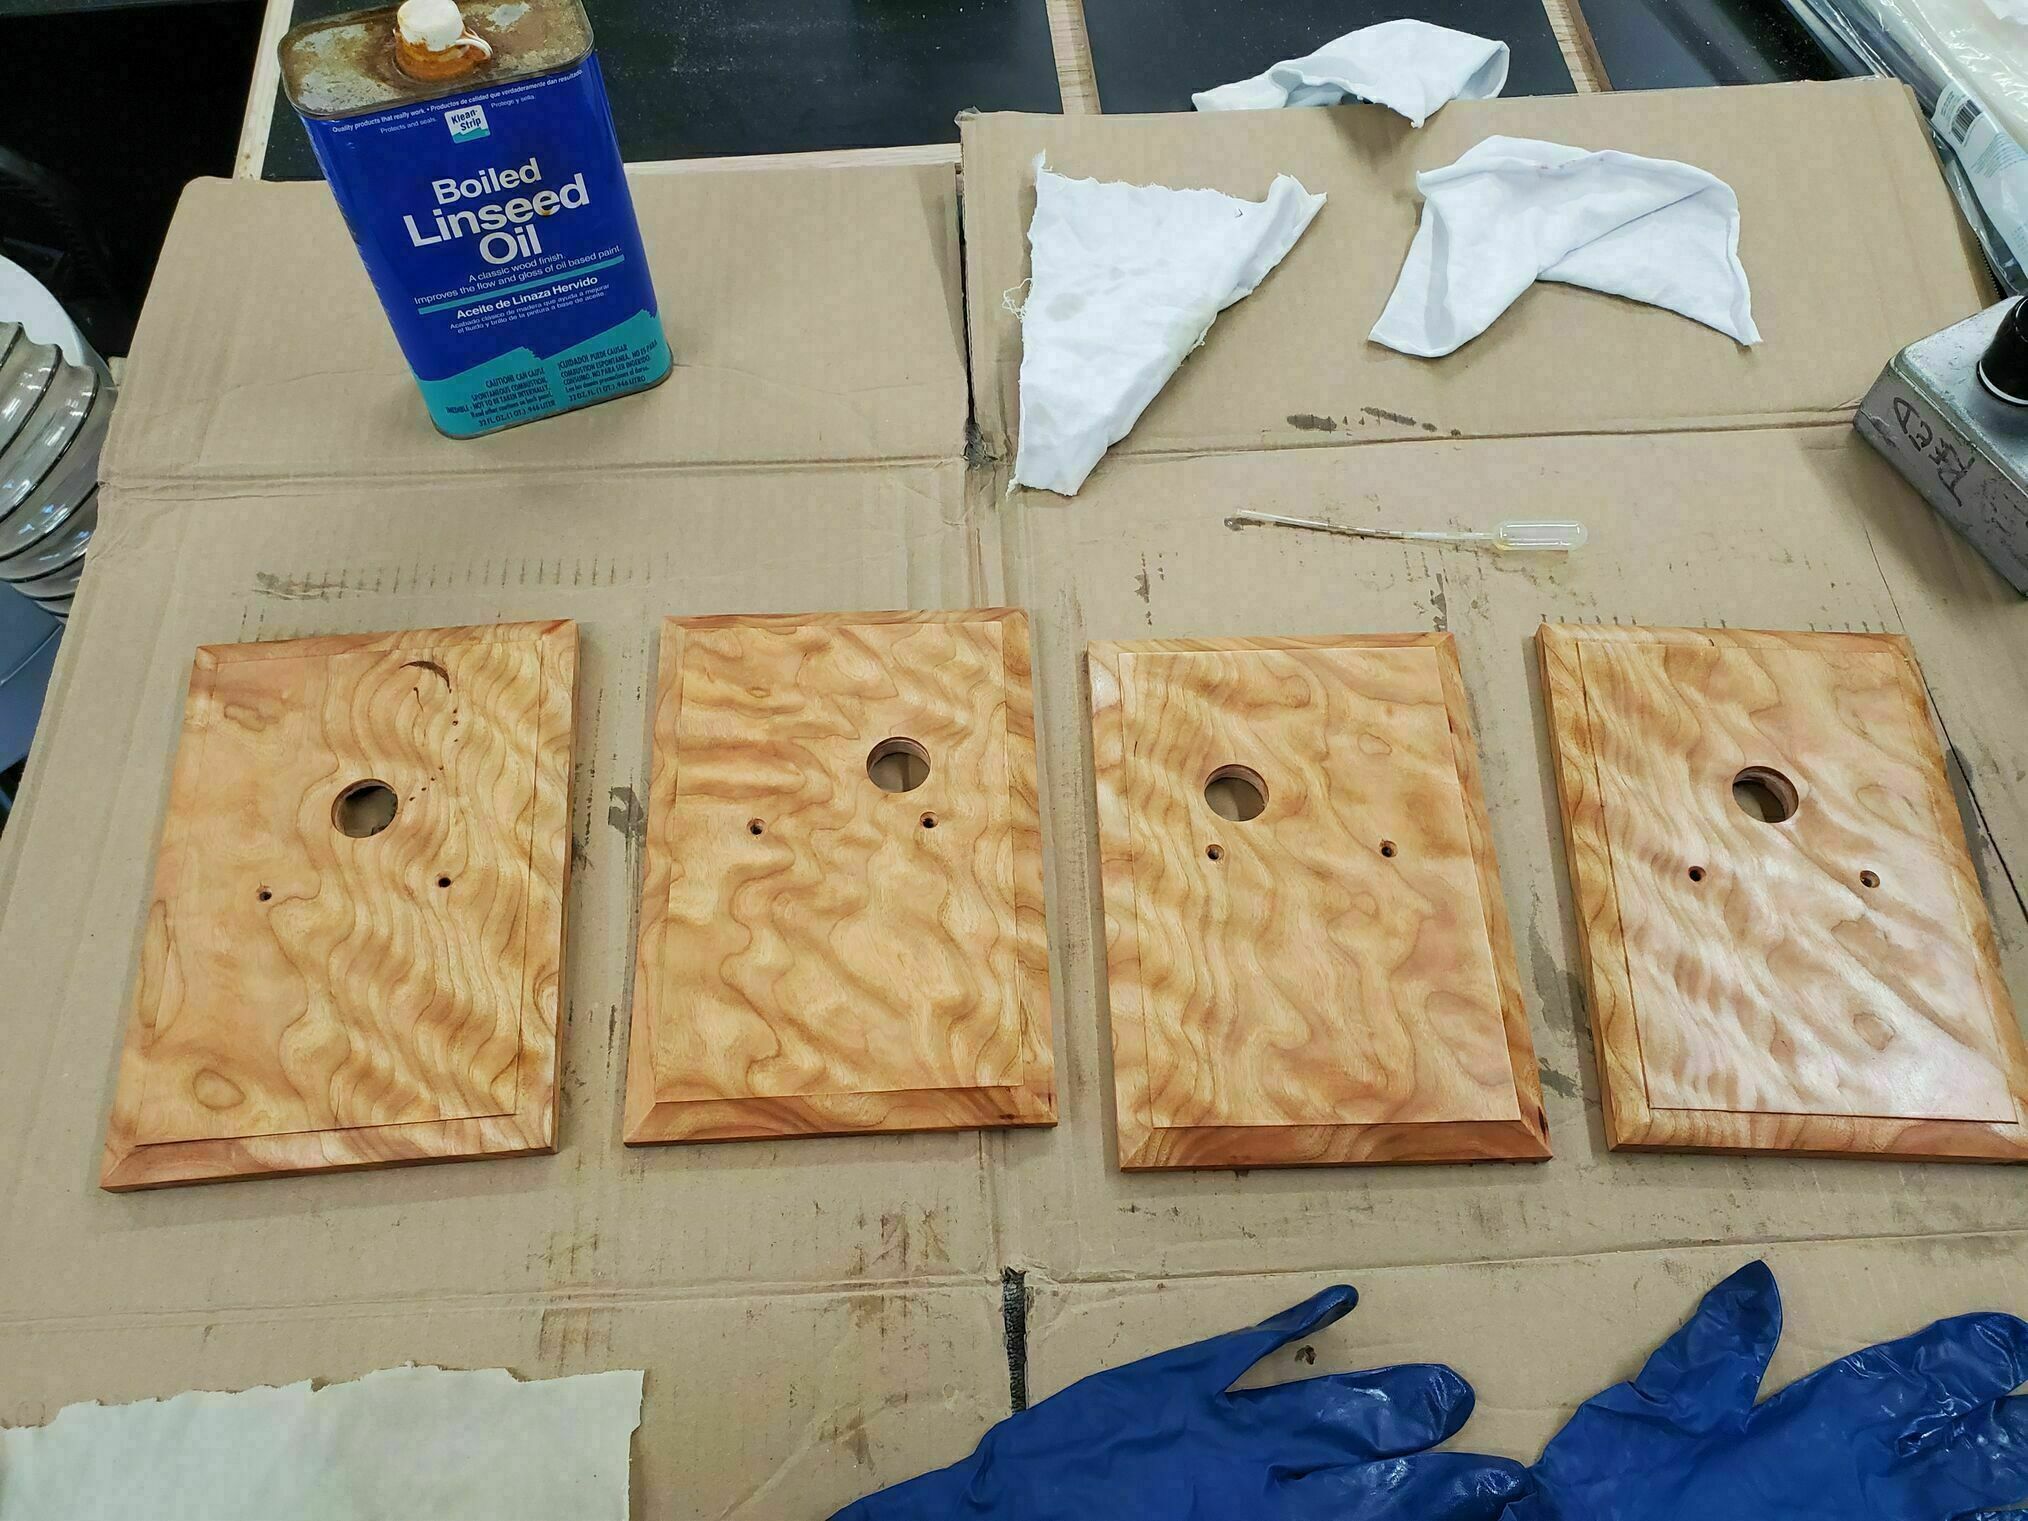
Finishing was multi-step. First, Steve wiped each plate with plain water to raise the grain, let it dry, and sanded it smooth. Then a wipe with tack cloth and application of boiled linseed oil.
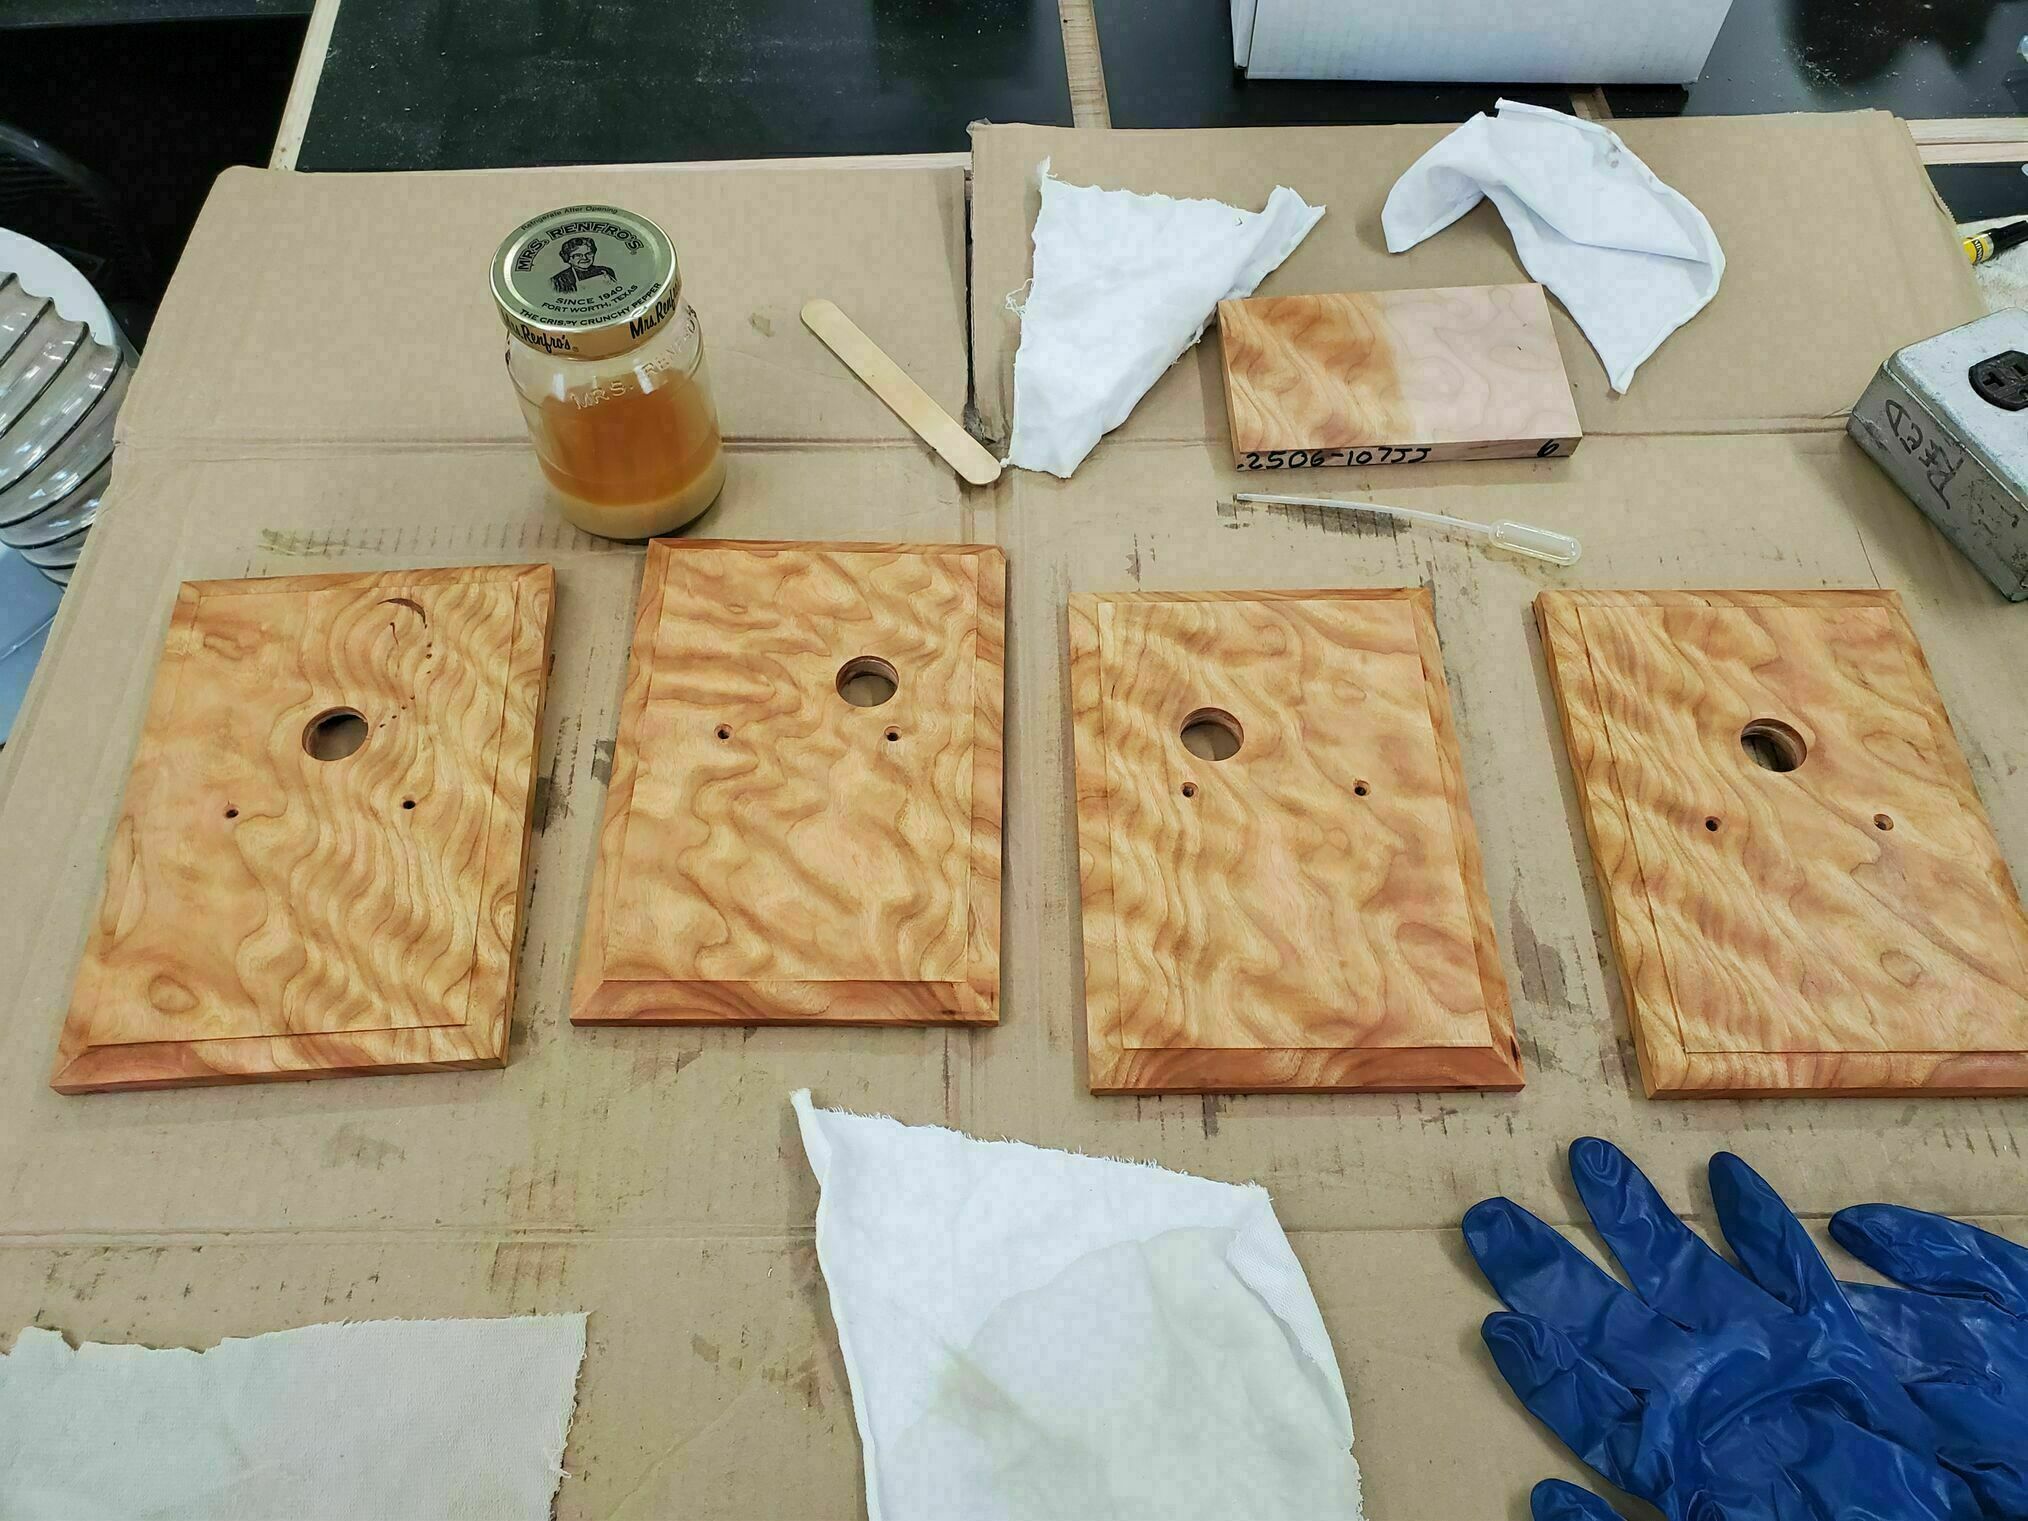
Next, shellac cut 50:50 with denatured alcohol, wiped on. We did 4 coats of this, I believe.
Finally, a coat of clear satin varnish.
Finished IInstallation
After the new sconces were mounted, we realized we didn’t have any bulbs to test them 🤦♀️
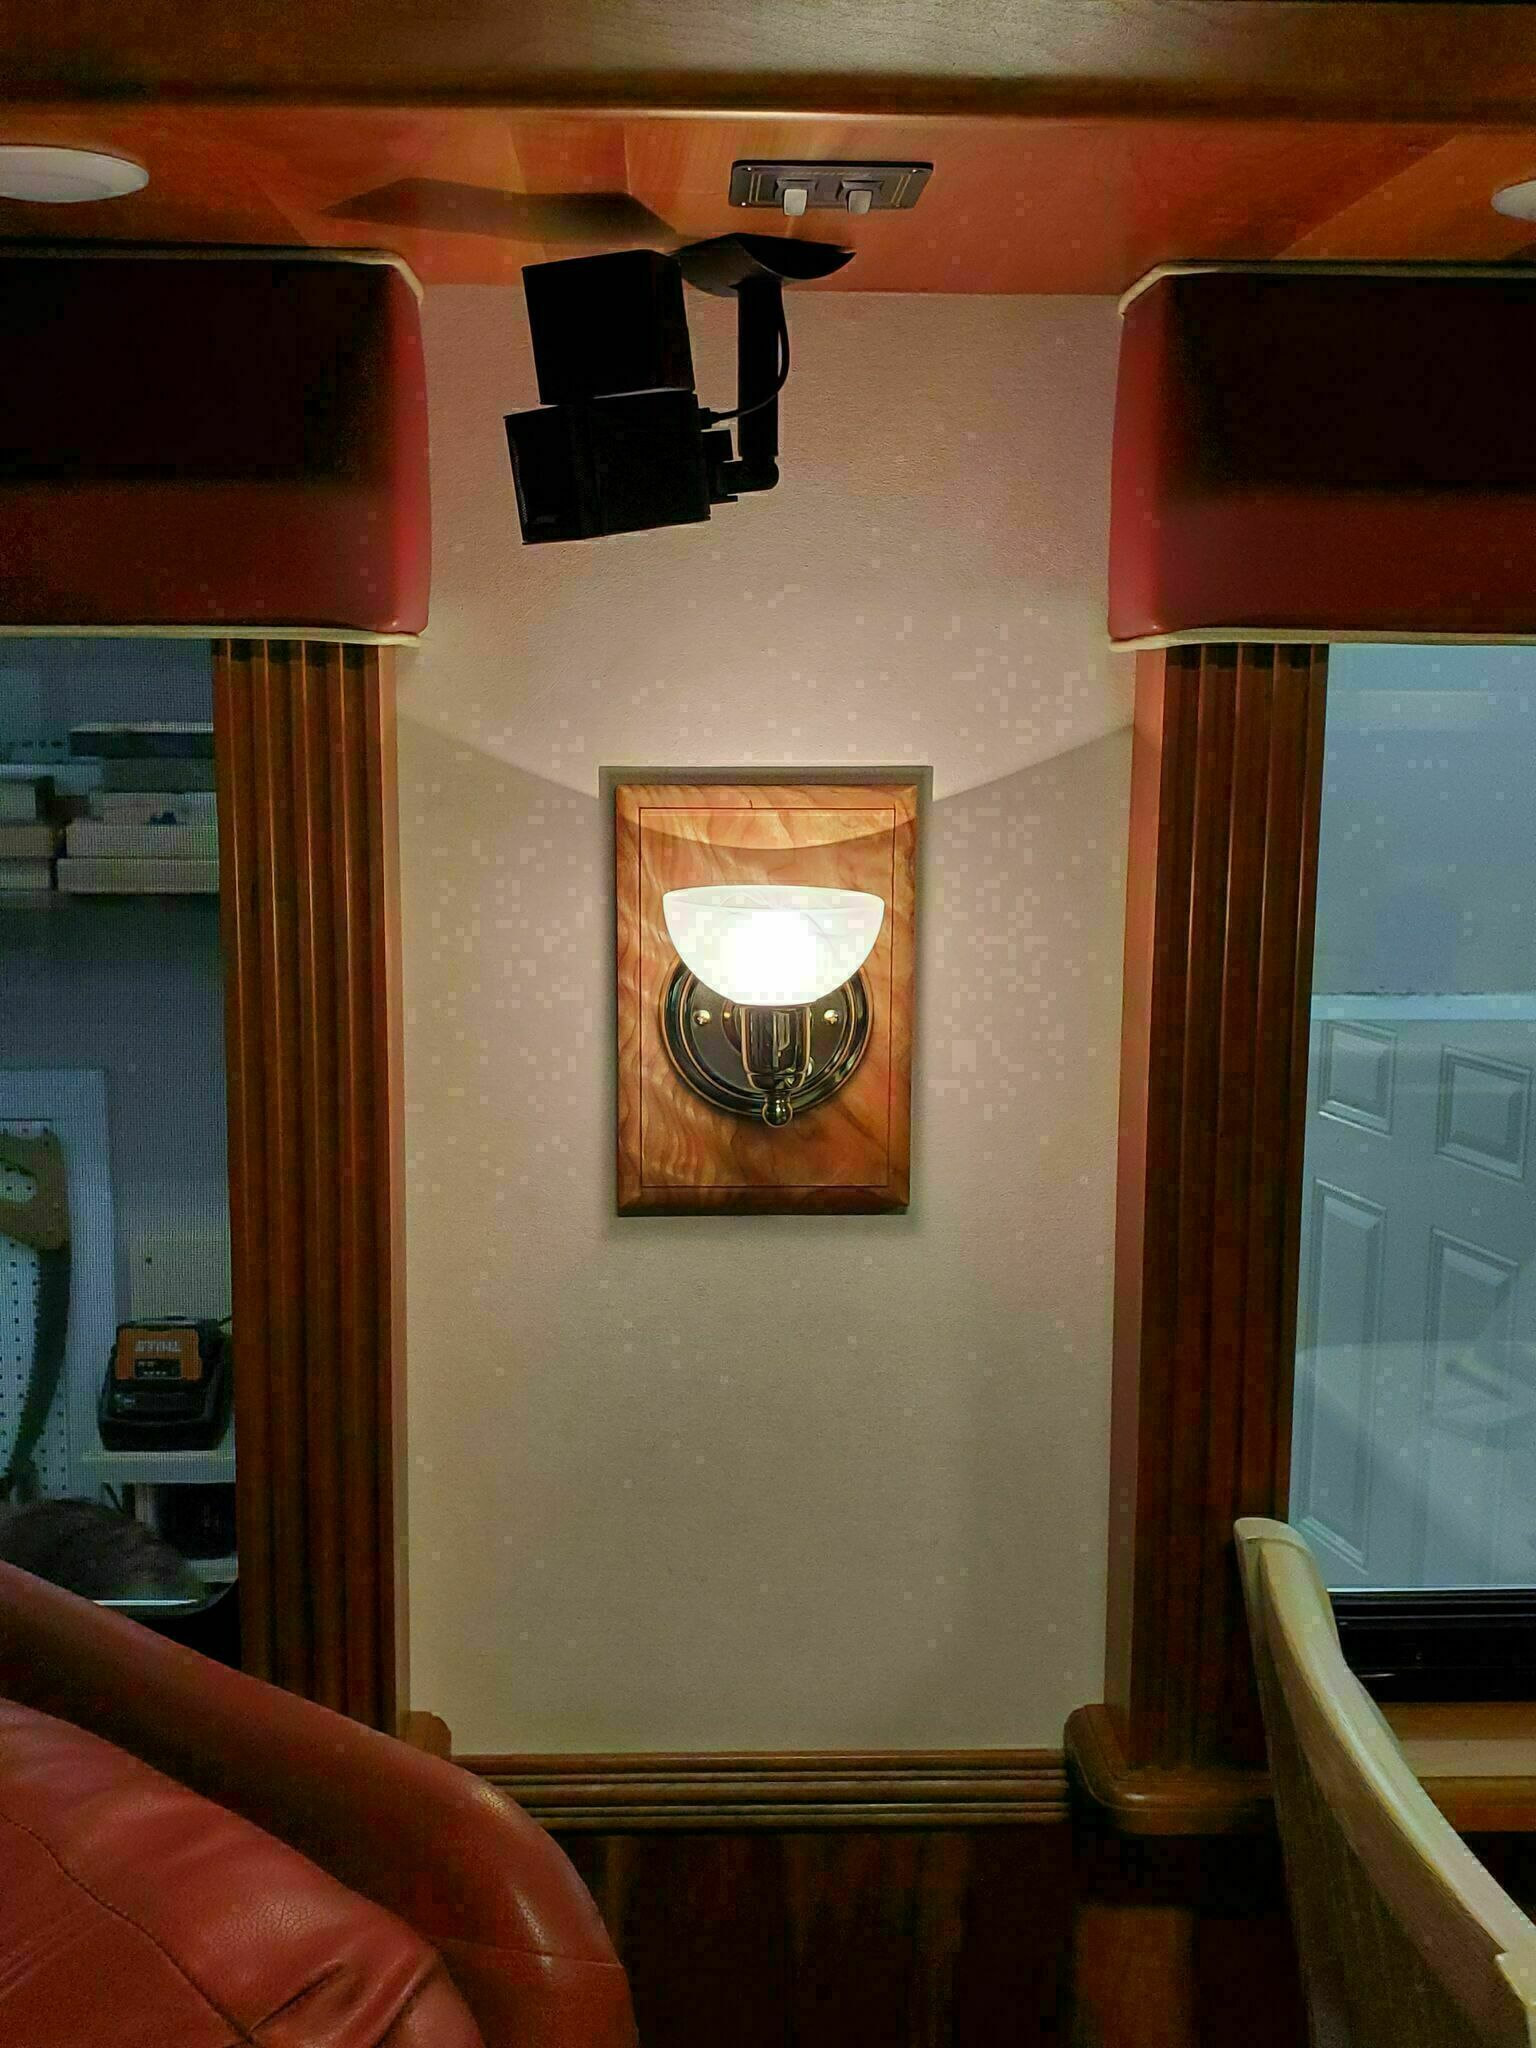
It took 2 auto parts stores to find the 4 912 incandescent bulbs. AutoZone had one twin pack, Advance Auto across the street had one twin pack. We chose these because we rarely use the sconces (although that might change because these are so pretty) and they’re more of a decorative accent. We didn’t want the brighter 921, most LEDs were too tall for these shallow shades, too high of lumens for the desired ambiance, and much too cold a color temperature for our taste. So Sylvania 912 Long Life incandescent bulbs were the winner.
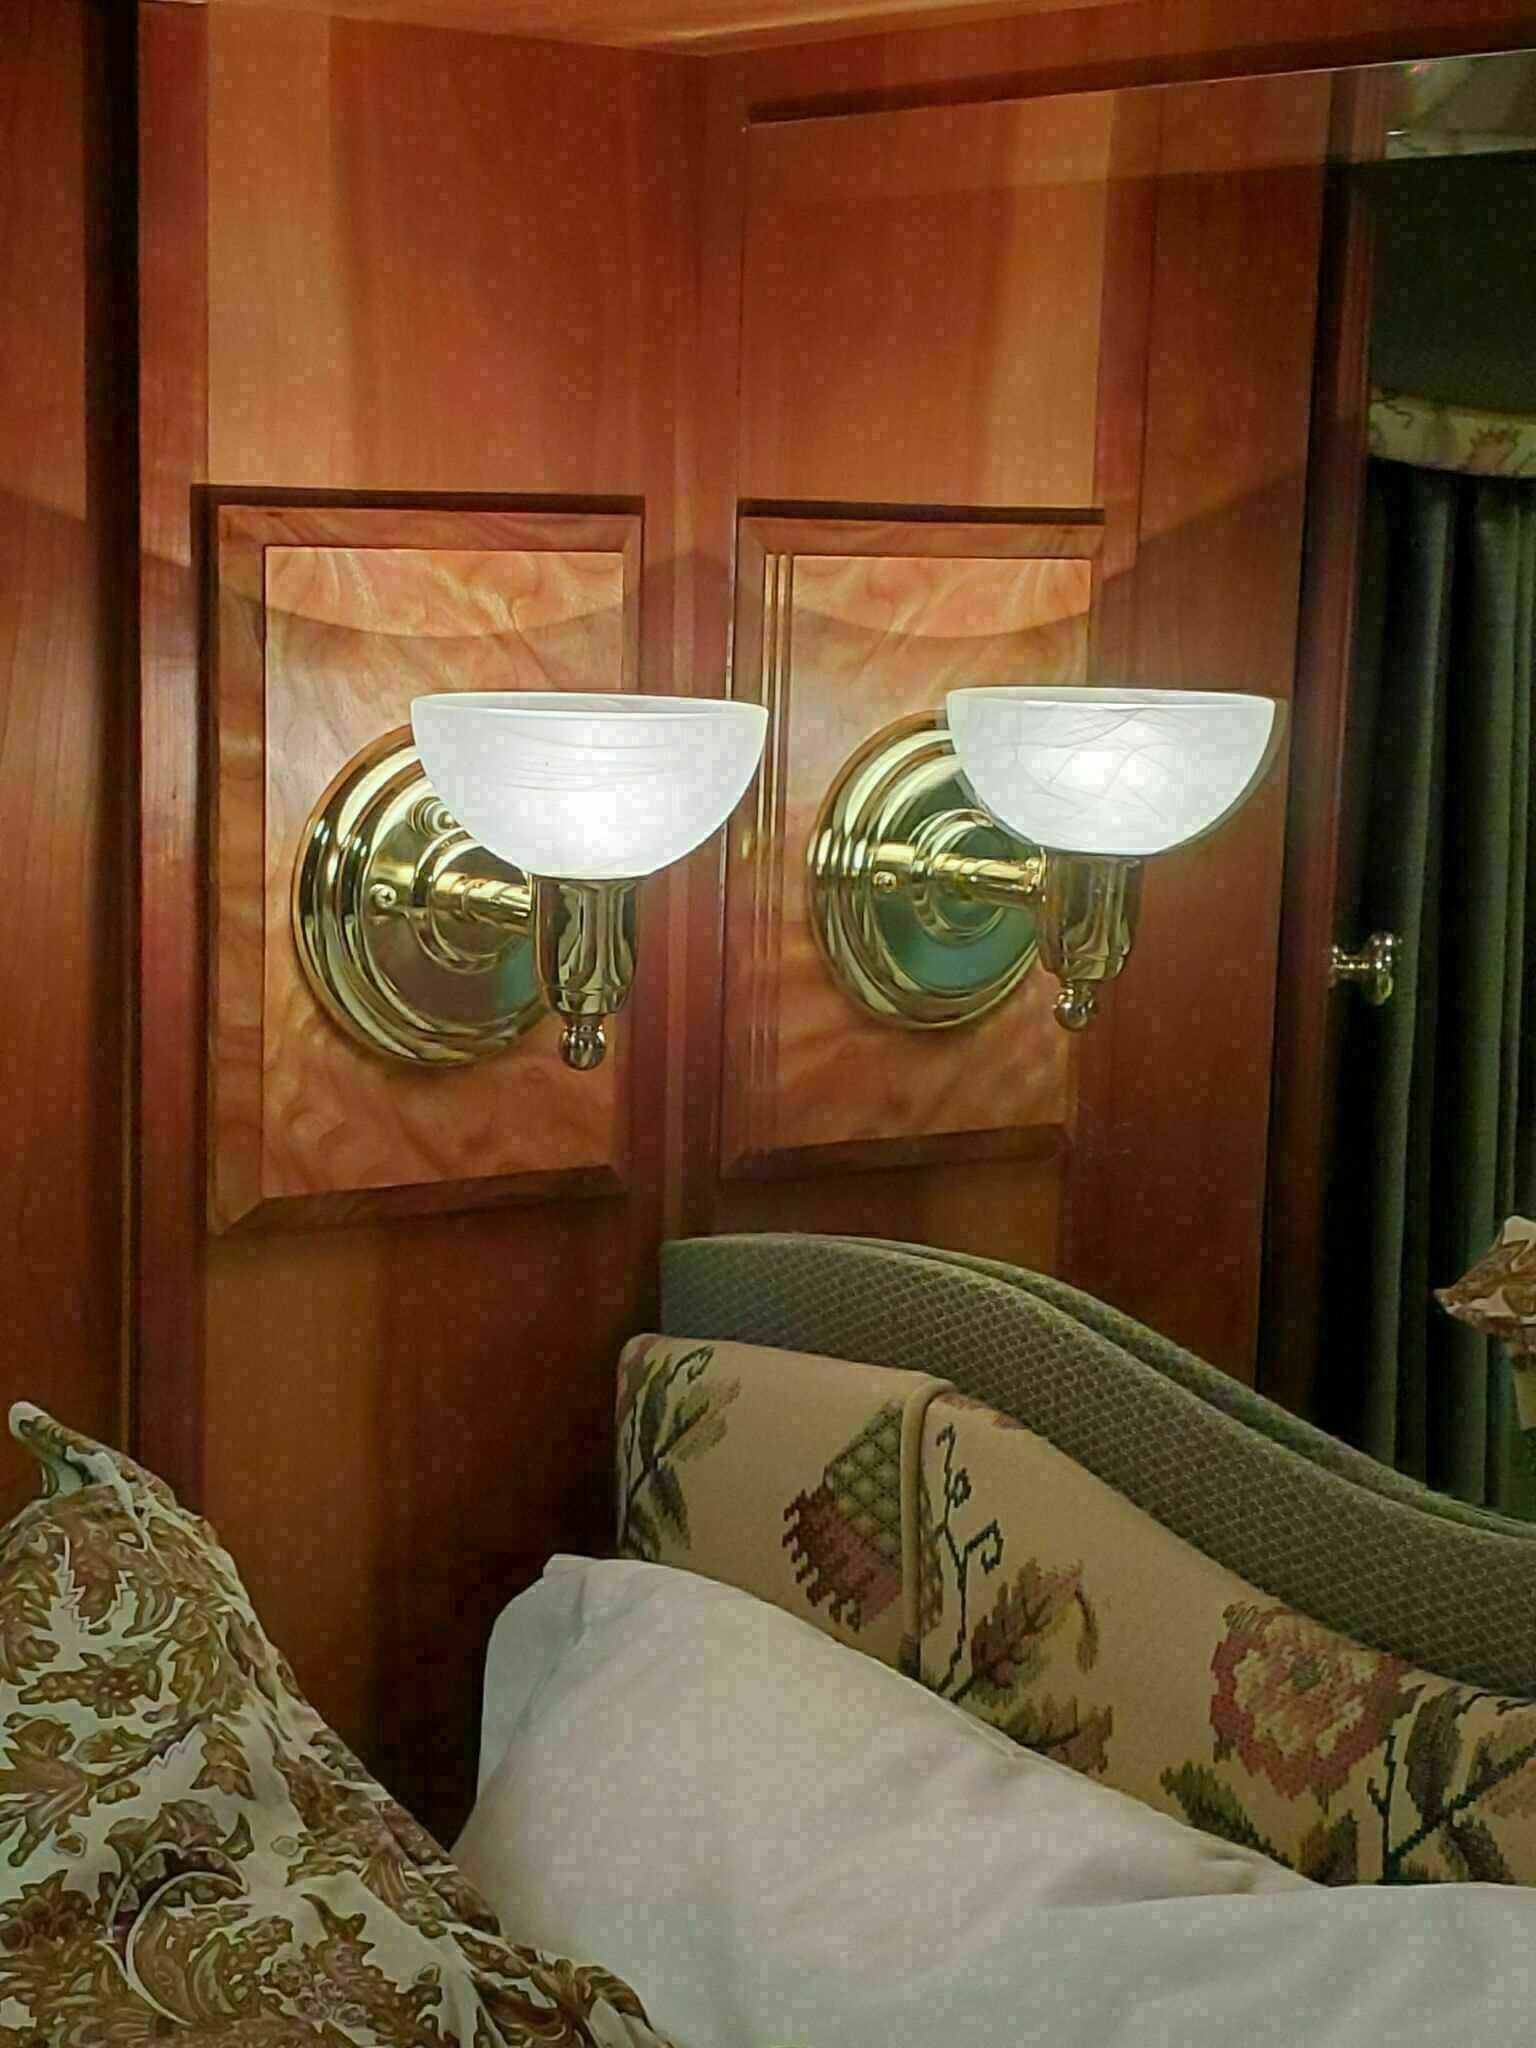
Funny how the reflection in the mirror makes it look like there are 2 sconces on each side of the bed
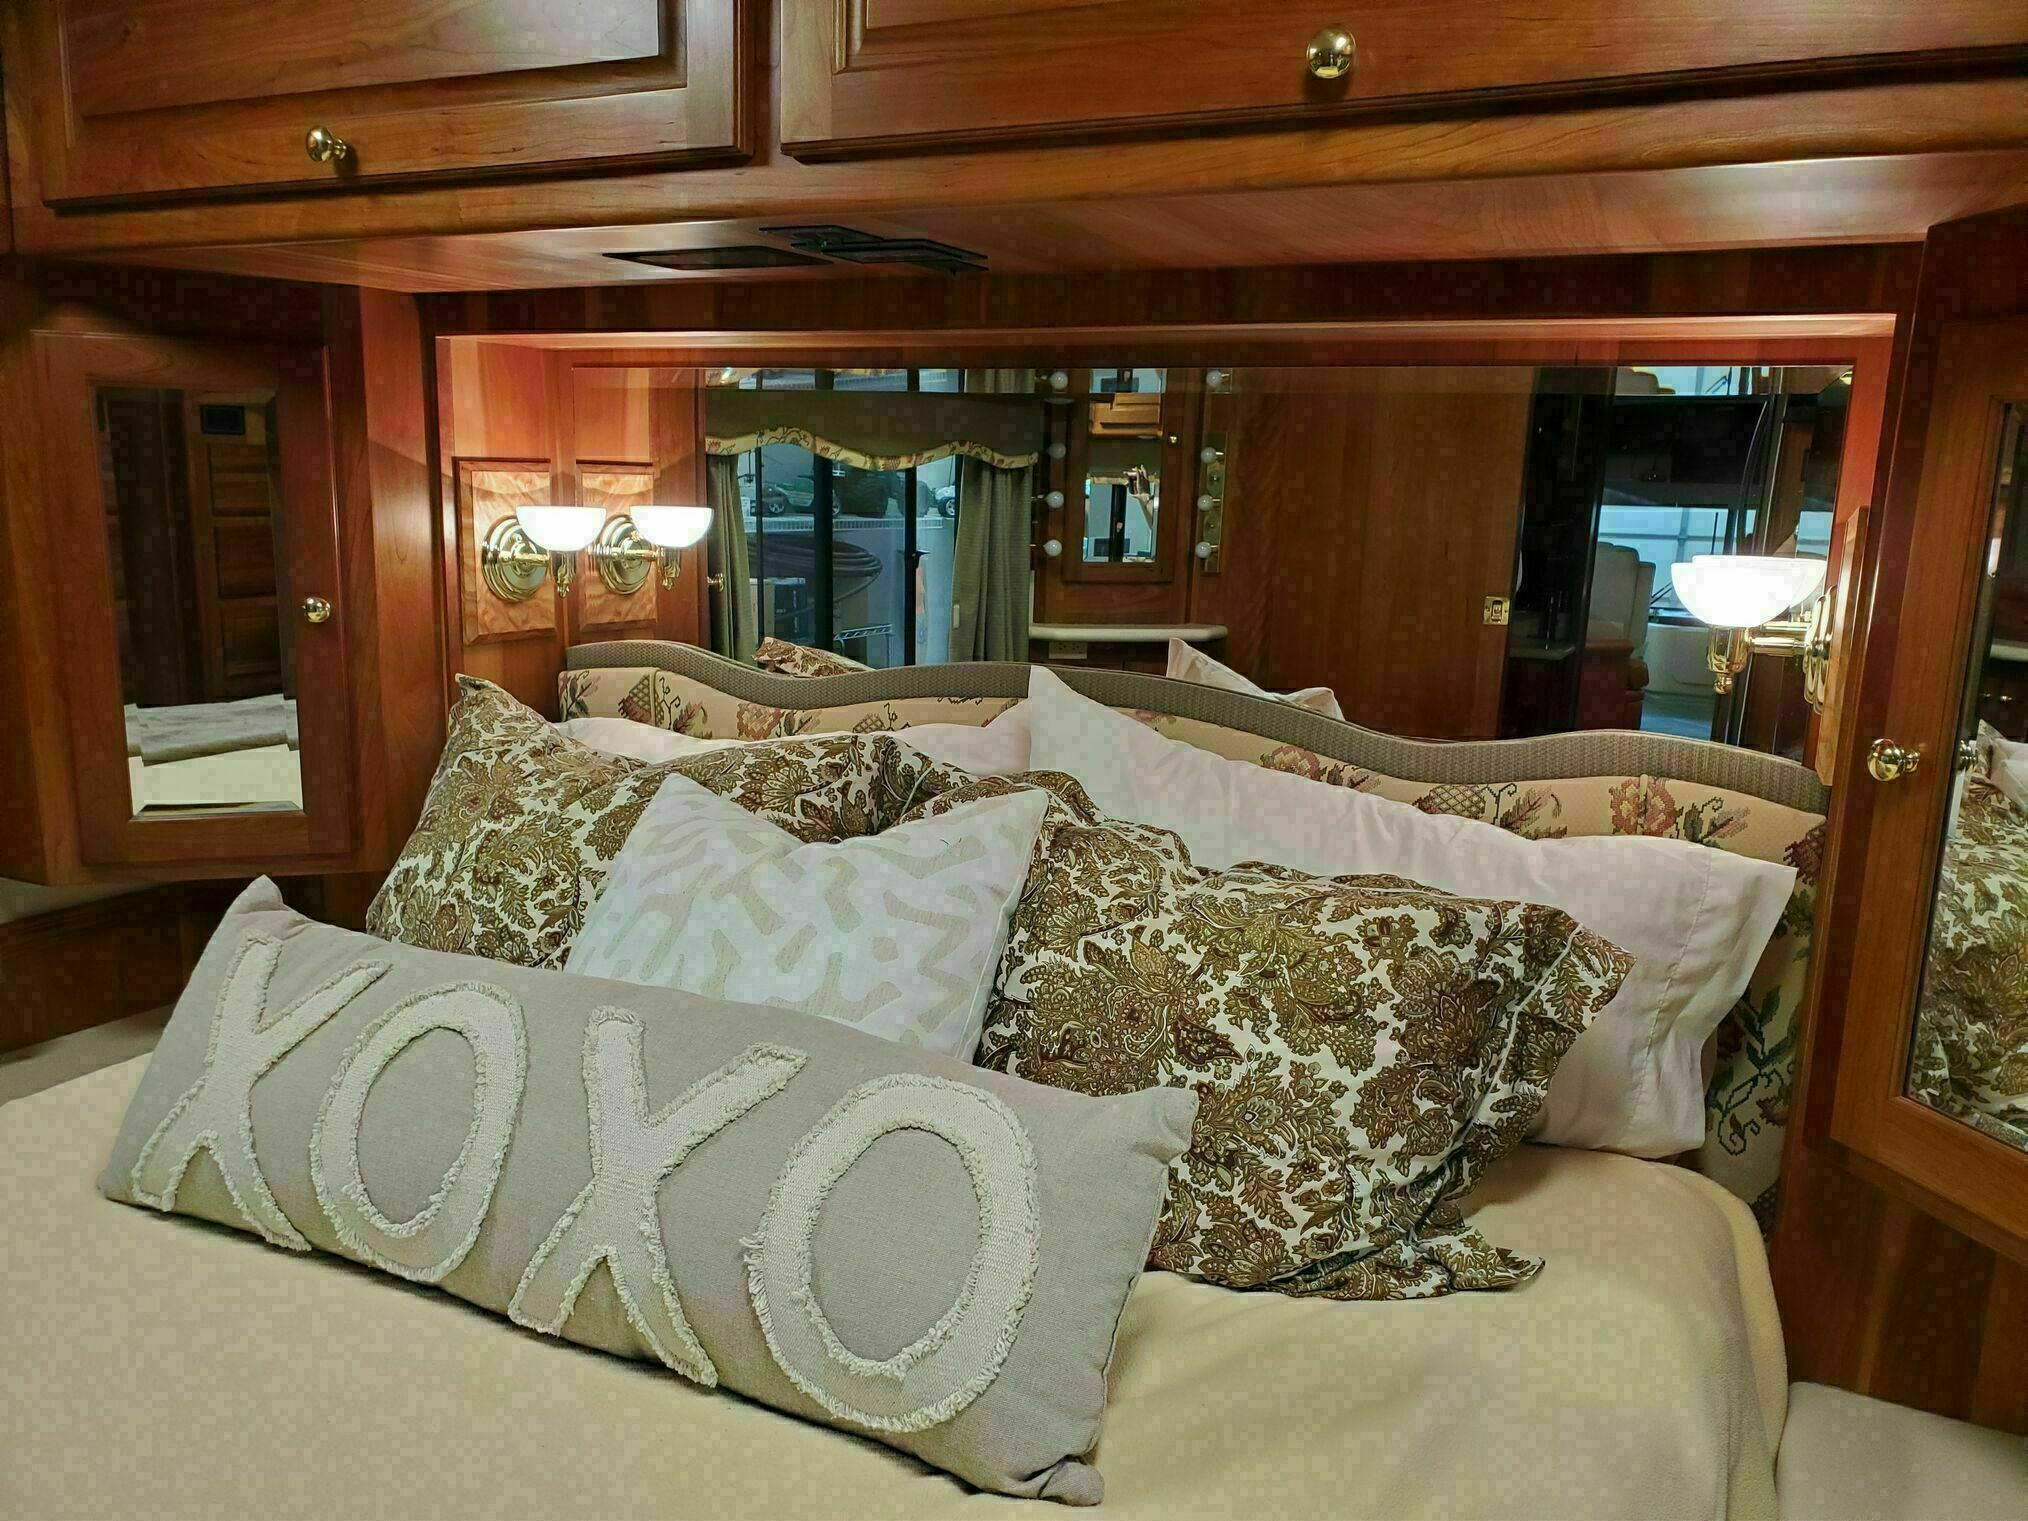
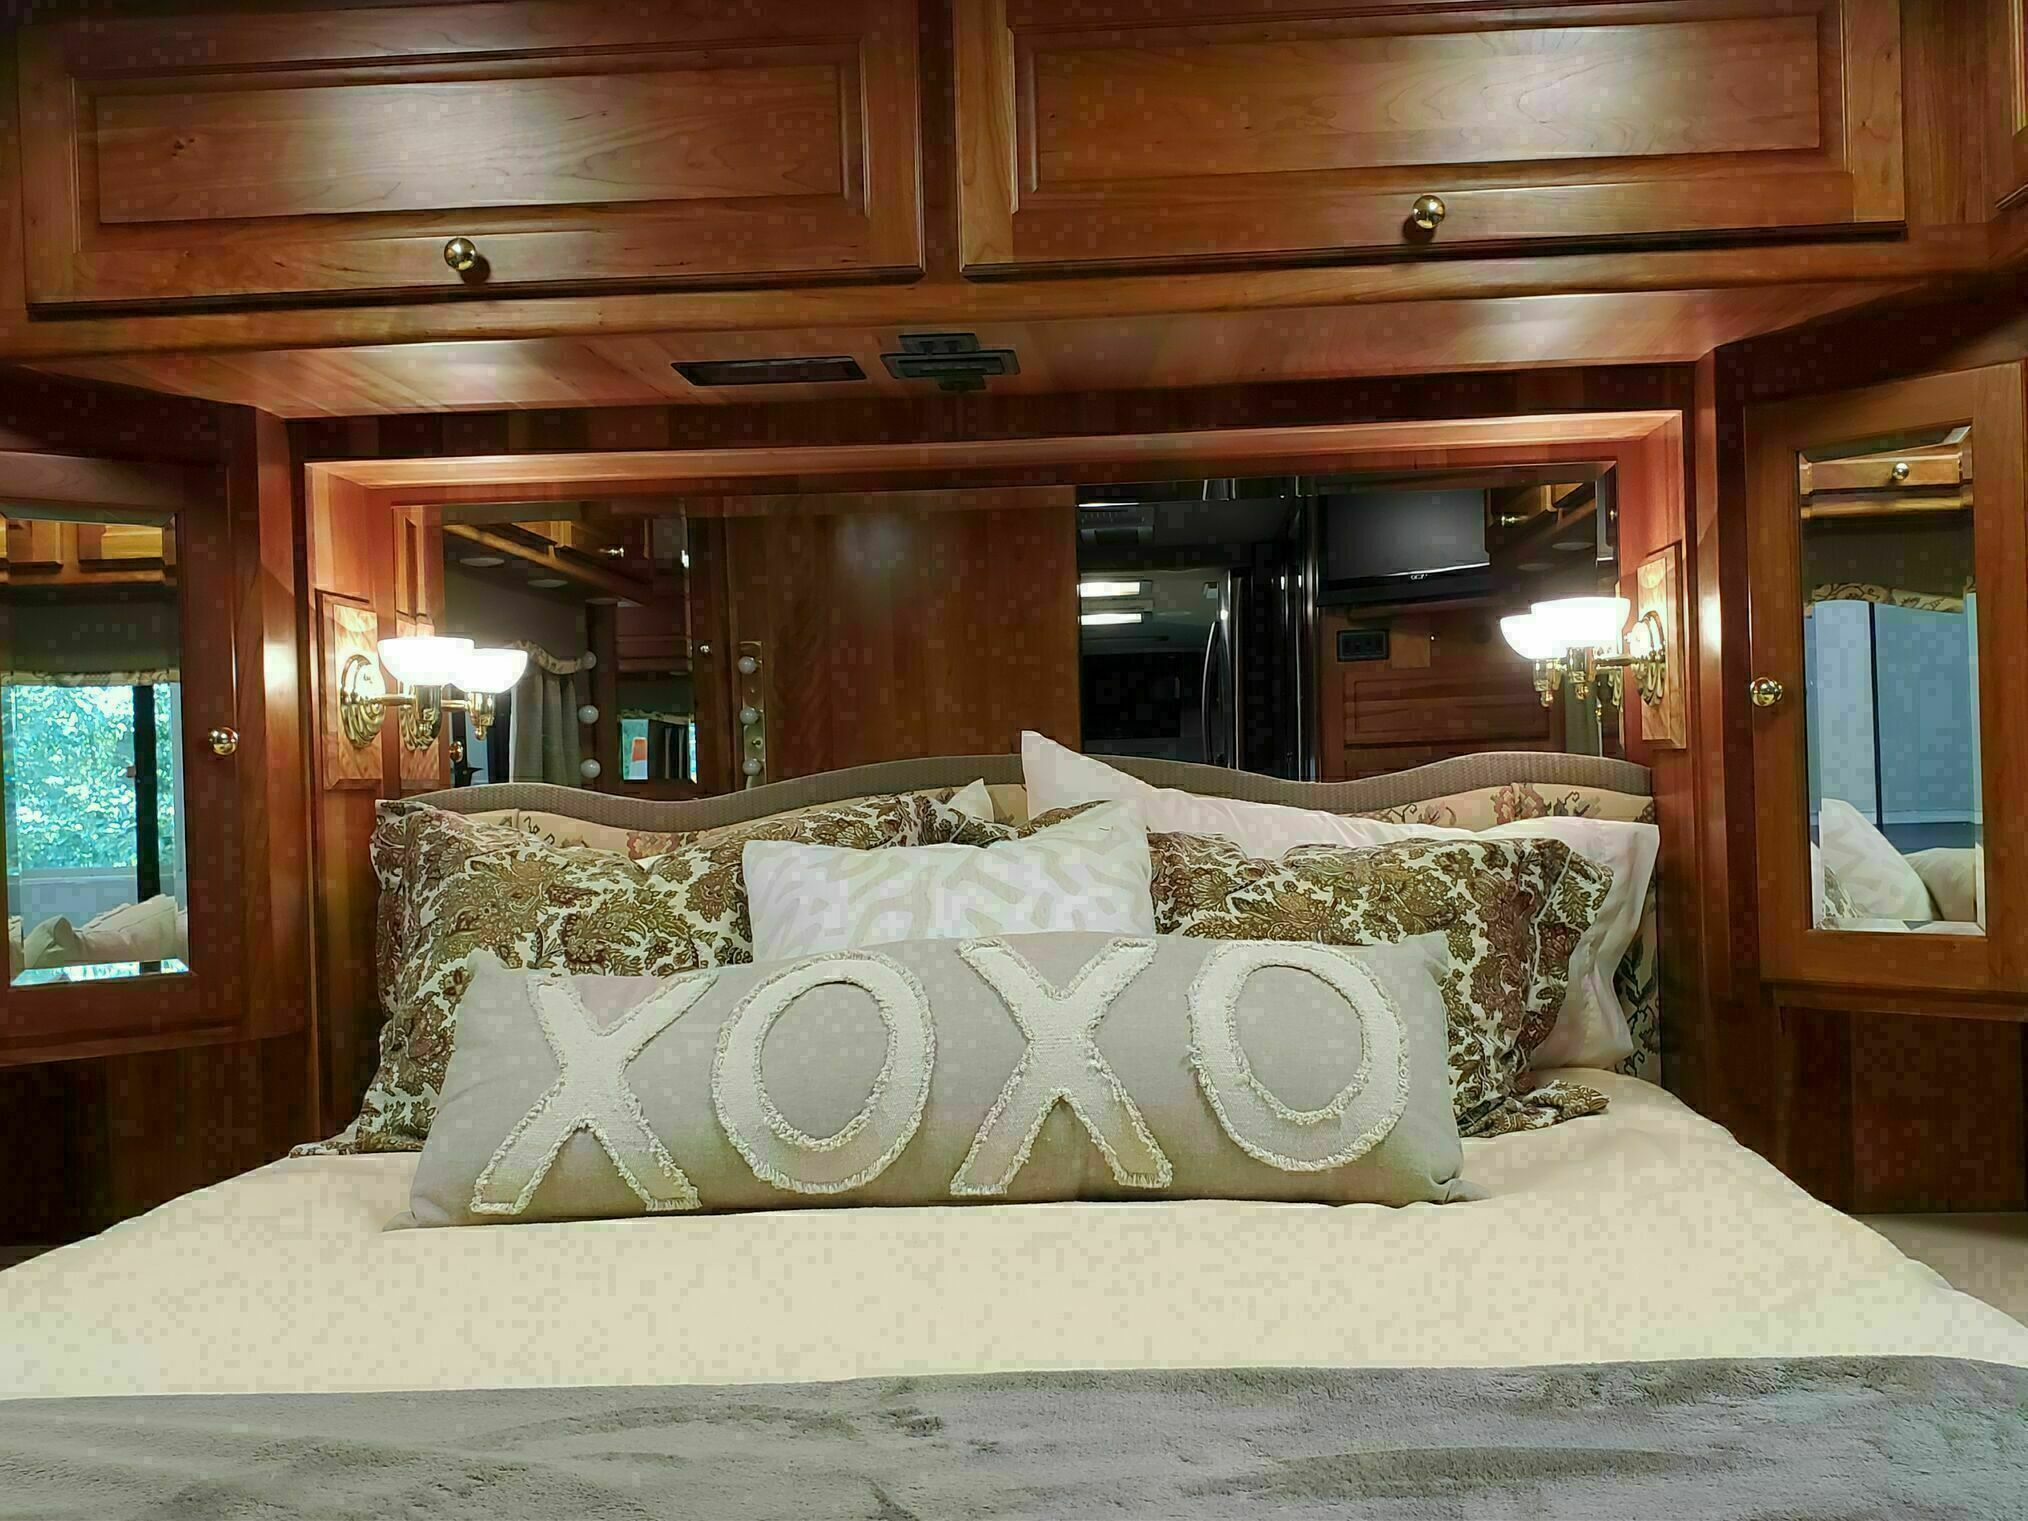
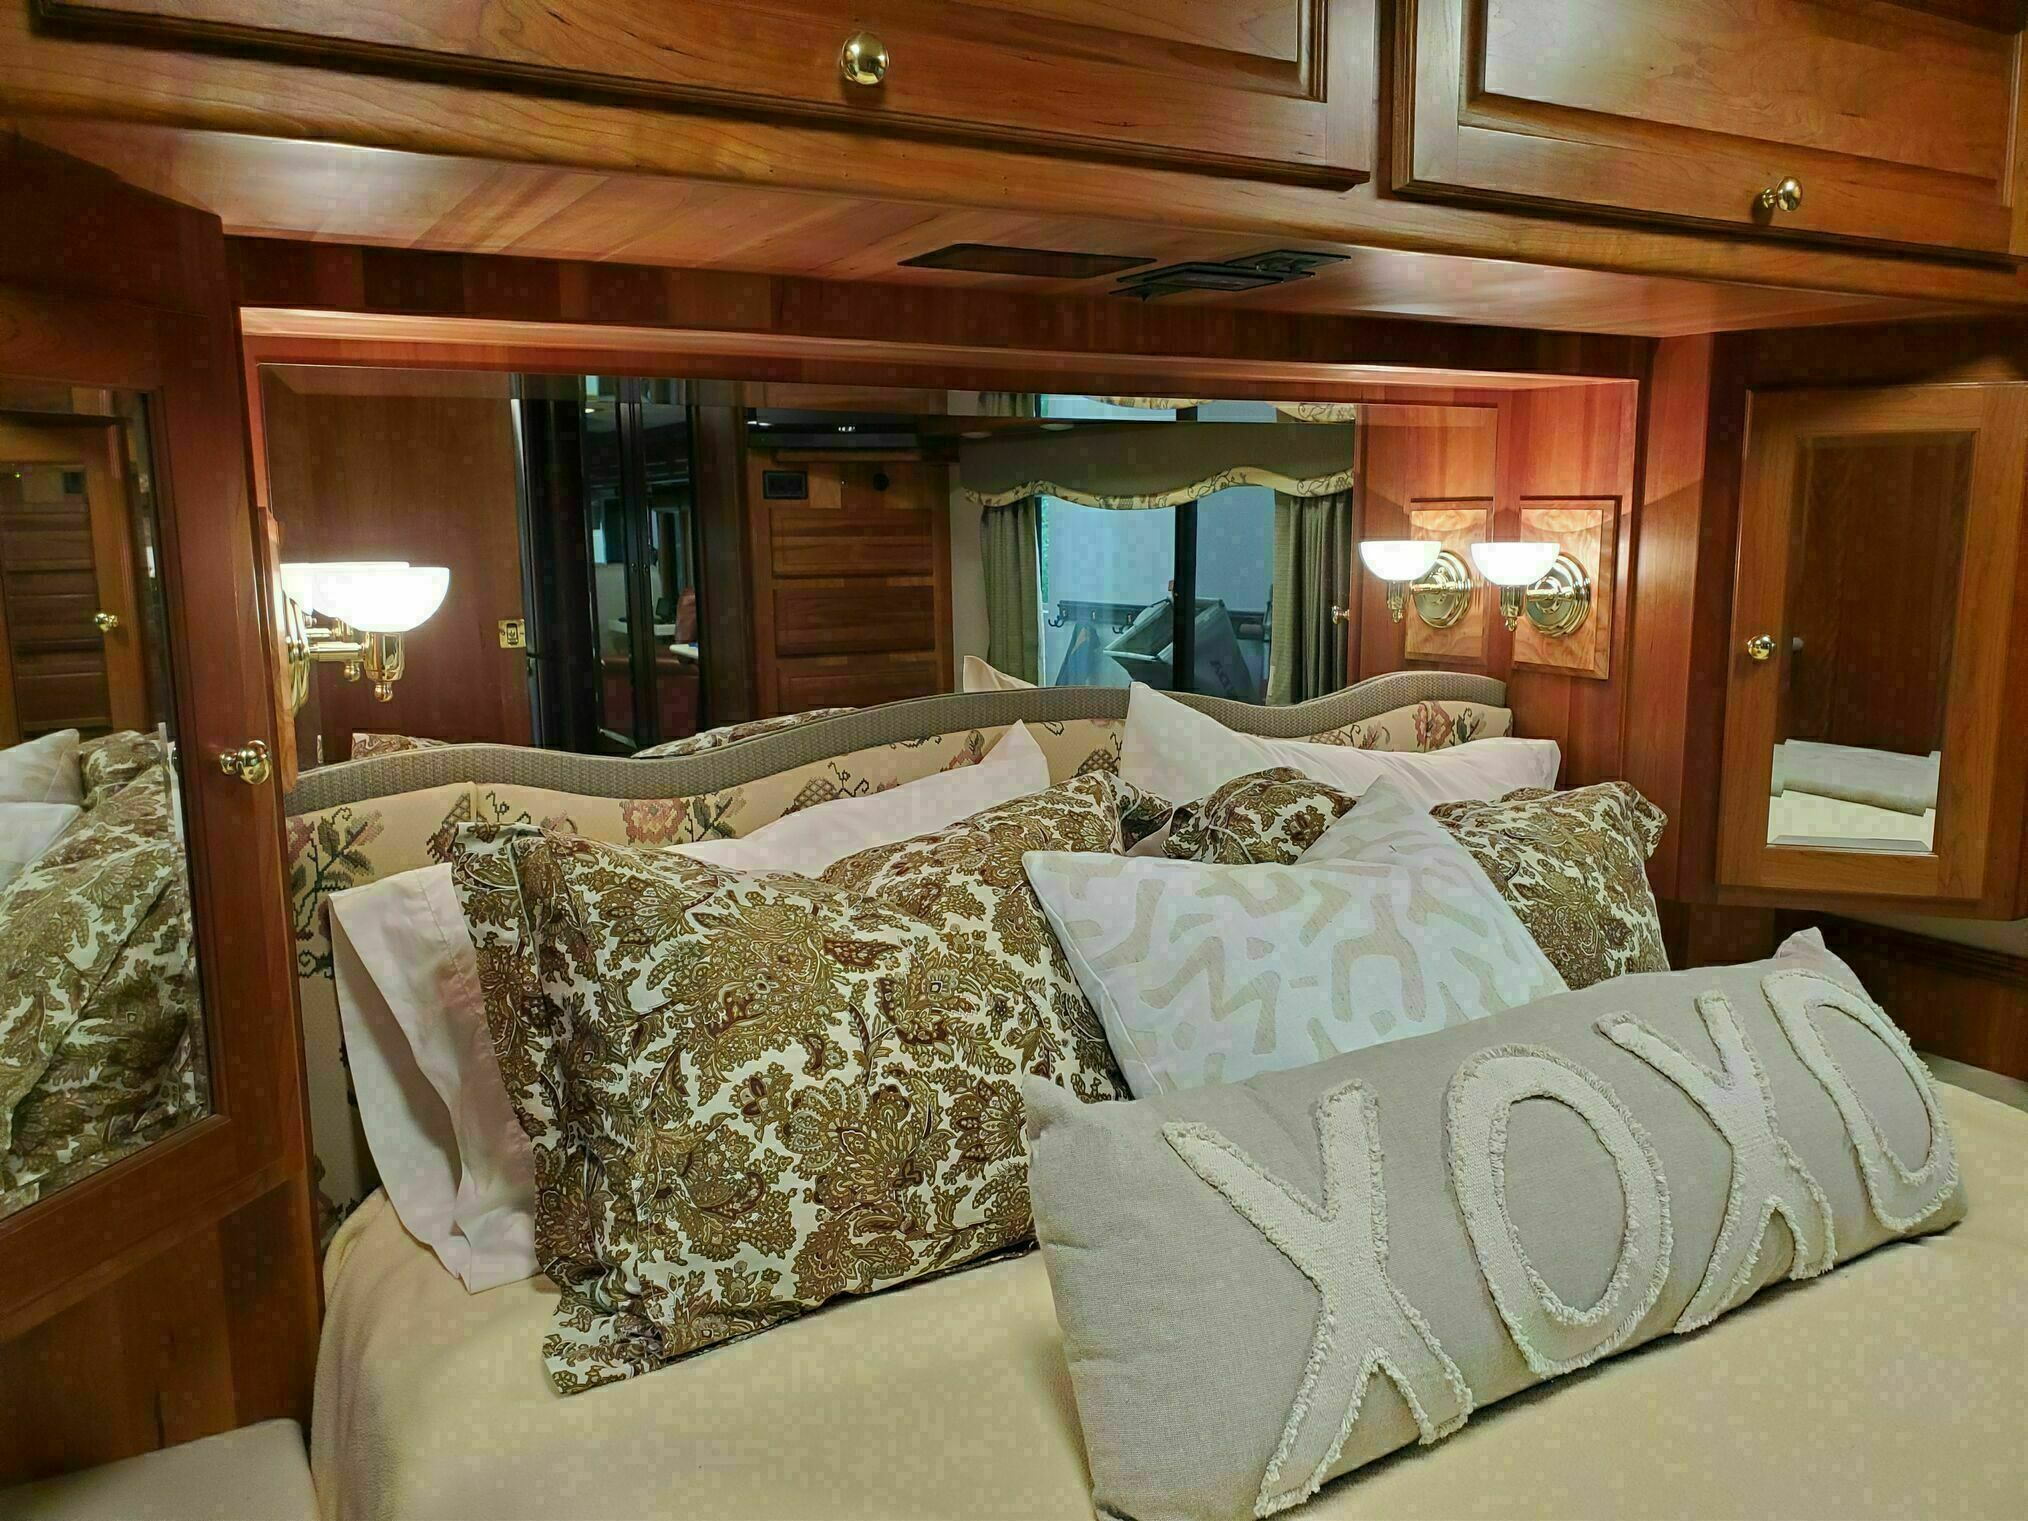
I absolutely LOVE the new sconces, and it’s especially cool that these are ones that Steve custom made for us.