AquaHot Zone Pump Leaks
After pulling the coach forward we noticed a small, concentrated puddle on the garage floor, maybe four inches across, directly below the AquaHot. The shape suggested a very slow drip. The fluid was clean and the proper color. Being a 2000 model still running the original AH with 50:50 ELC coolant (changed about a year ago), the fluid color looked correct. We hadn’t seen any prior signs of a leak, and we always check the garage floor after pulling the coach out.
We had run the AH on electric heat for a couple of days during a February cold snap, the garage never dipped below 45°F, we were just playing it safe, which may have aggravated the situation.
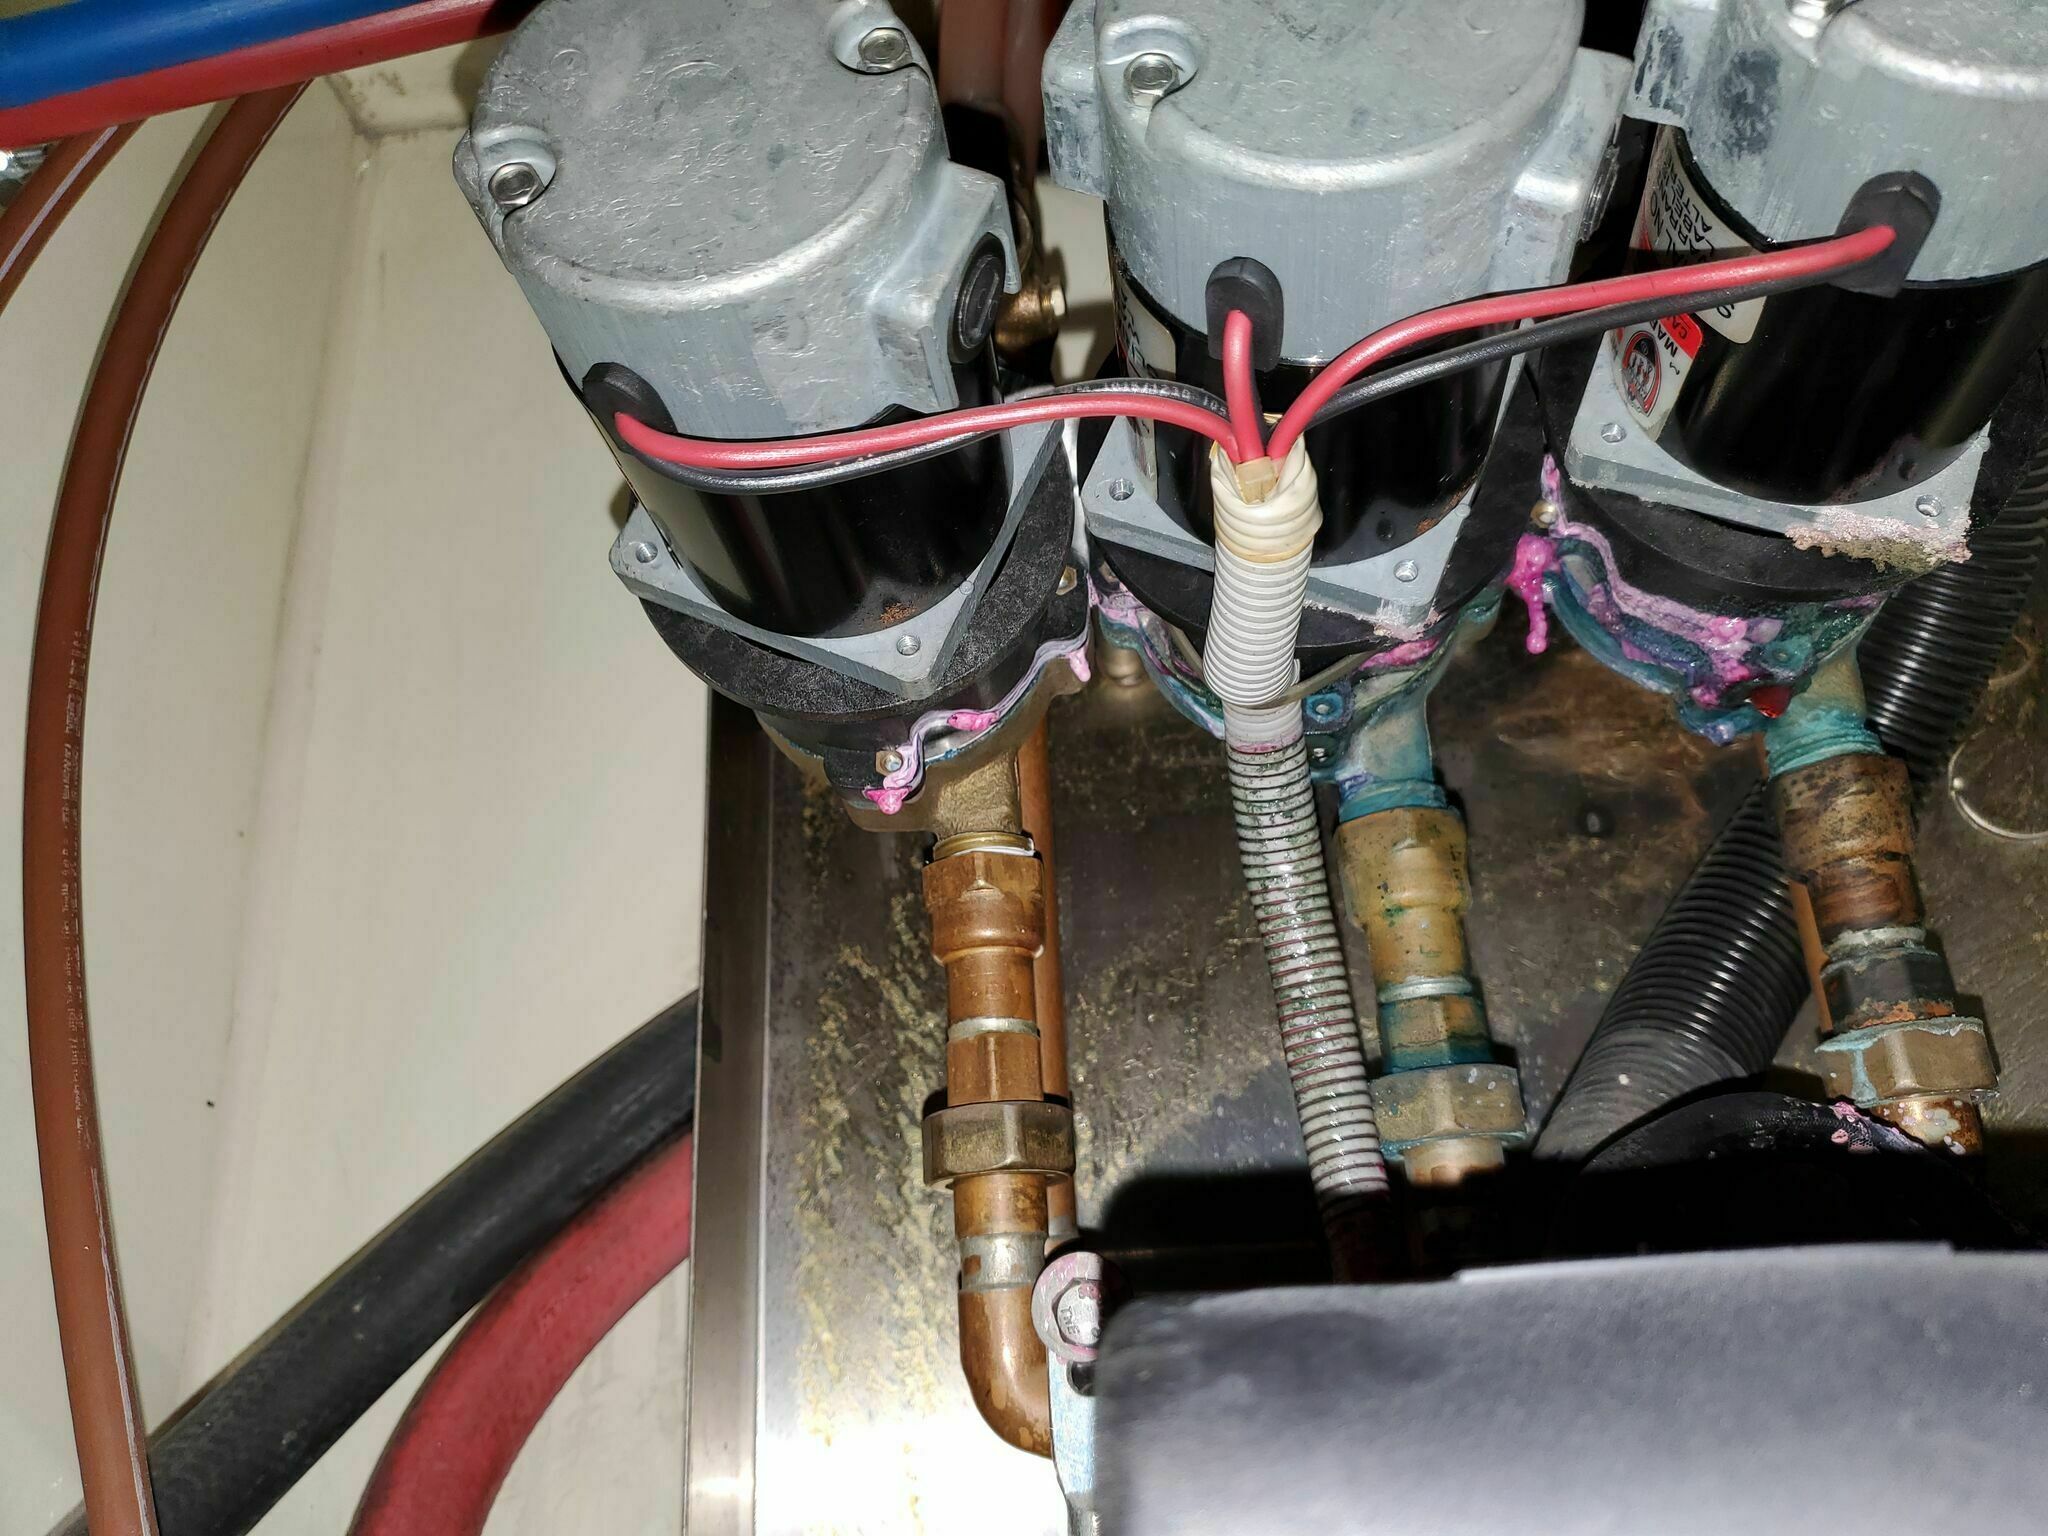
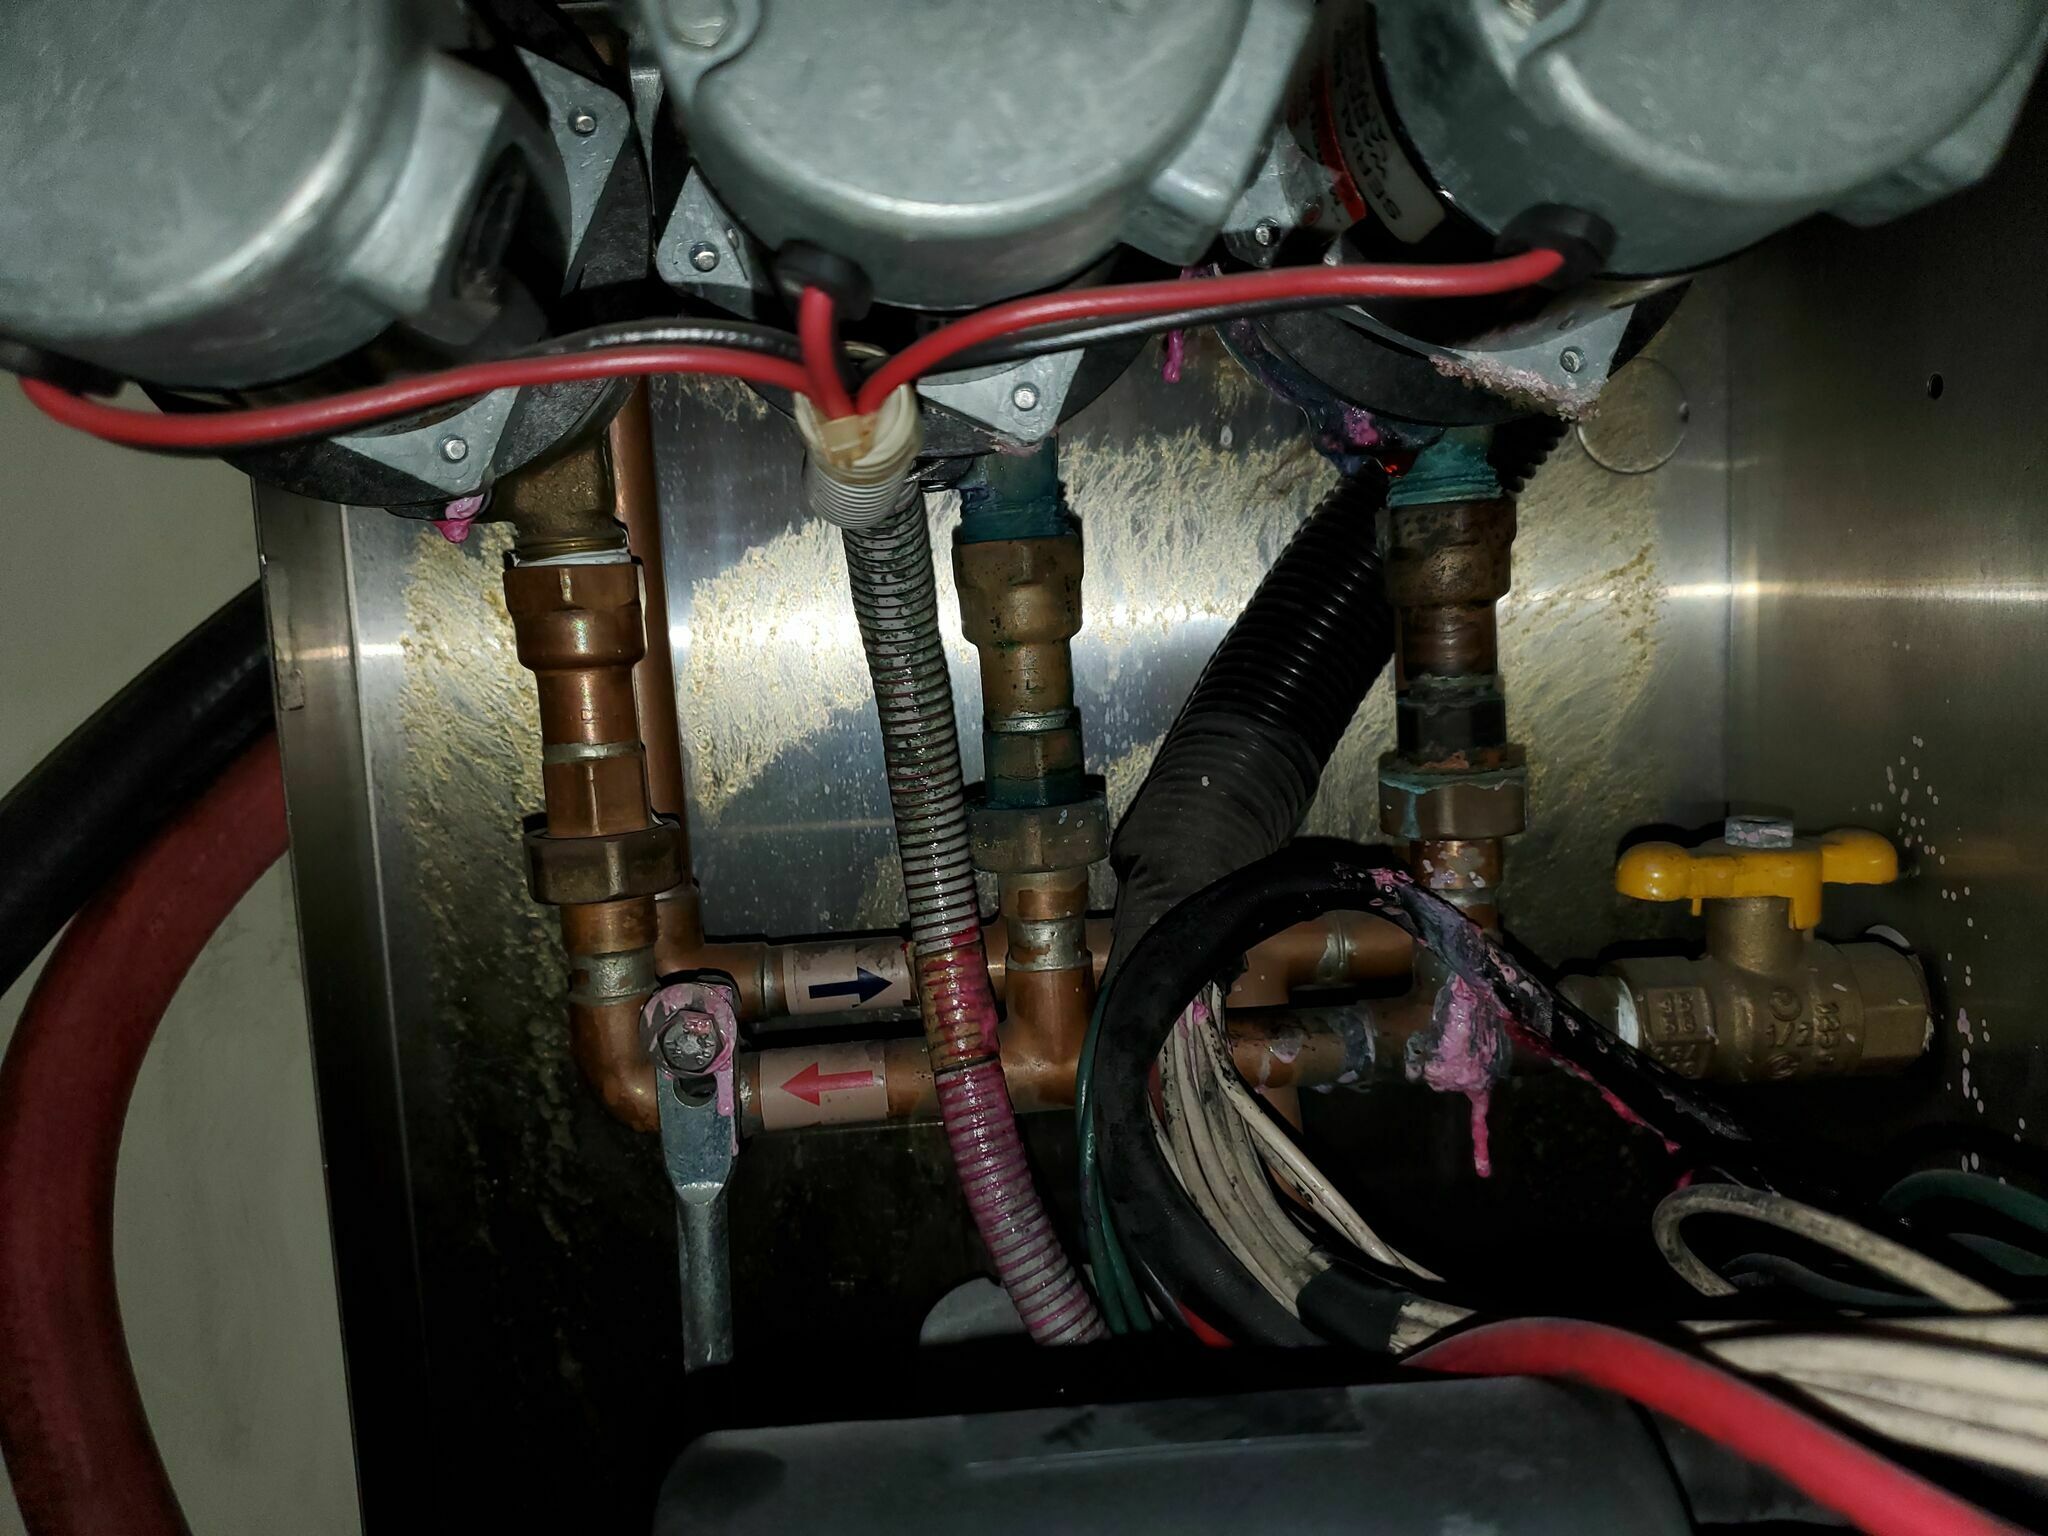
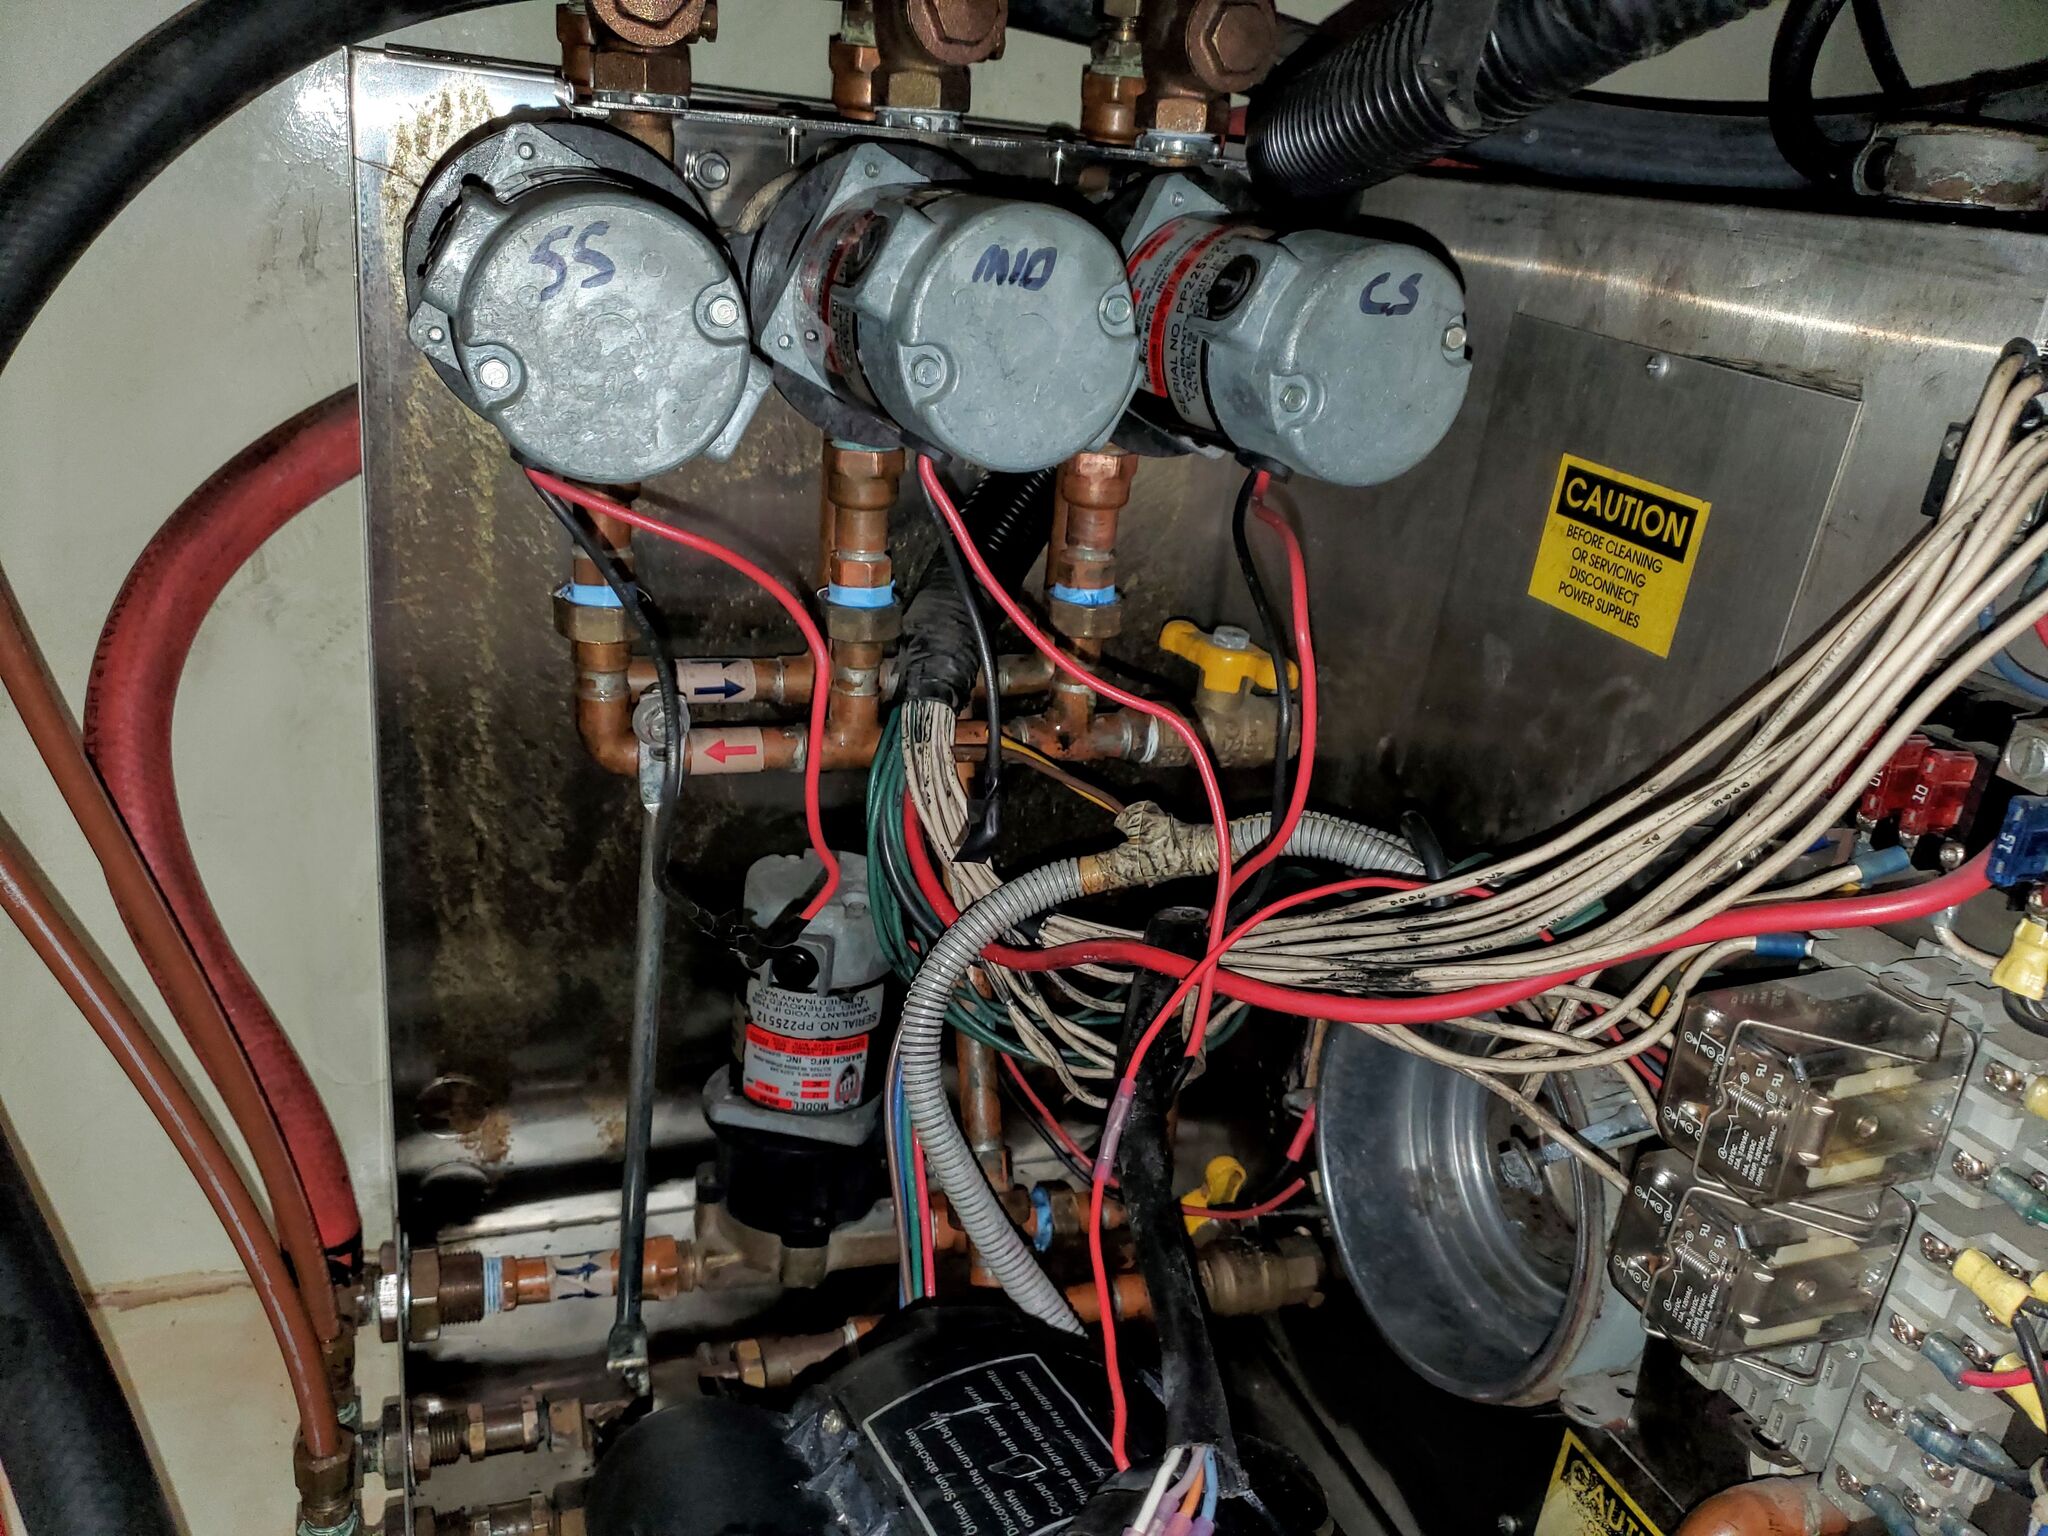
Pulling the covers off, we didn’t find any recent moisture. There was dried residue in the pan, and it was oddly bright pink rather than red. Tracing the leak path, all three zone pumps had bubblegum-to-bright-pink dried residue on them.
Diagnosis
The leading theory was worn O-rings, most likely exposed, or worsened, after replacing the radiator cap. The old cap had been in terrible shape and was probably not holding much pressure. Once the system was holding proper pressure again, even slightly degraded seals can start to weep.
Pump Removal
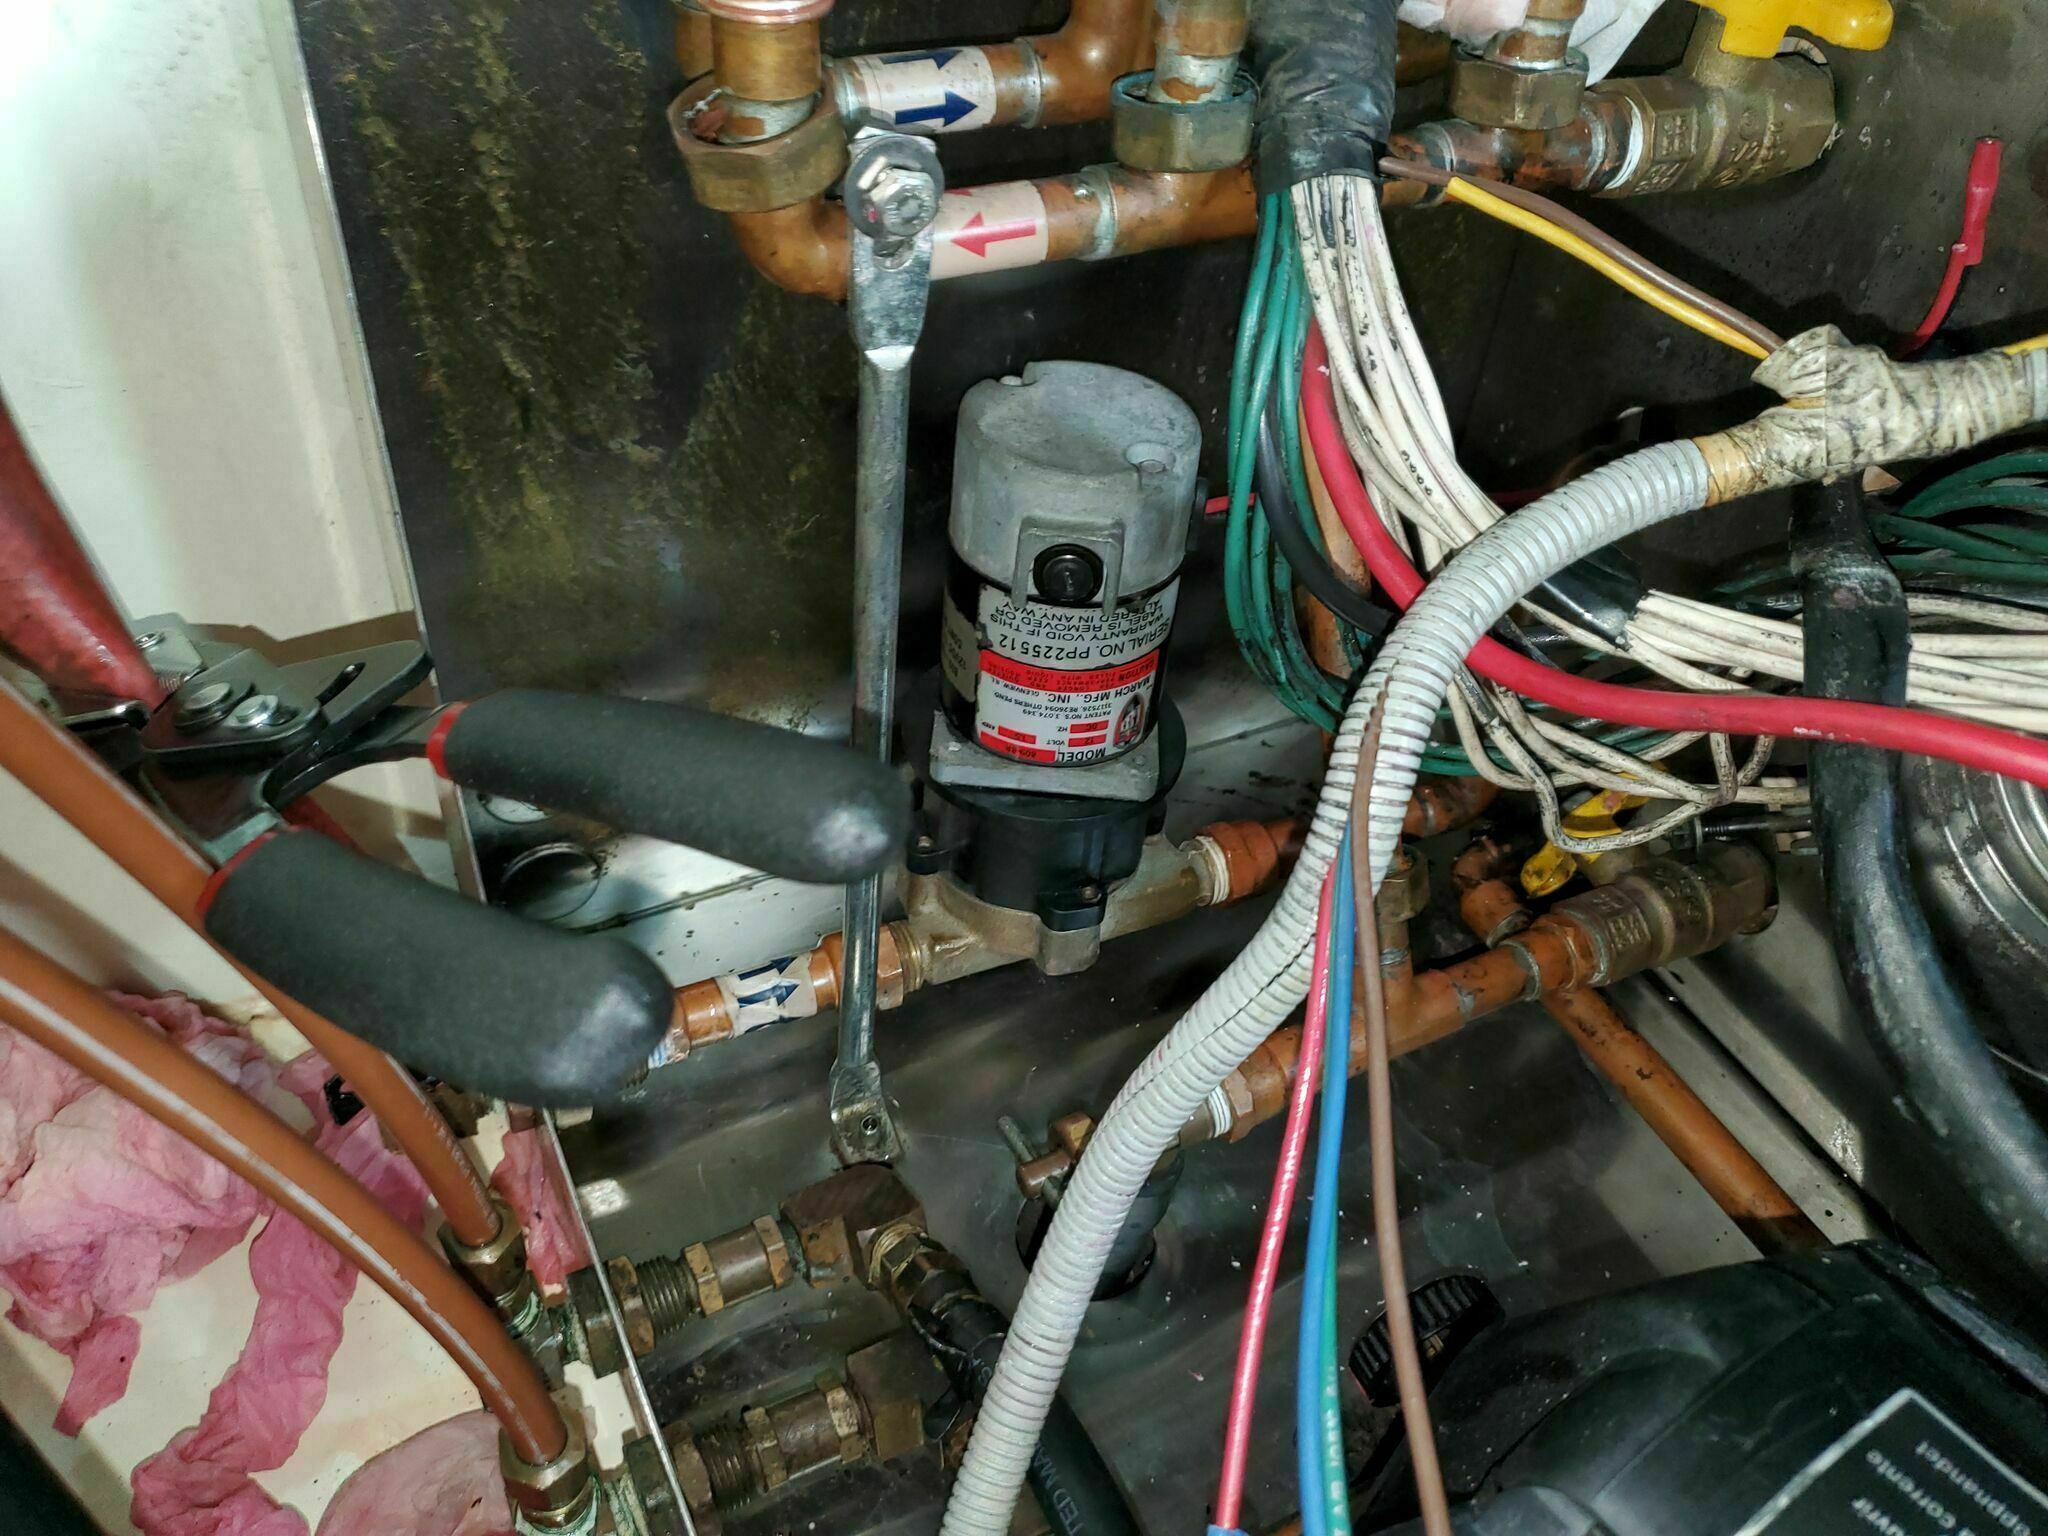
Zone pump removal is a messy job that has to be performed from a confined space, one of the joys of the infamous “AquaHot cave” found on some coaches. On coaches with the journeyman storage drawers adjacent to the AH, it’s worth removing them before you start; with them in place, everything has to be done lying on your side.
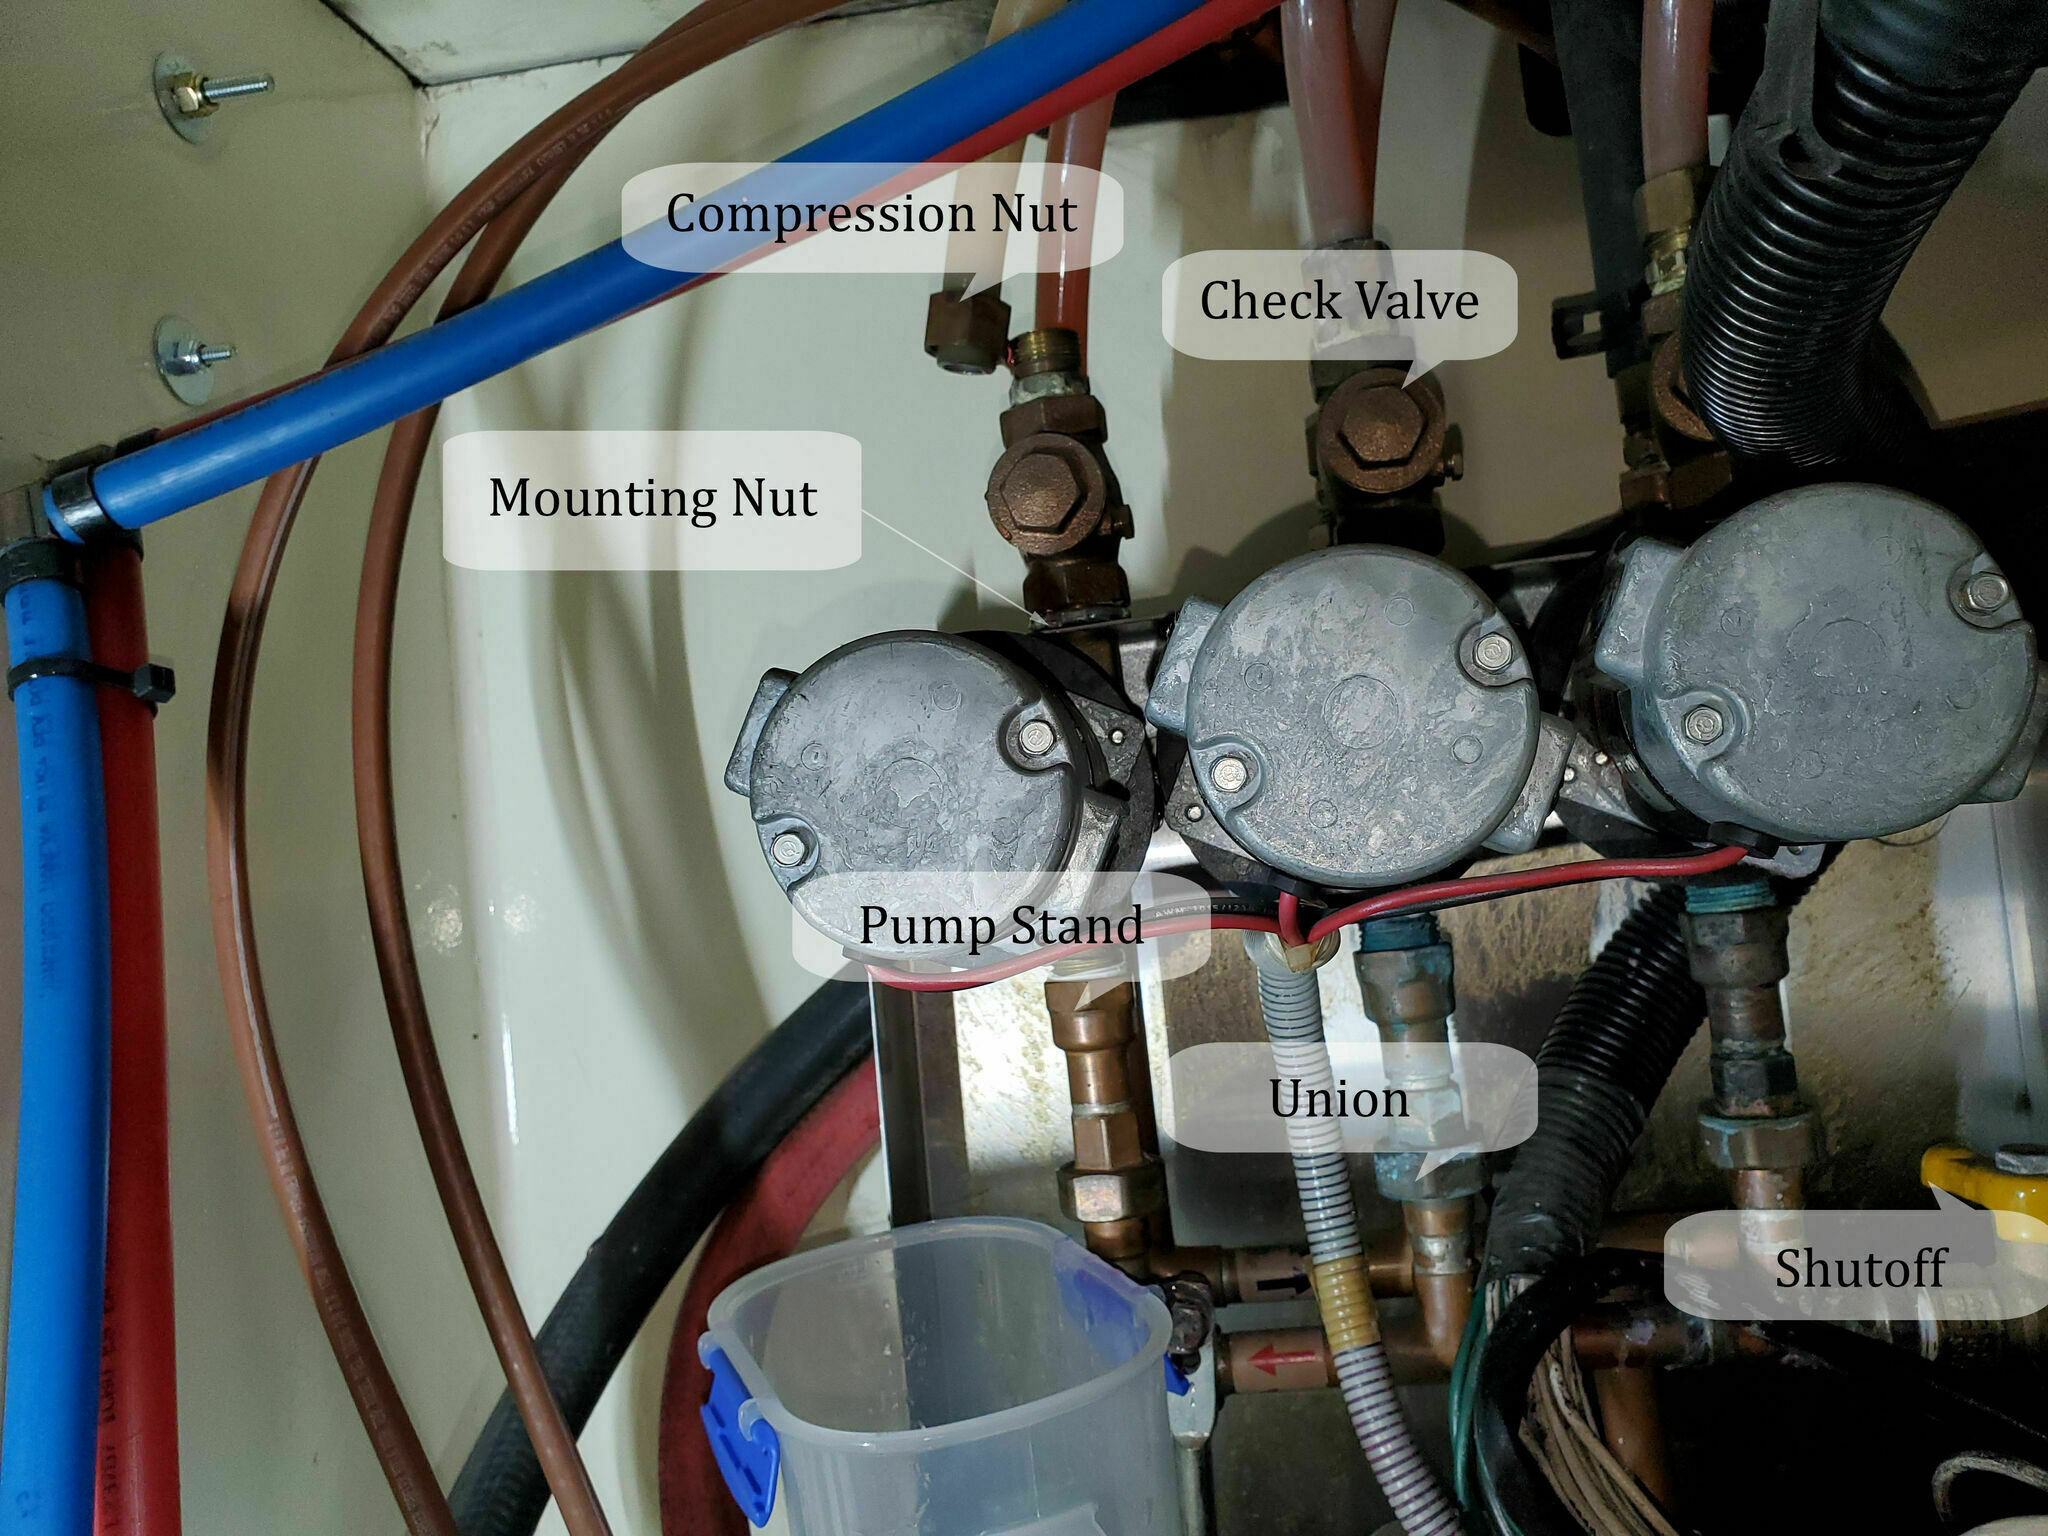
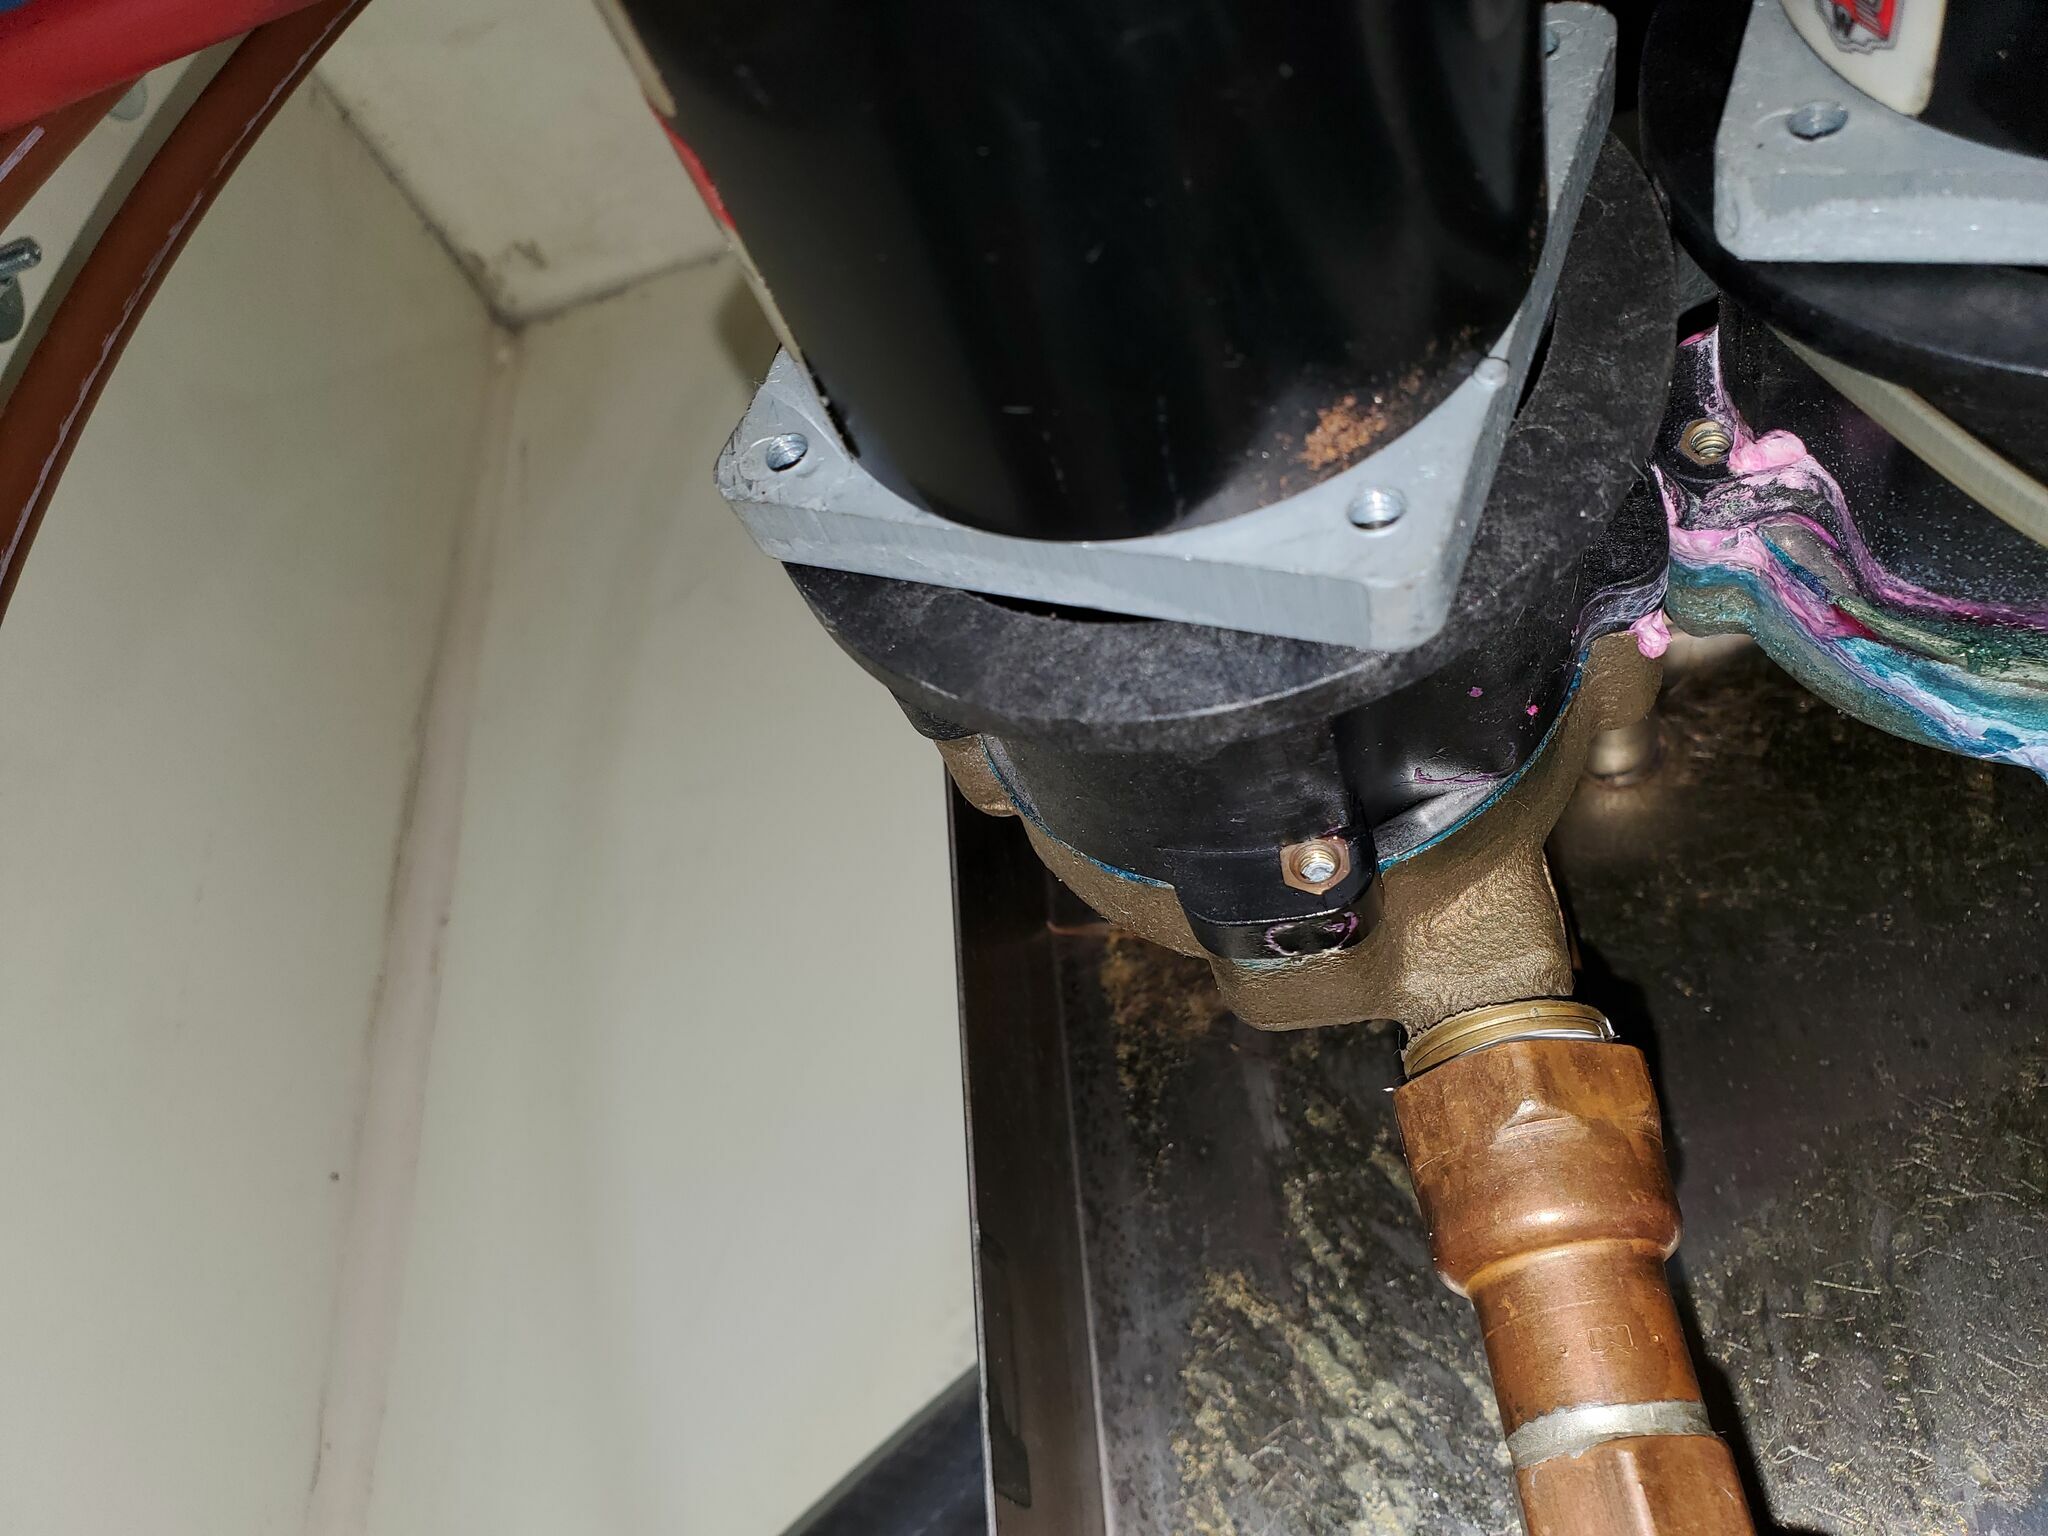
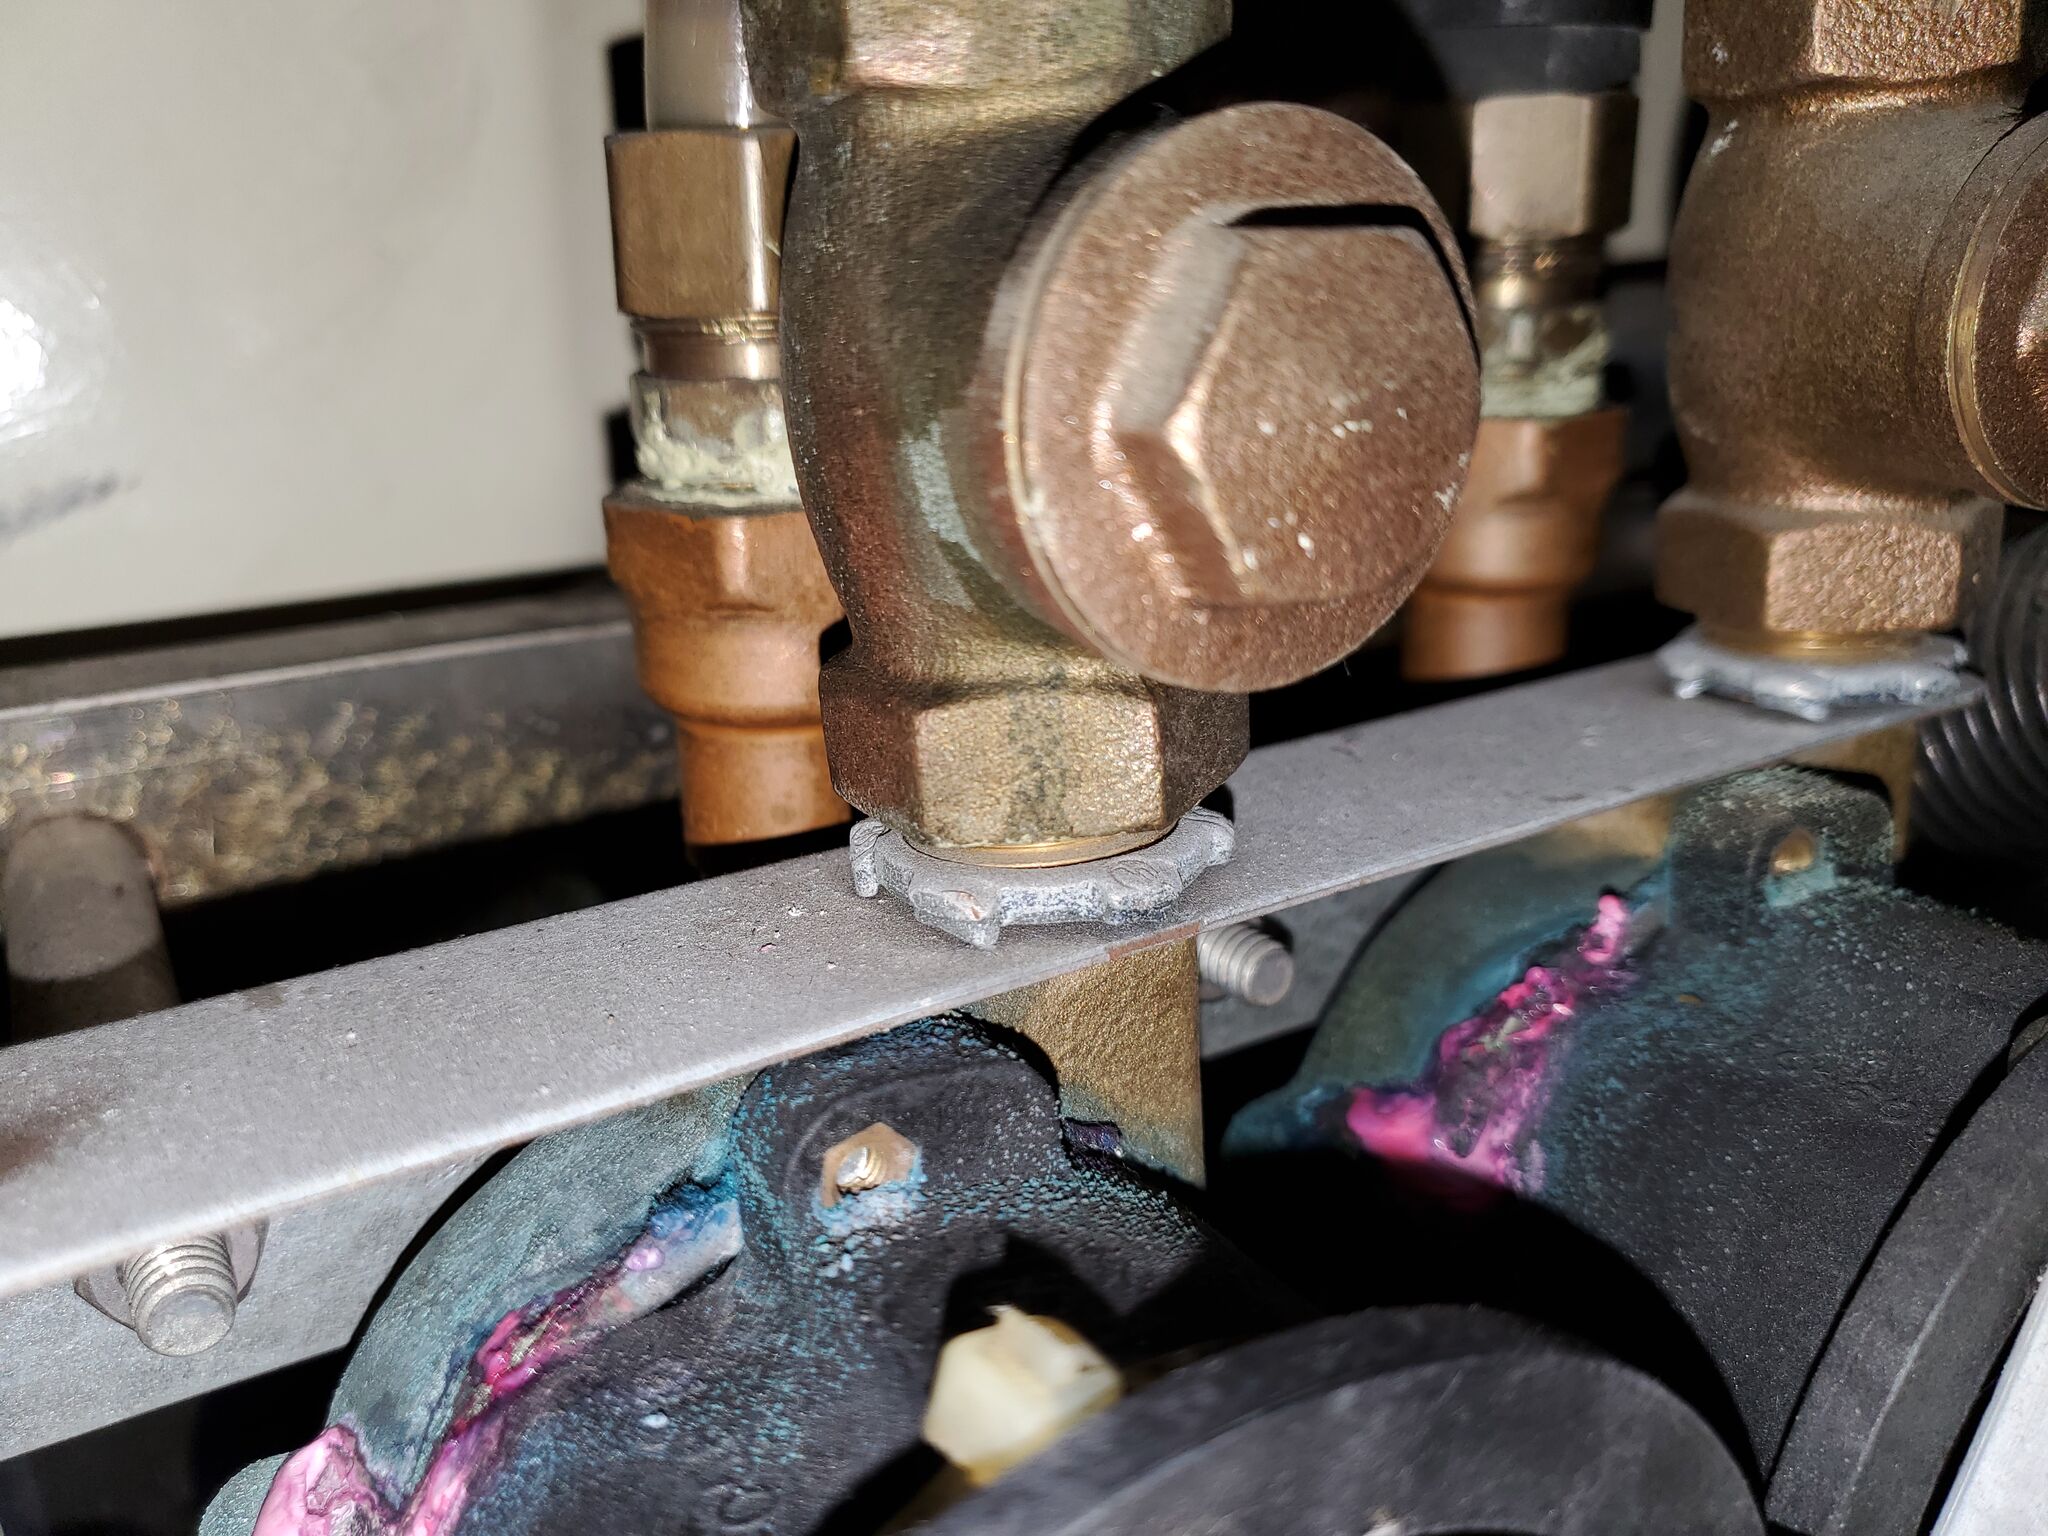
Start by closing the supply and return lines. On mine, these are the yellow ¼-turn valves above and below the burner head. The service manual calls for ¾” and 1-1/8” wrenches, but I also needed a 7/8”.
The plastic lines coming off the tops of the pumps use simple compression fittings. Crack them open slowly, you’ll see air bubbles entering the lines. Waiting a moment lets fluid draw back, so when you fully disconnect them, coolant loss and mess is minimal.
The lower unions came loose without much trouble. Just make sure to hold the pump stand with a wrench to avoid stressing the soldered (sweated) joints.
For the electrical connections, pull the split loom open and clip the +/- 12V leads at the butt connectors inside, rather than at the pumps themselves. This avoids adding yet another set of splices to the wiring.
Check Valves & Bracket Removal
Removing the check valves from the tops of the pumps in situ didn’t go as planned, they were extremely tight (sealed with pipe dope), and there’s no good way that I could find to hold the body securely enough to generate enough leverage to remove the valves.

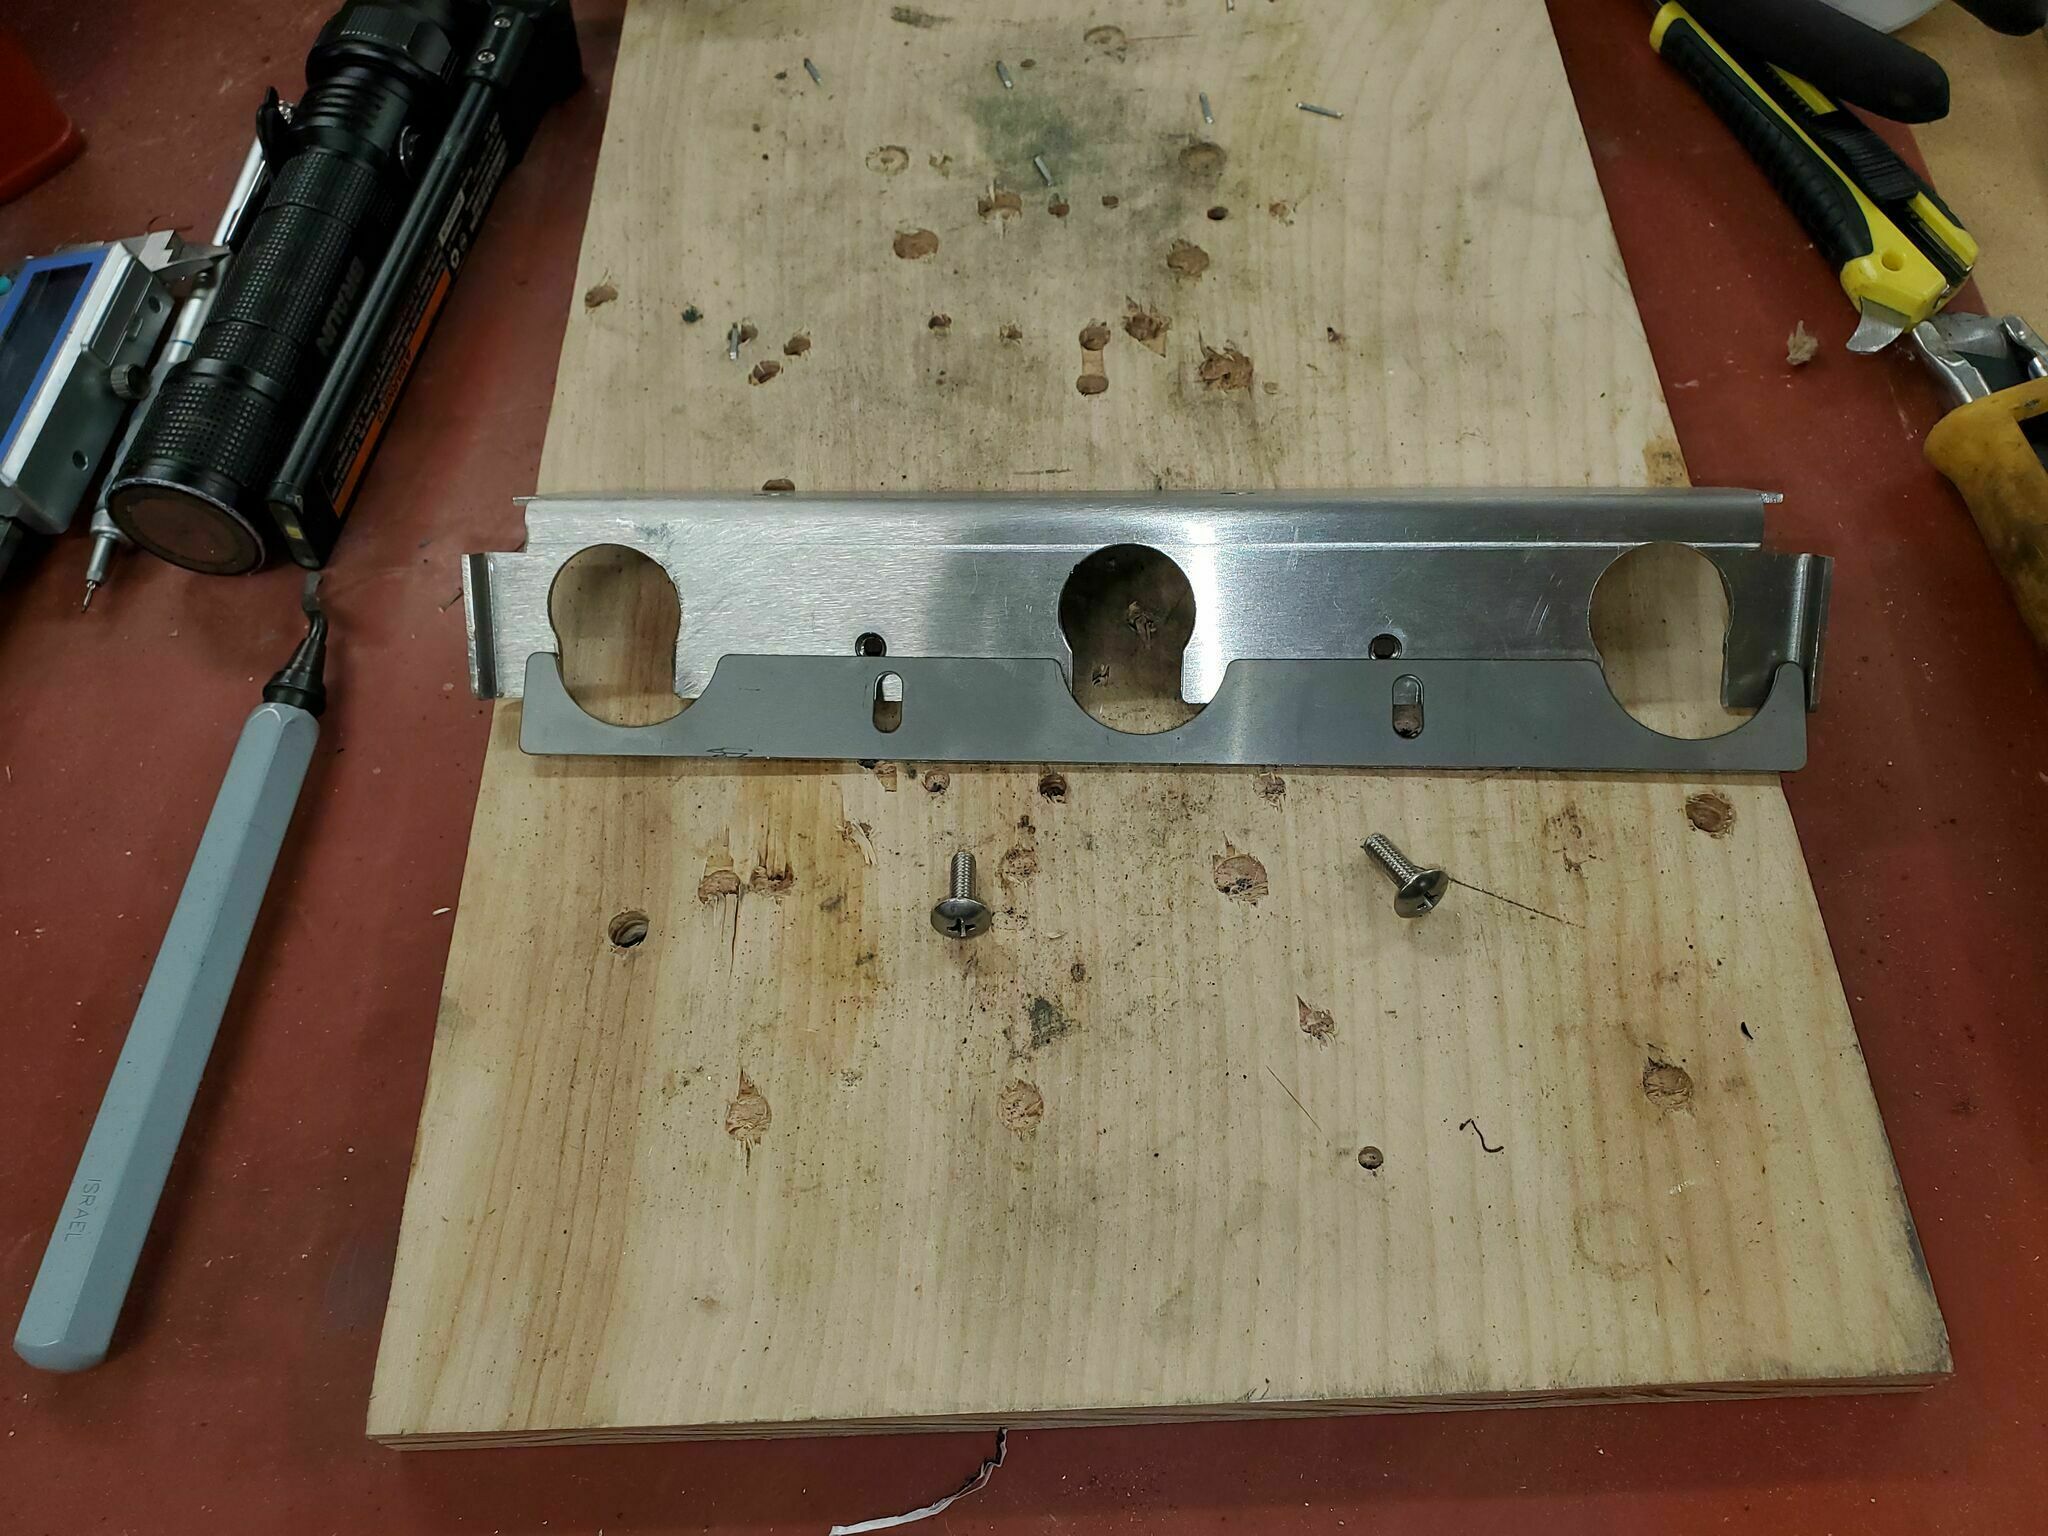
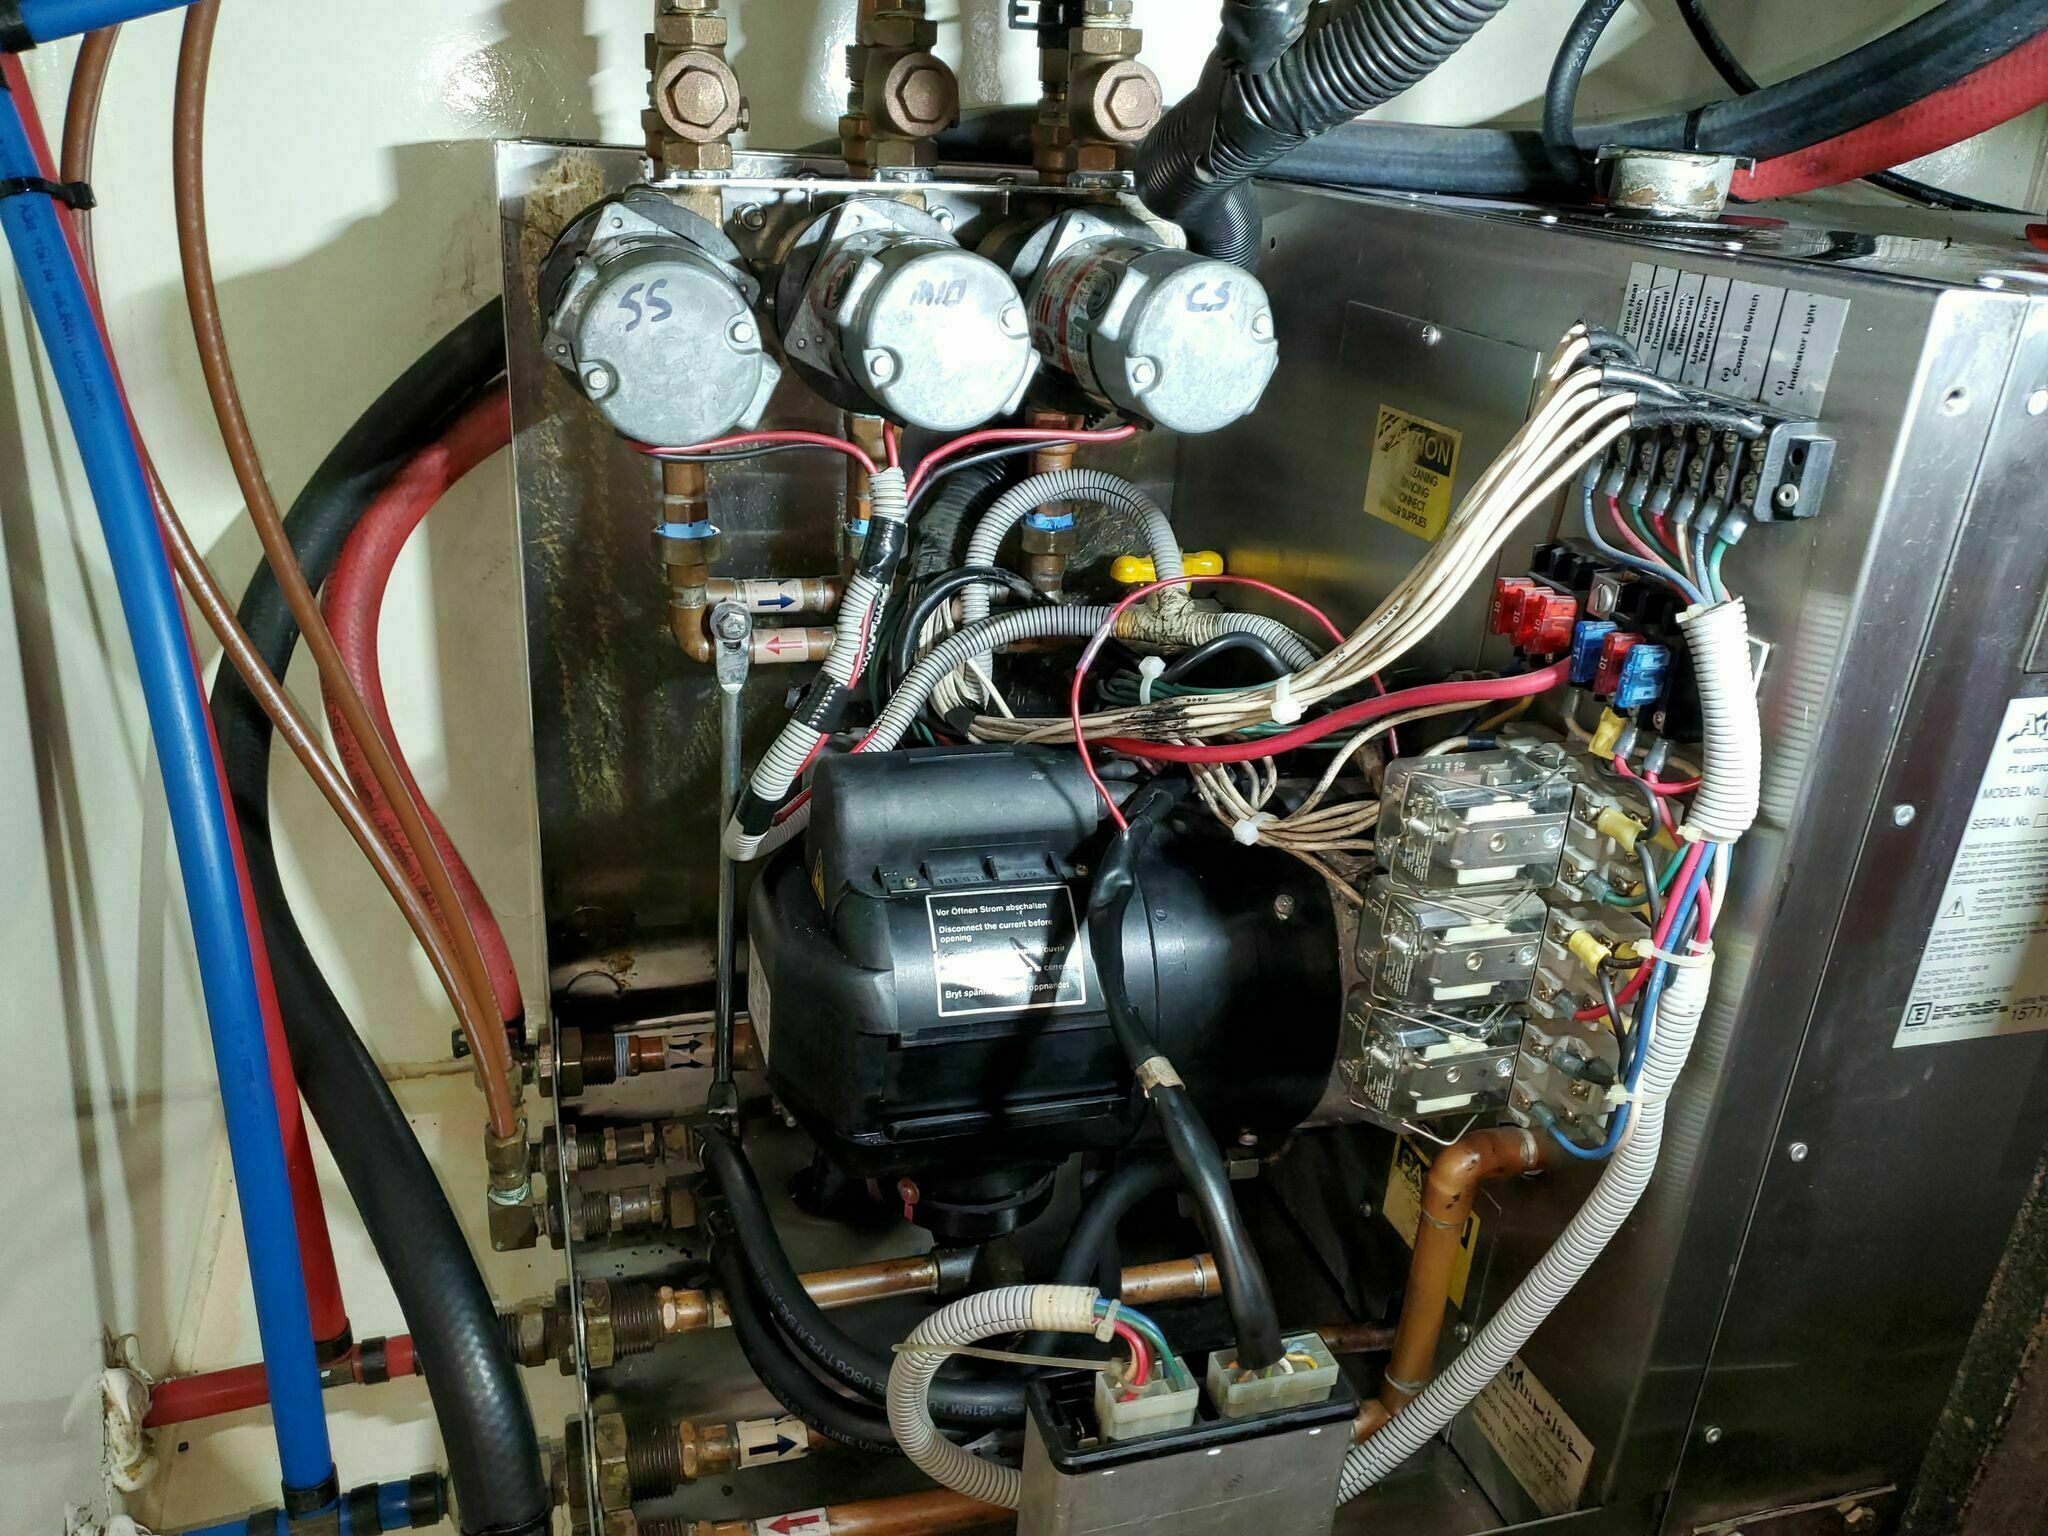
Since all three zone pumps are mounted on a shared metal bracket secured to the AH unit with just two nuts. Removing those lets you pull all three pumps out together as a single assembly. Even on the bench, getting the check valves off was still a challenge, but at least you have room to work.
The valves are held to the bracket with electrical knockout box nuts. On my unit, these weren’t actually tight, they just prevented the valves from falling through without truly securing them. I assume this is intentional to avoid putting stress on the plumbing joints. The bracket design overall is pretty poor; it would be far better if it allowed front-loading replacement of individual pumps. More on that in the reassembly section.
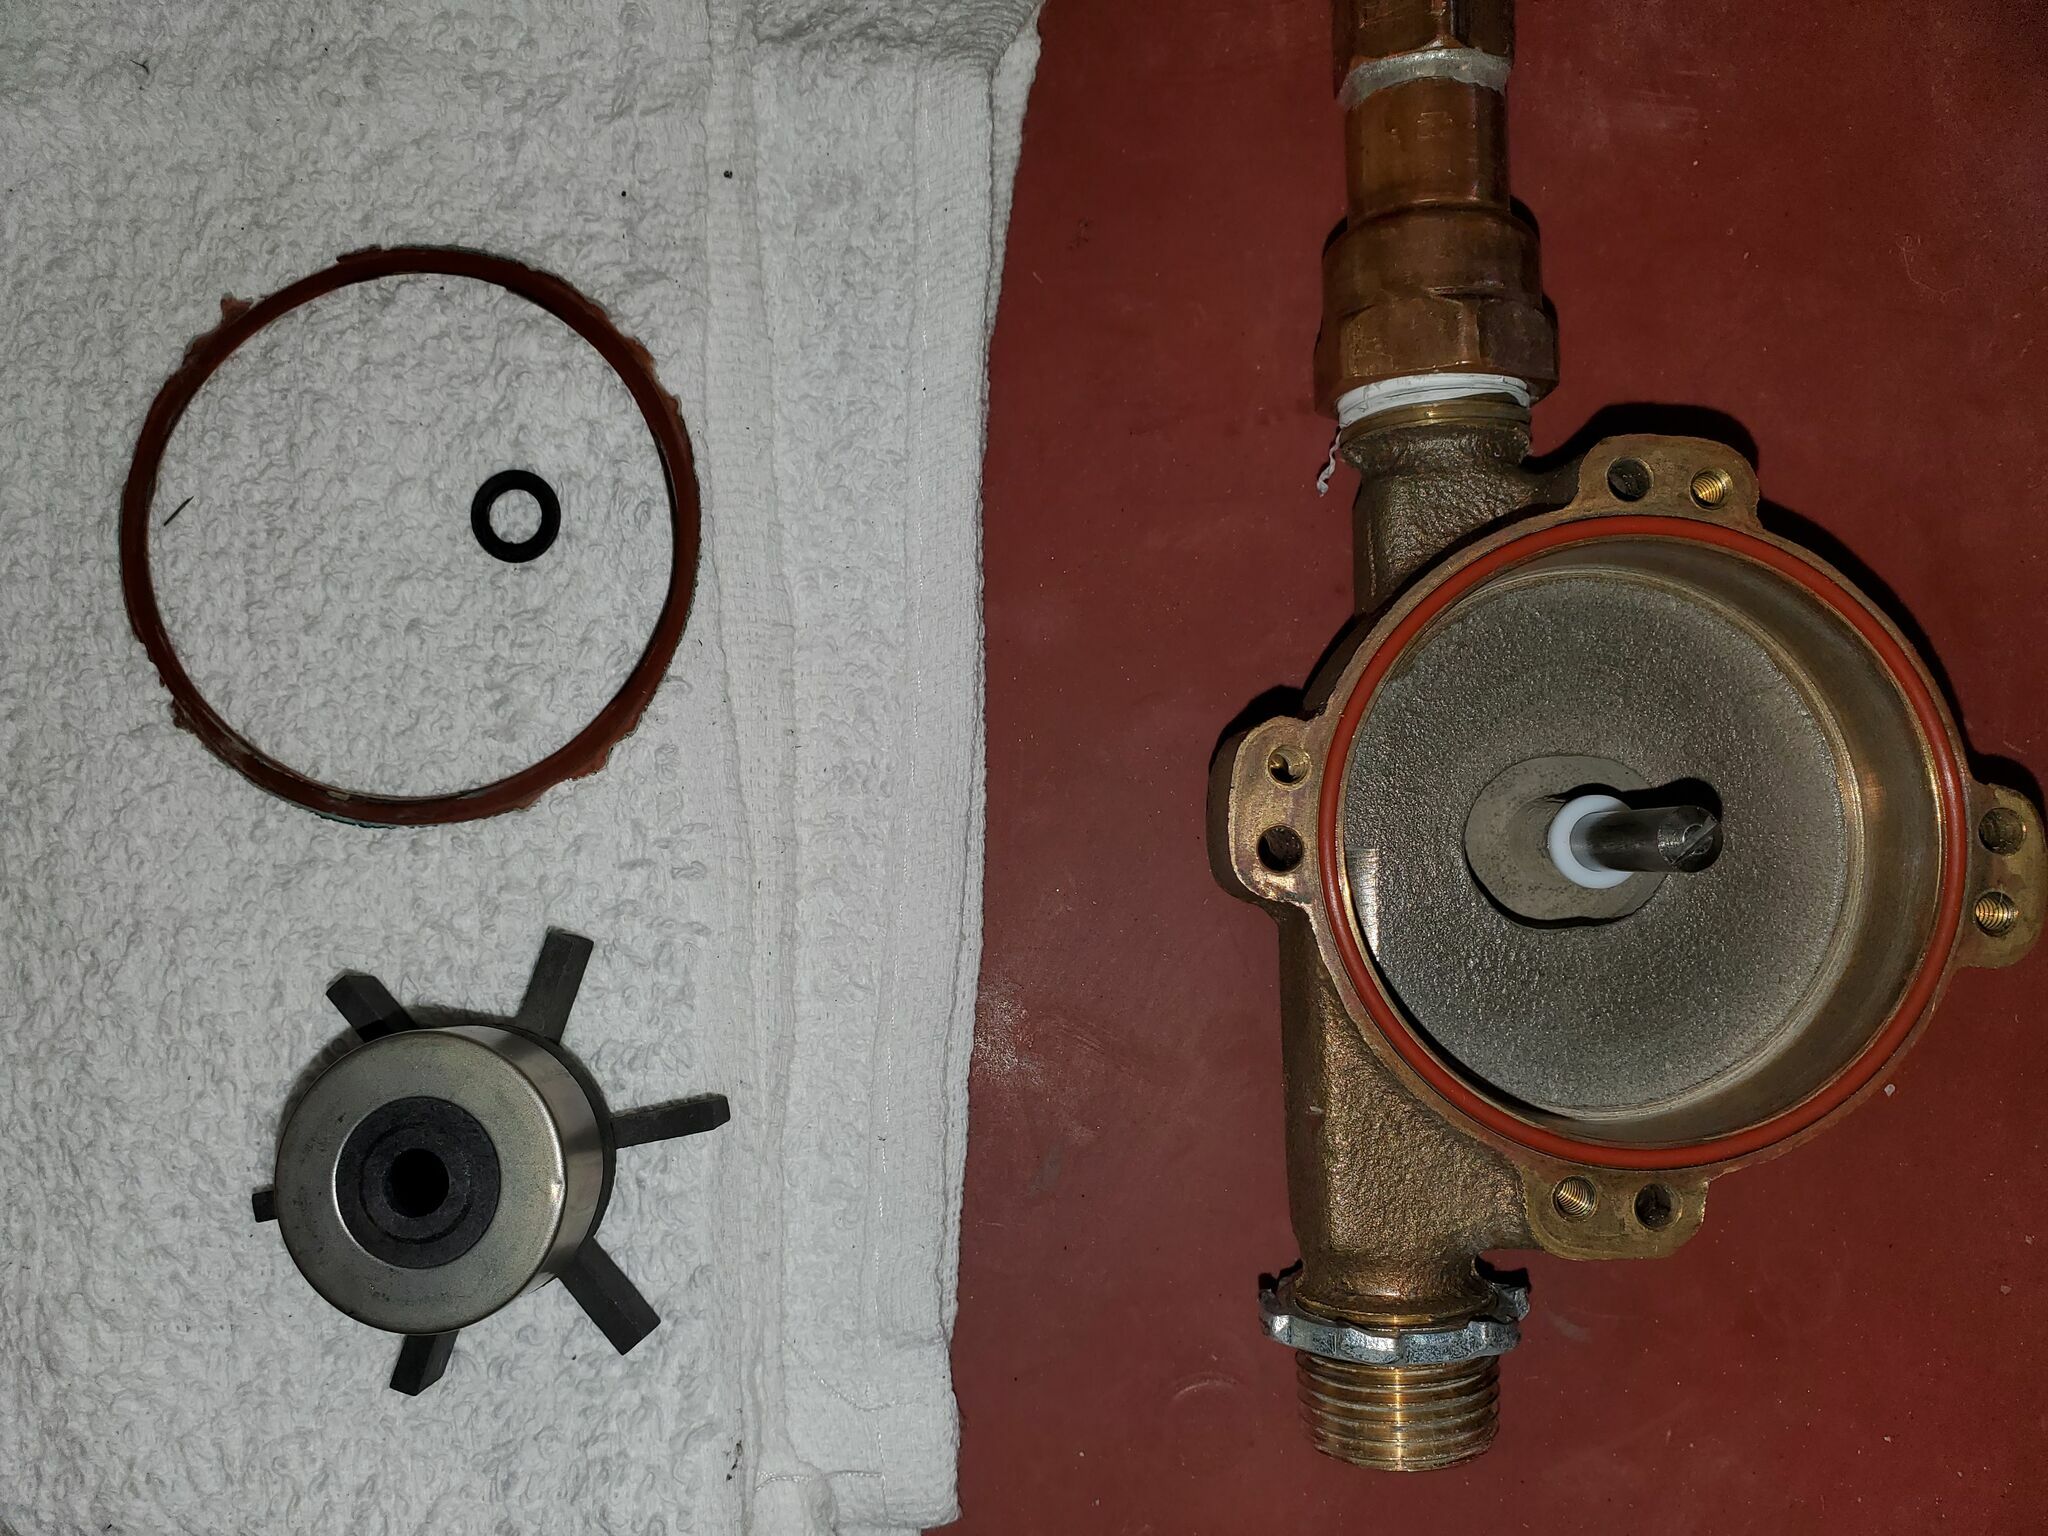
Pump Disassembly

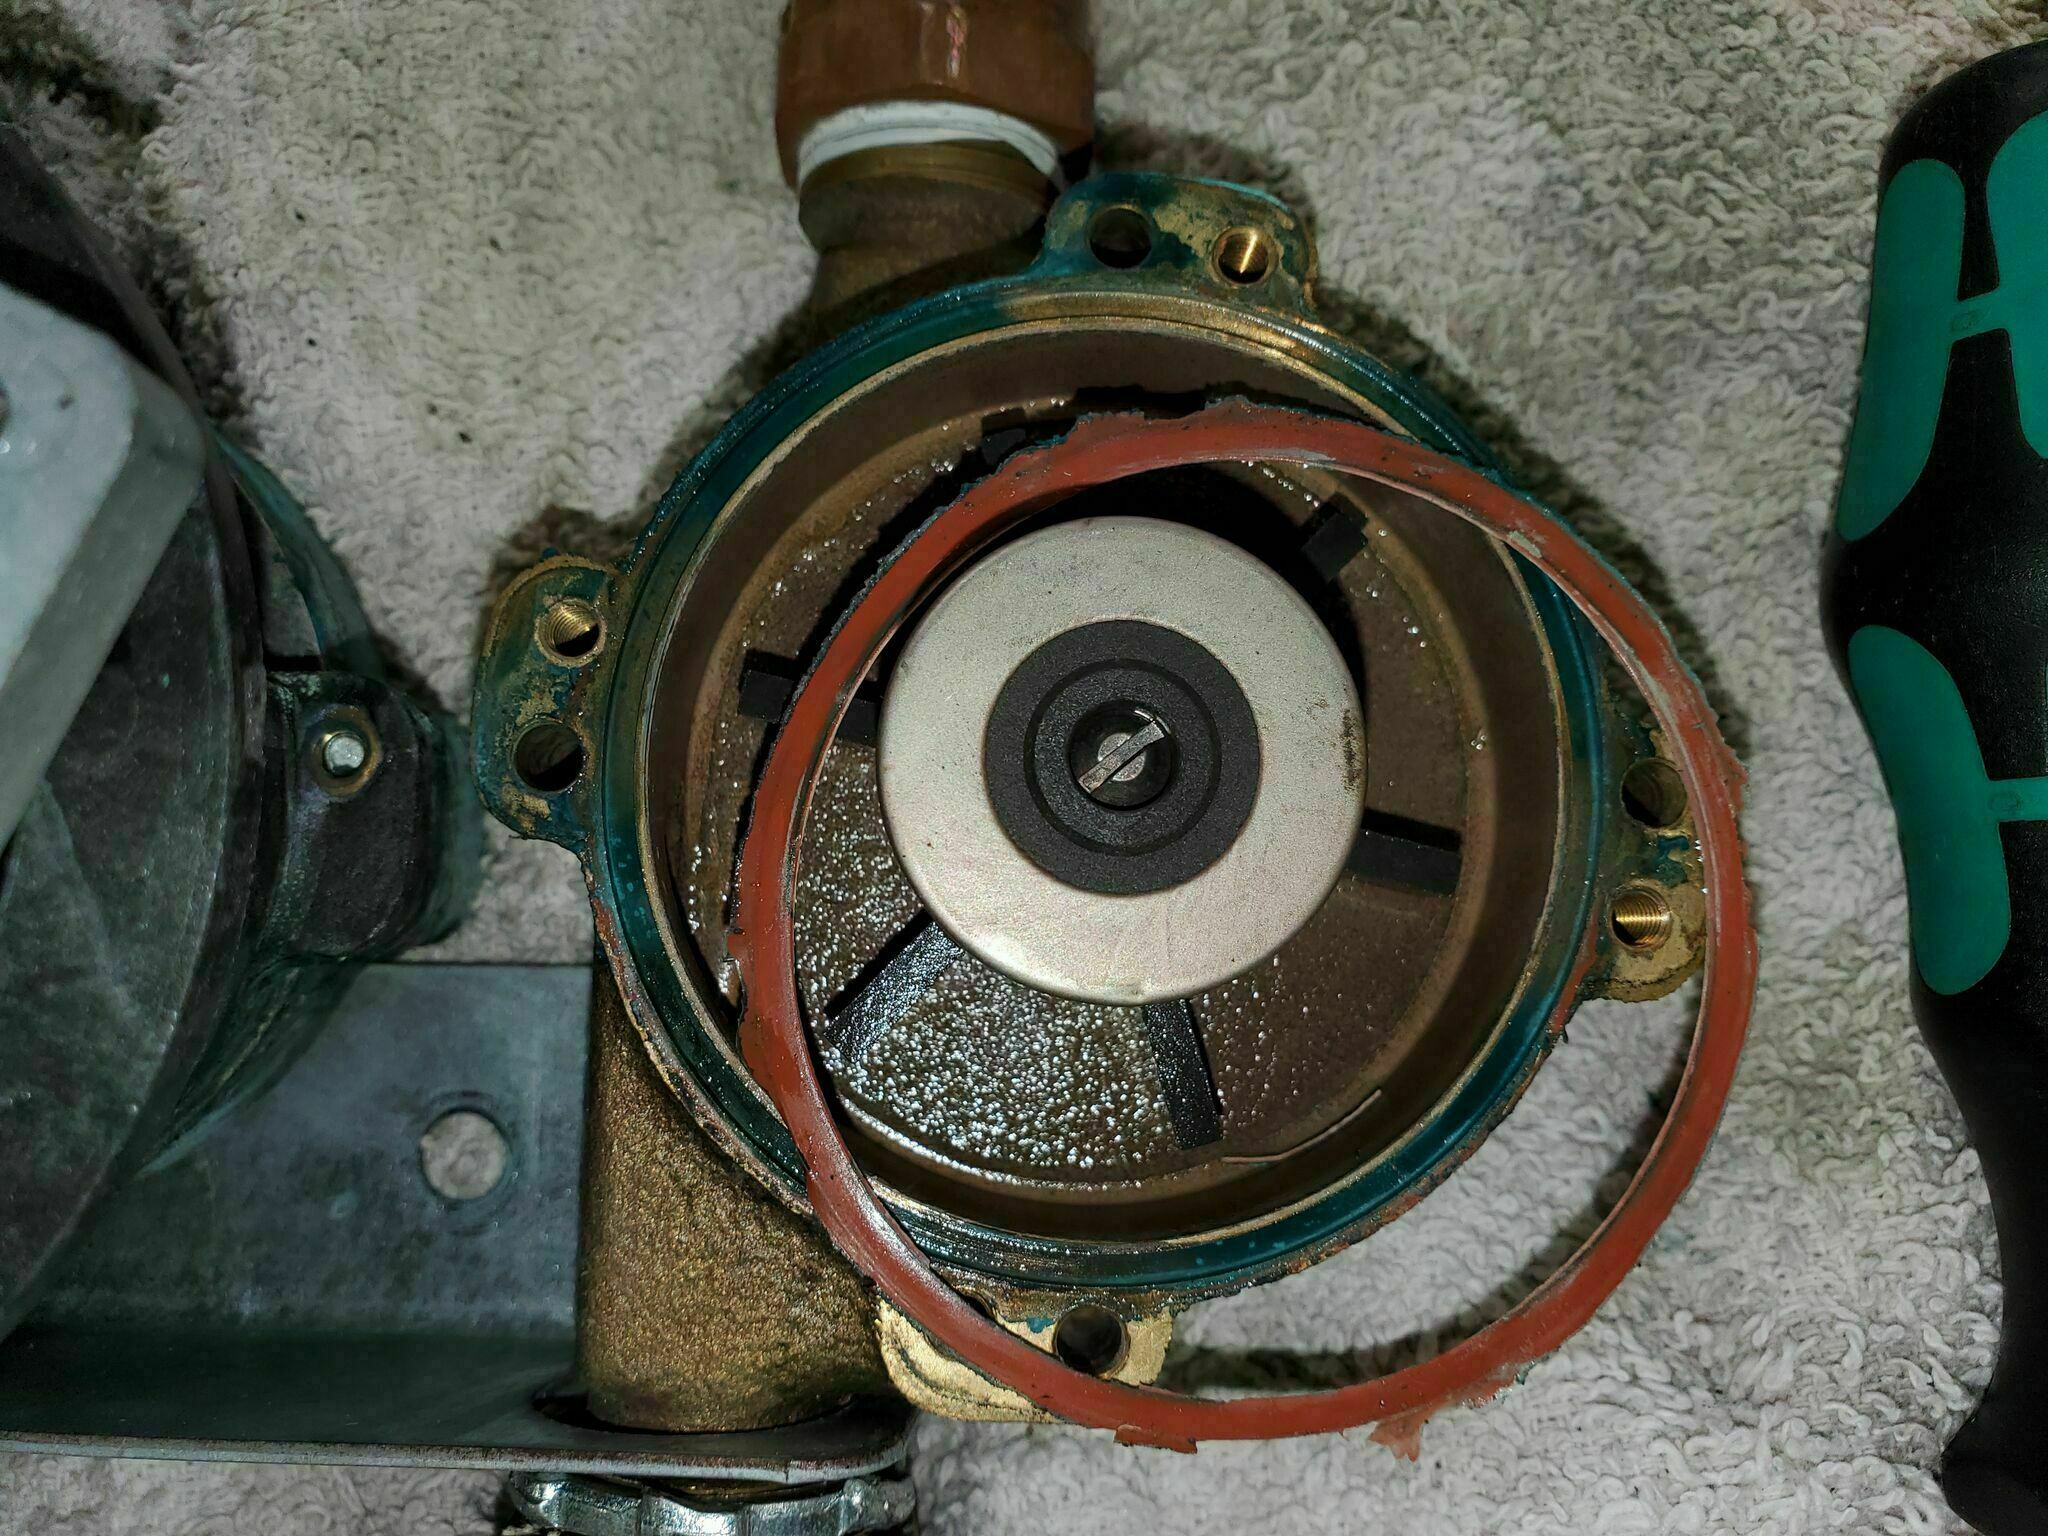
The pump body attaches to the brass impeller housing with four screws. Four more screws open the housing and expose the O-ring. The first pump I opened had a square-profile O-ring, corrosion in the O-ring groove, and corrosion on the mating surface. The motor and impeller both appeared to be in good condition, and interestingly, this was the least leaky of the three.
Sourcing Parts
Replacement parts came from Centennial Equipment:
- (4) March 809-BR O-rings, P/N 0809-0165-1000, $3 each
- (4) Thrust washers, P/N 0809-0043-1000, $1 each (a small Teflon flat washer on the impeller shaft)
Fair warning: shipping will cost more than the parts. Even so, the price beat the alternatives considerably, AquaHot wants approximately $1,650 for a new pump, eBay runs around $450, and Centennial is about $375.
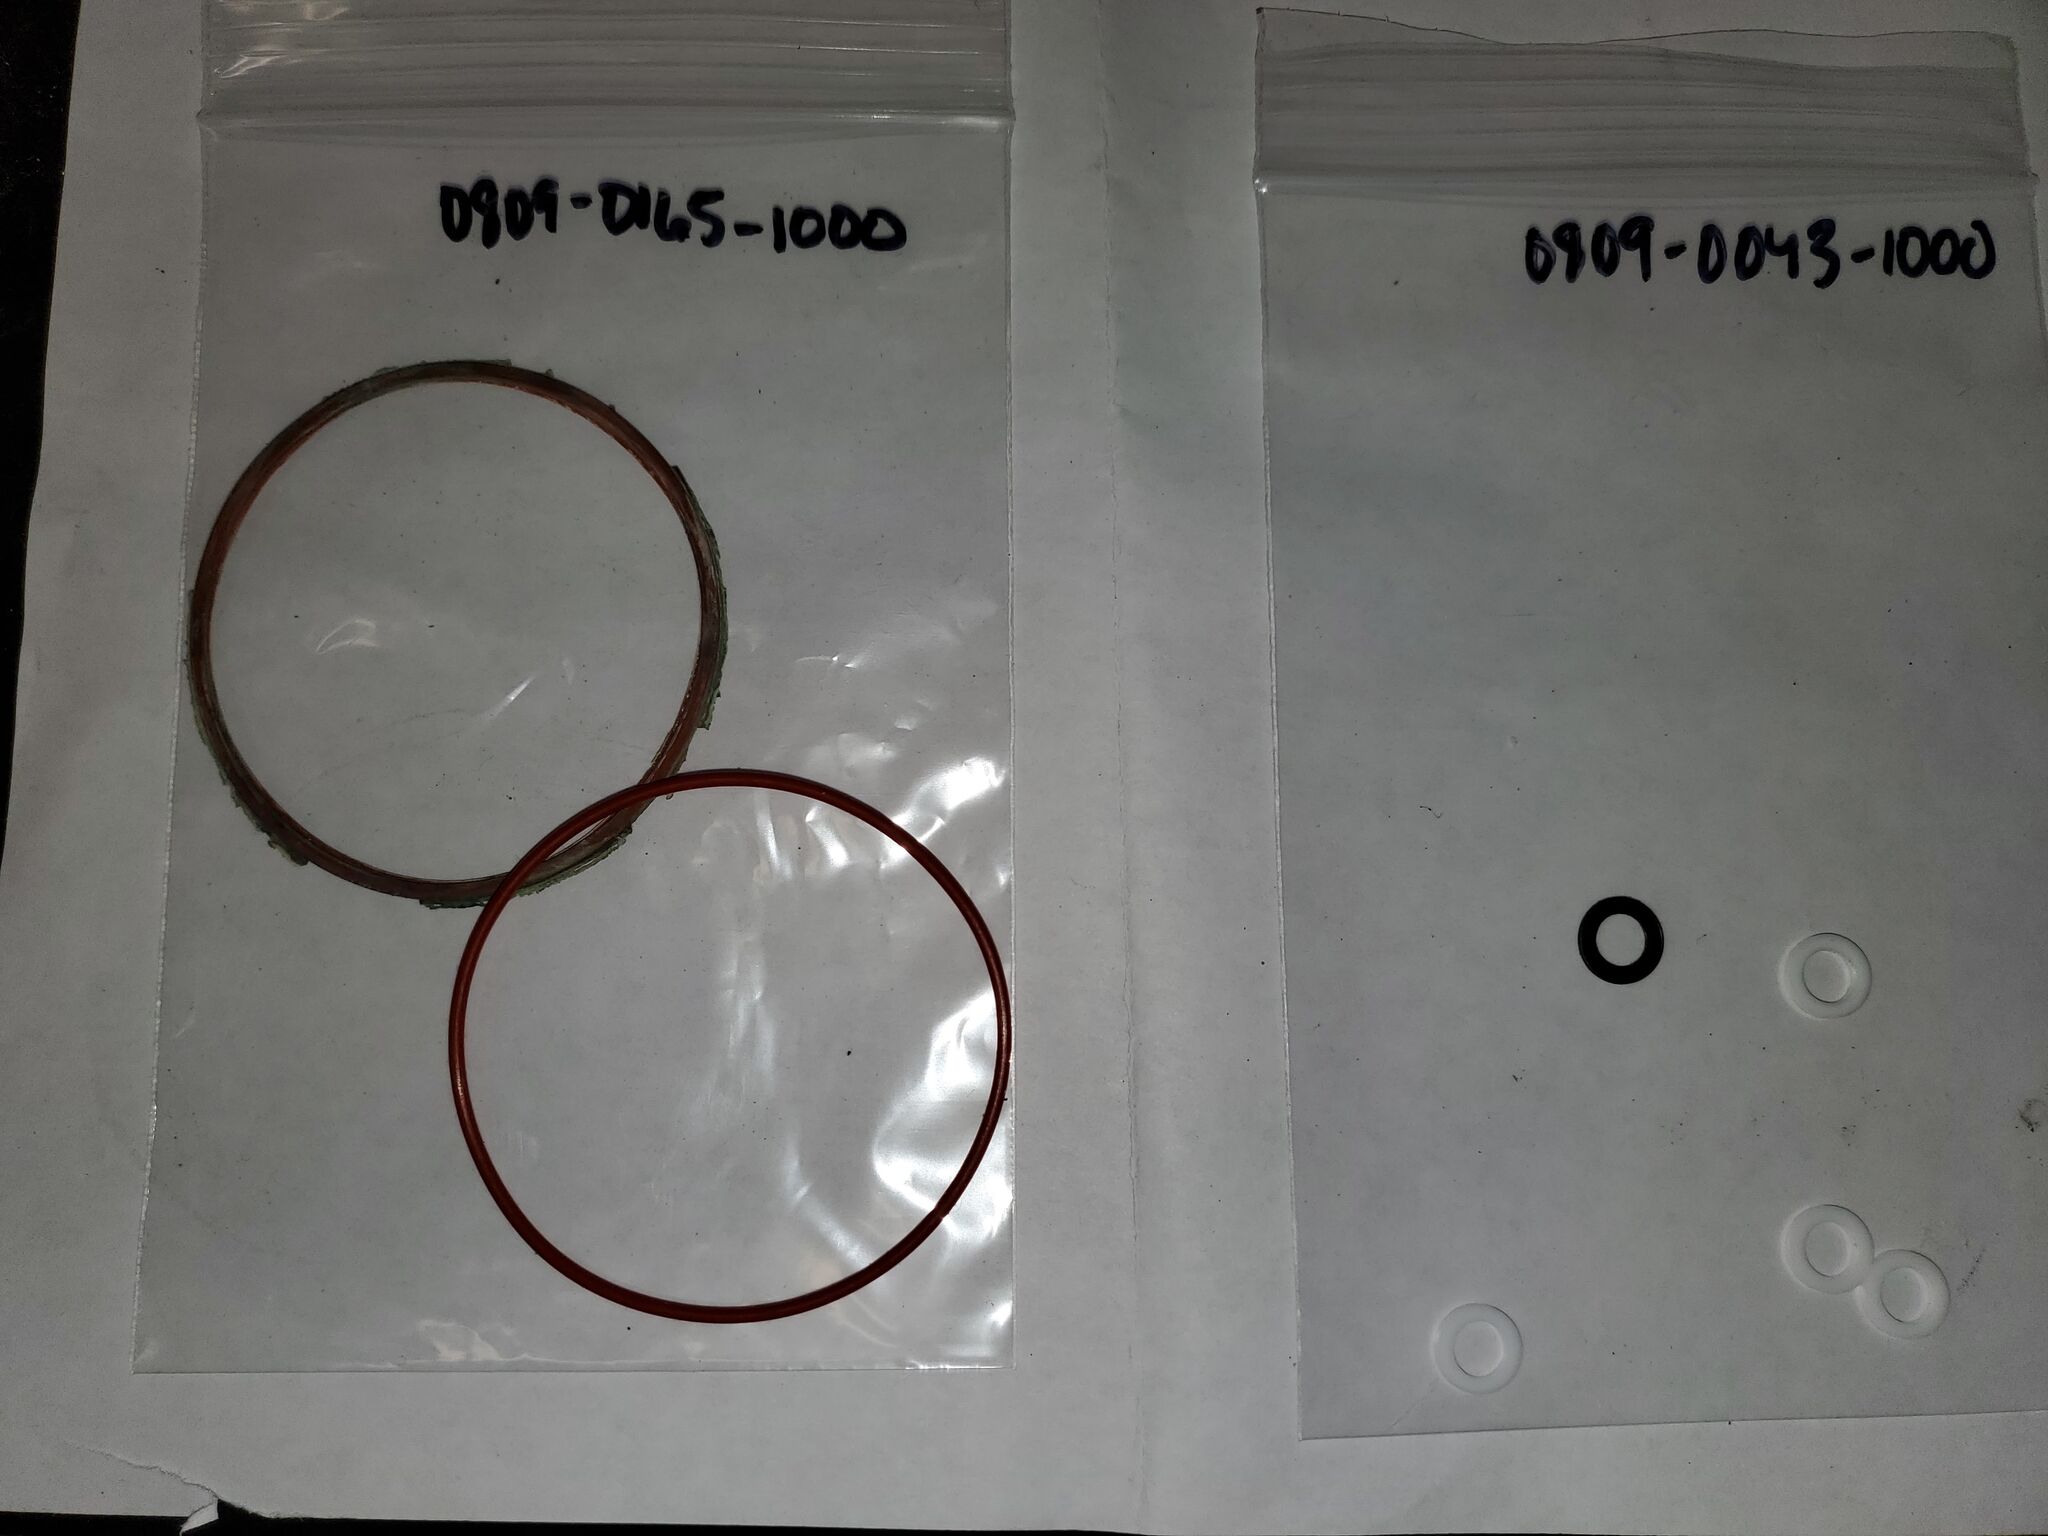
Round vs. Square O-Ring
The square cross-section on the originals was a curiosity, so I contacted March directly, both engineering and service/repair. They confirmed the 809-BR mag-drive pump ships with a round O-ring, though they acknowledged someone could have swapped in a square one for a specific application at some point. They had no source or part number for a square O-ring in that size. The service department’s best guess is that the original round O-ring simply conformed to the housing over 25 years of compression and heat. Since both old and new are silicone, they were comfortable saying the round replacement is perfectly fine.
With that “settled”, the zone pumps went back together with the new O-rings and thrust washers. I held off on the engine loop pump, not wanting to leave those hoses pinched off for an extended period while waiting on parts.
Engine Loop Pump Removal
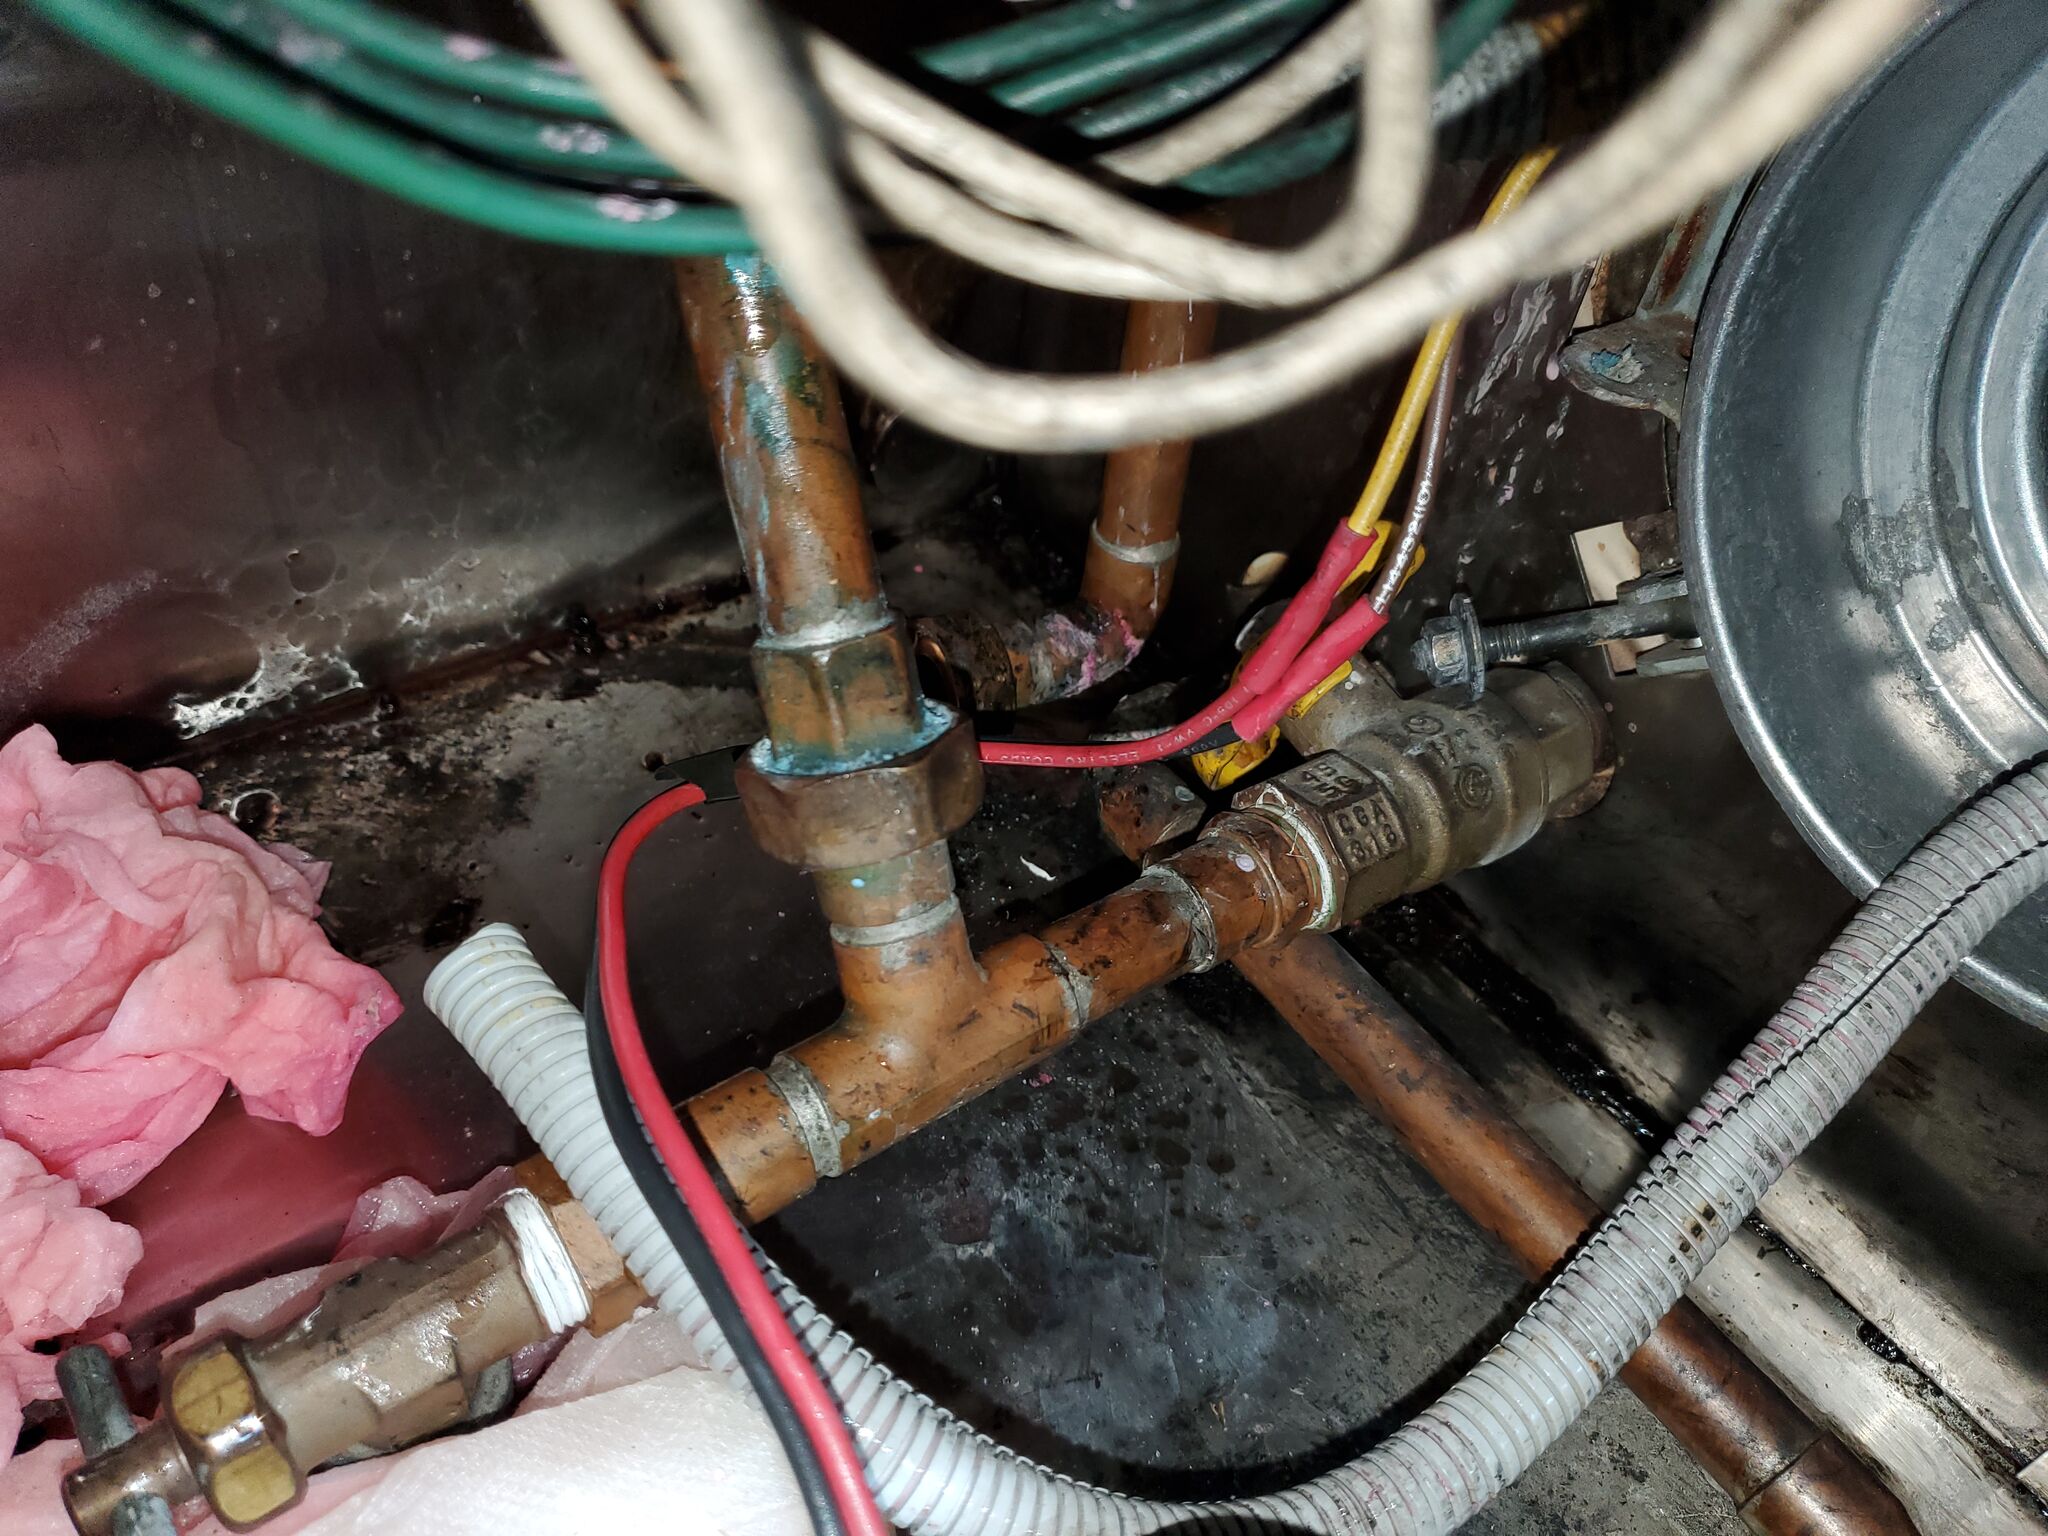
For the engine preheat pump, removing the journeyman drawer above the storage tray first is IMO mandatory, it’s the difference between sitting in the space and lying on your side for the entire job.
To remove this pump you need to move the burner head out of the way, use pinch pliers on the engine loop in/out lines, unscrew the fittings from the bulkhead, and undo the pump union. In my case, turning the hose barb unscrewed the bulkhead fitting from the pump stand, which was actually ideal. This step is messy, at least a quart of fluid drained out, some from the coil inside the AquaHot and some because the pinch clamp on the input side had to be repositioned. Have plenty of towels on hand.
With everything out, the O-ring was flattened but you could see in profile that it had originally been round, consistent with what March told me.
Housekeeping & Bracket Rework
With everything out of the way, I cleaned up the pan and addressed any fittings and pipes that needed attention, there was plenty to do.
I also reworked the zone pump bracket before reassembly. The modification allows each pump to be installed individually with its check valve already attached, rather than requiring the check valve to be threaded on in the cramped space after the pump is mounted. Trying to reinstall all three pumps as a unit while simultaneously mounting the bracket would have been a nightmare, the reworked design makes future service considerably more manageable.
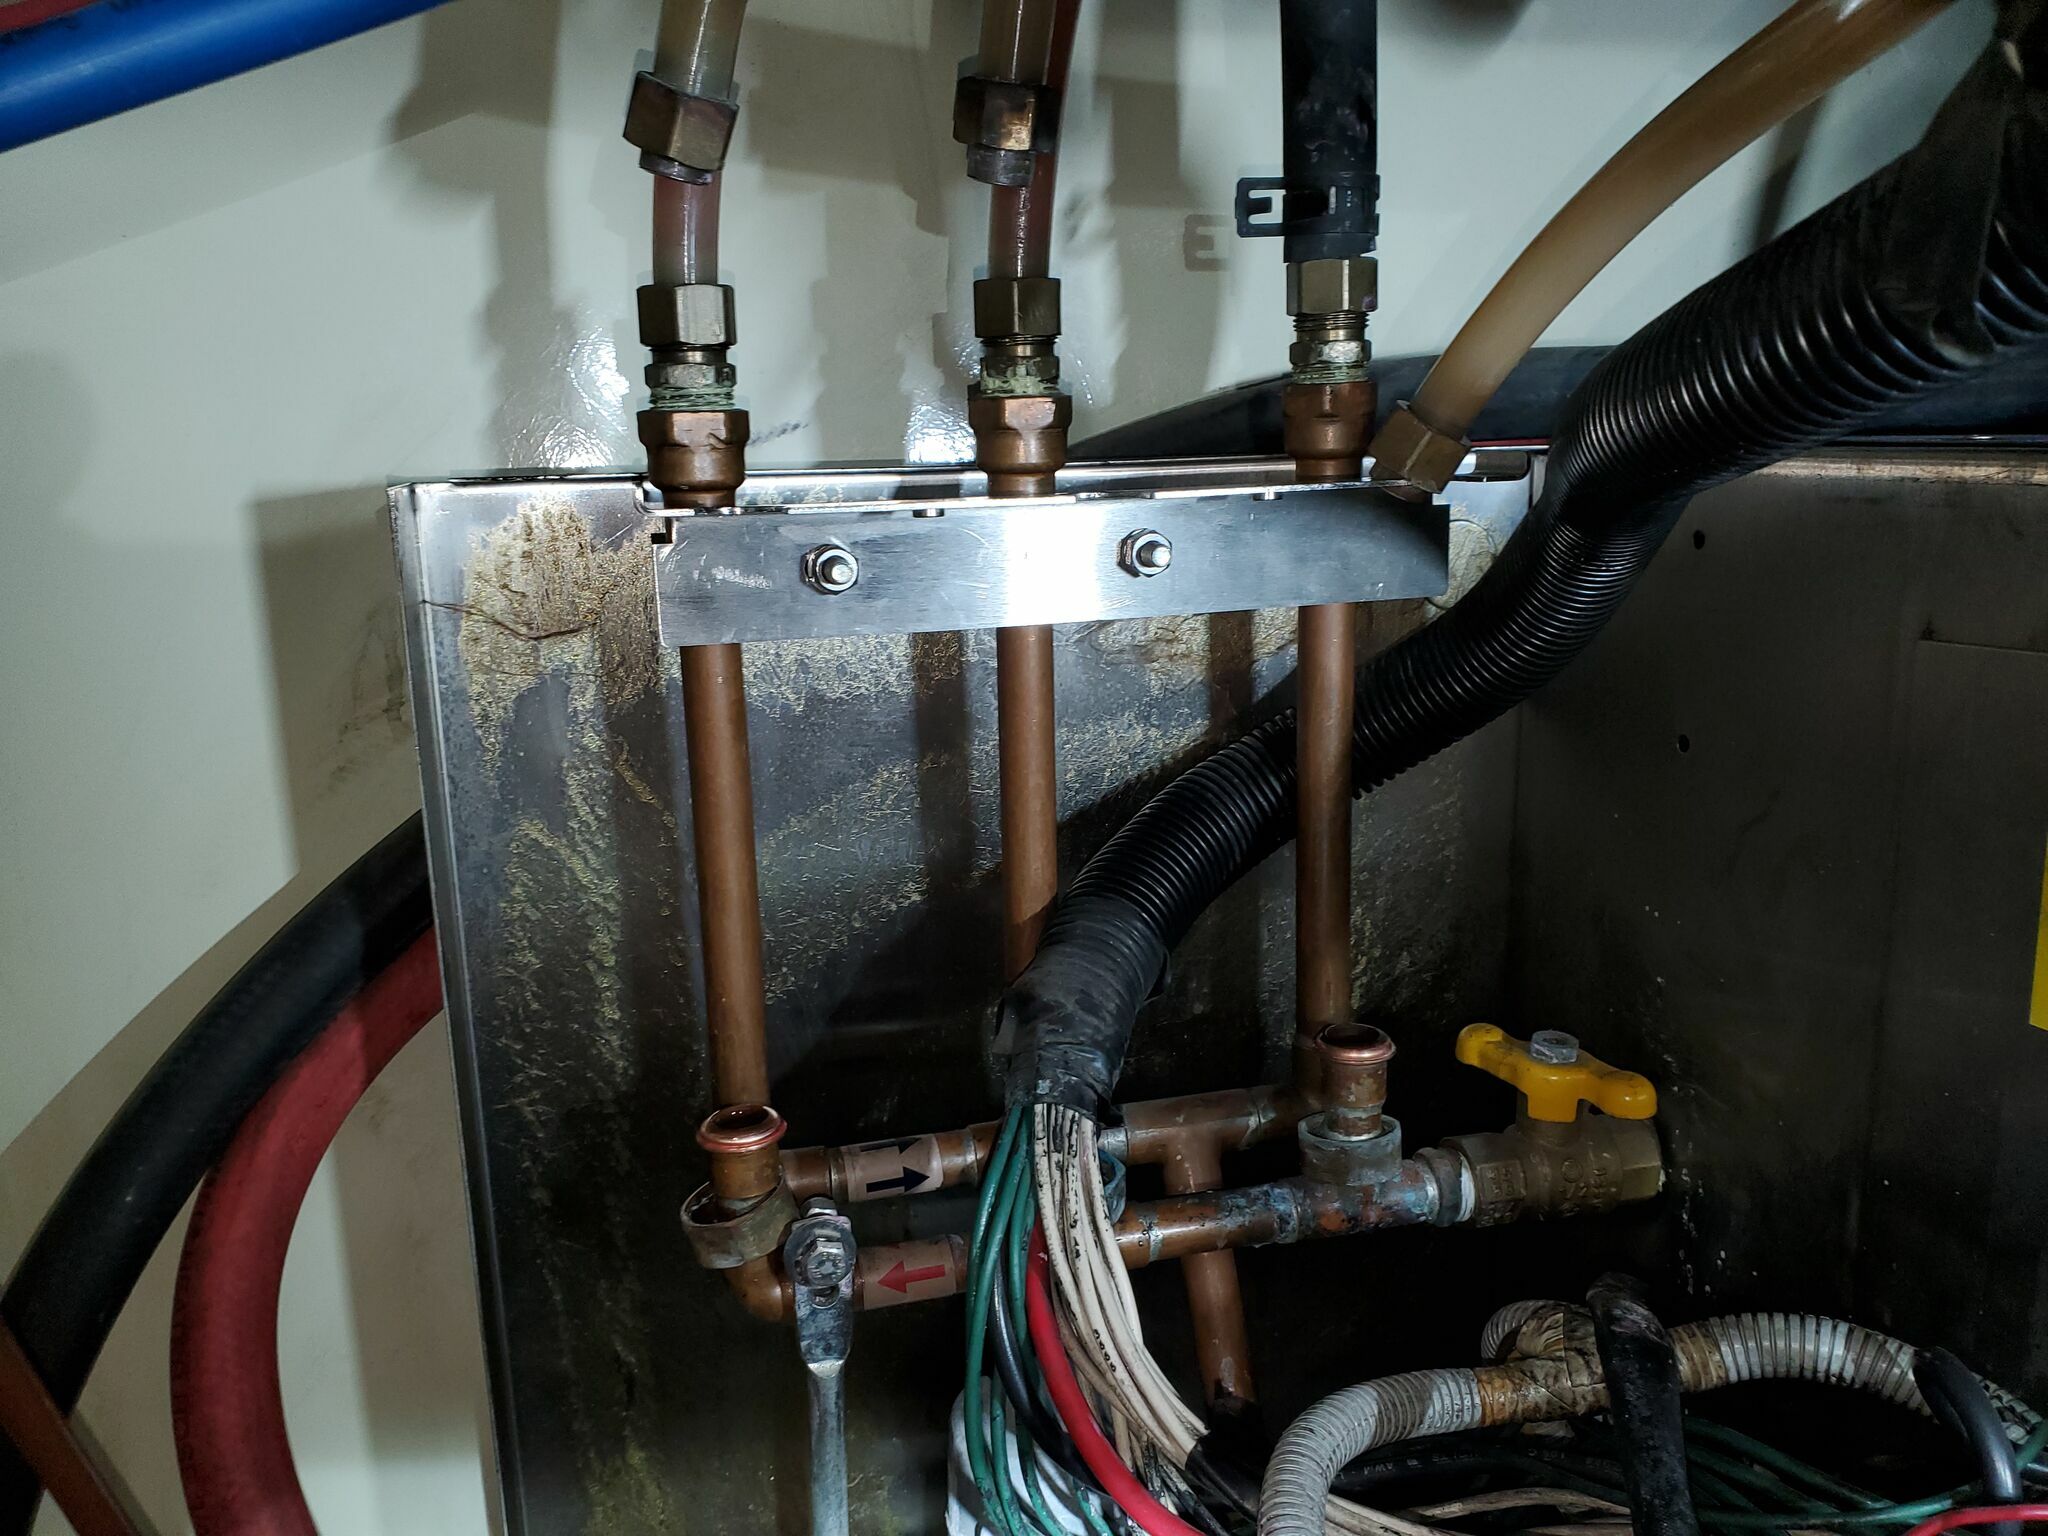
Reassembly & Purging
Reassembled the engine loop pump first, then the zone pump bracket. With everything back in place, I topped off the AquaHot tank, pressurized it with air via the overflow hose, and turned on each zone to purge the air and prime the pumps. The March 809-BR pumps are not self-priming, so you need that air pressure to force fluid from the tank into the impeller. Everything went smoothly. Once done, I topped off the AH tank again, the overflow tank, and the engine coolant.
No leaks were visible while the system was under air pressure. The final confirmation will come once everything is at operating temperature, but so far things look good. The service manual has a solid walkthrough of the various steps if you need a reference.