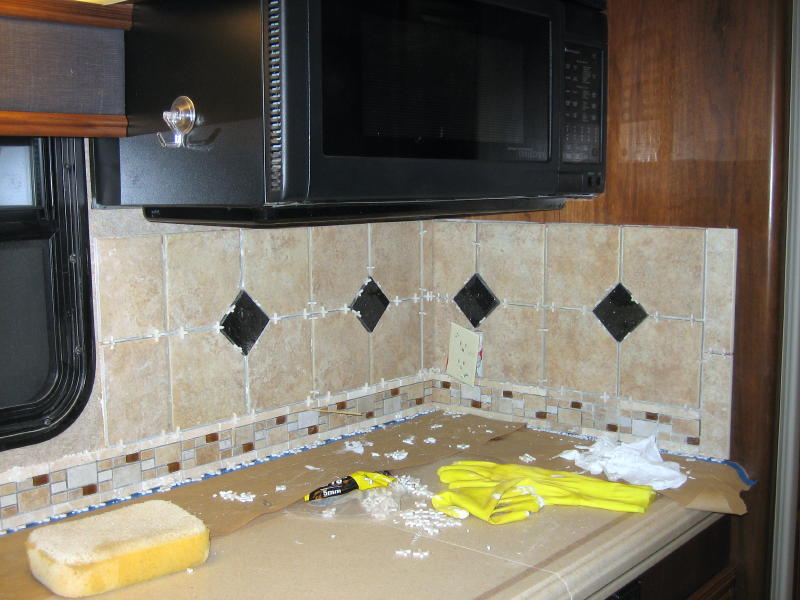
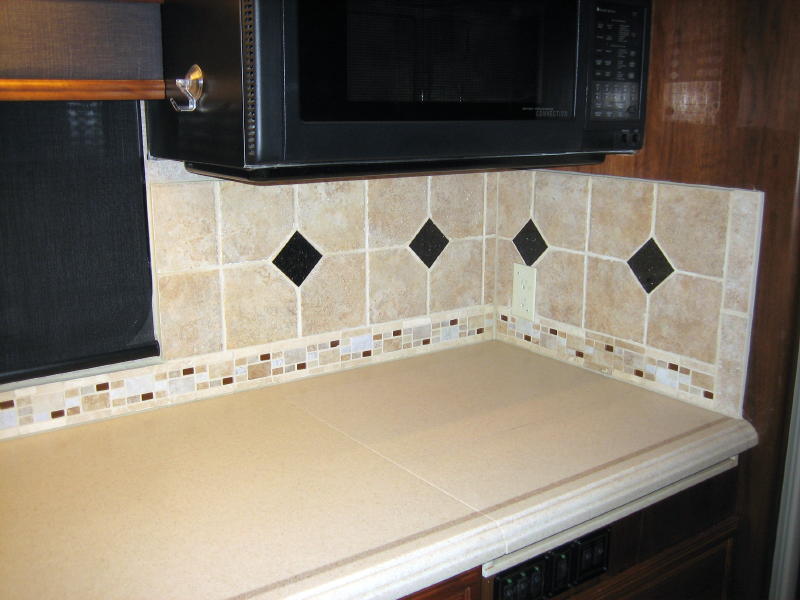
Kitchen Tile Backsplash

Ever the gluttons for punishment, we redid the solid surface backsplash in the kitchen of our ‘03 U320 this week.
Careful removal, repair, reinforcement, and prep work are required. The Corian on the back wall comes off very easily since on ours its on top of the wallpaper. So you simply score the wallpaper with a sharp knife along the Corian edge and it will come off with just a little prying.
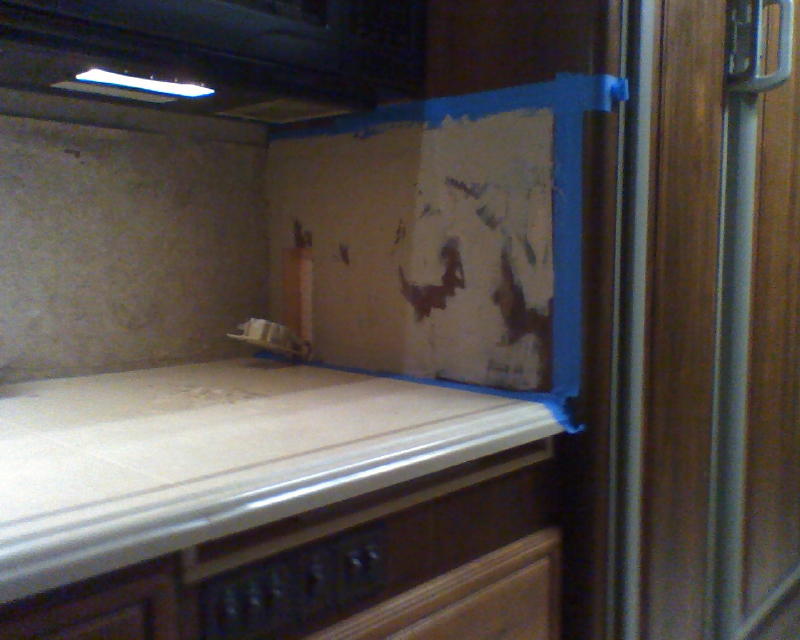
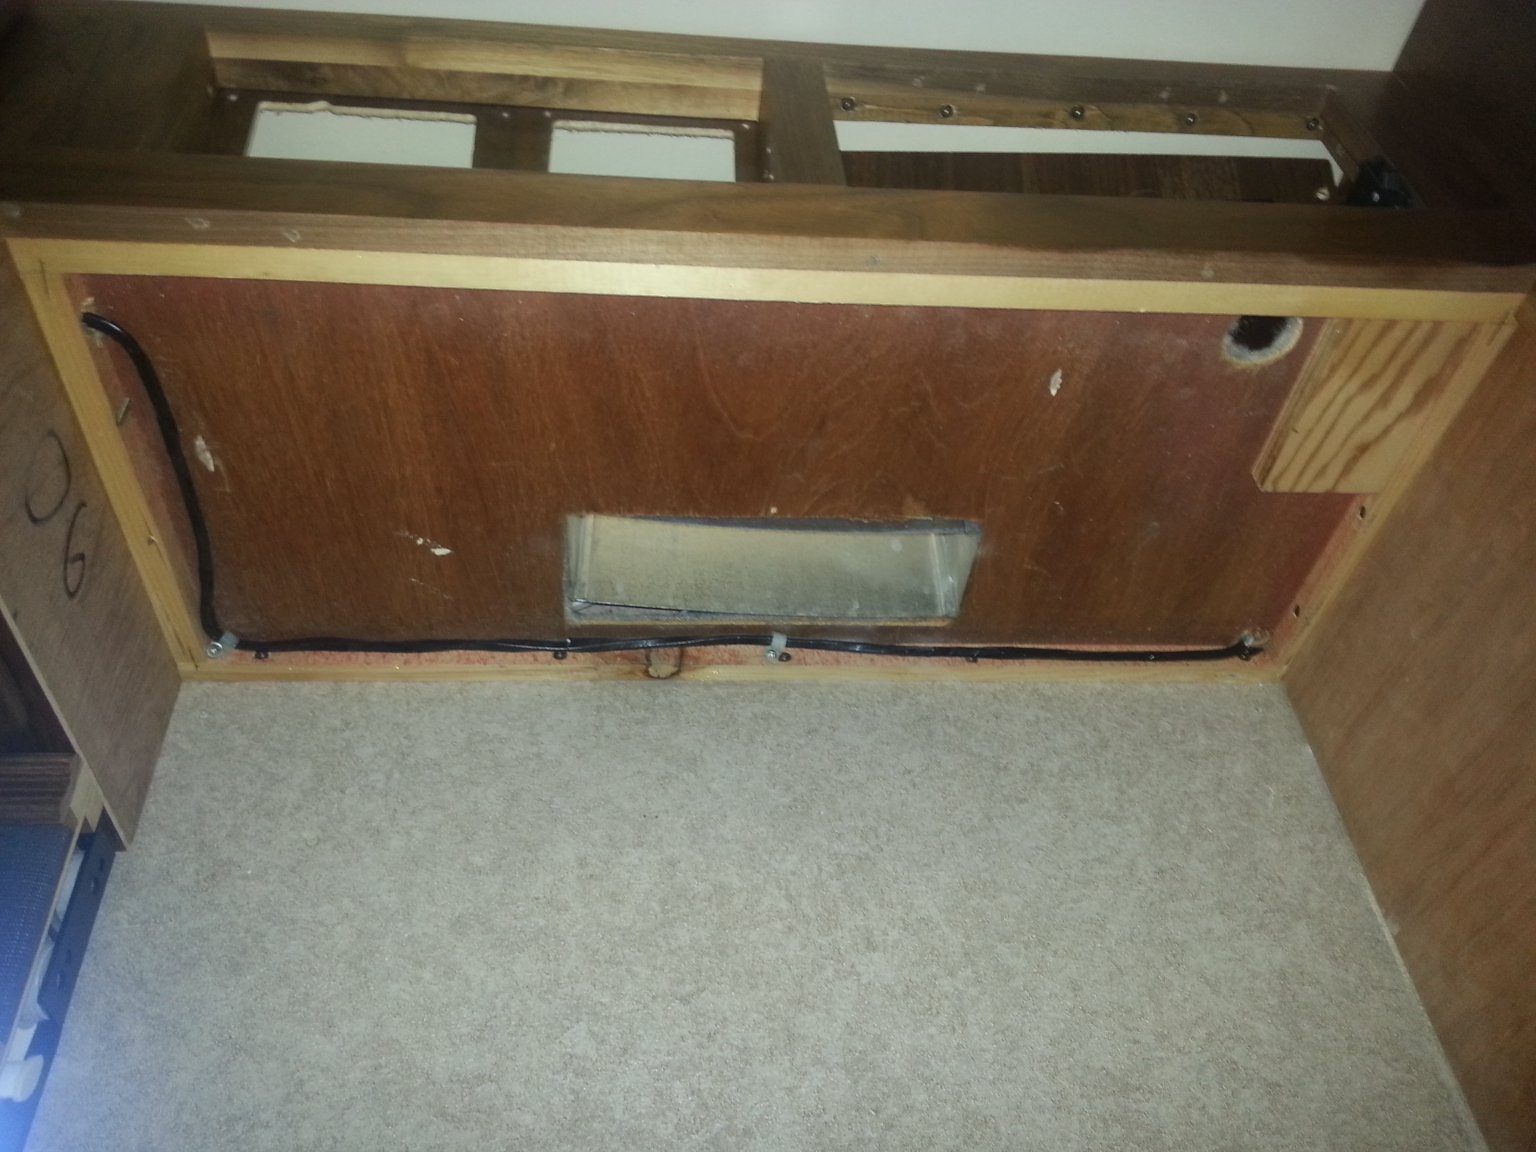
The Corian on the side wall (on ours it is the side of the refrigerator cabinet) is a bit more of a challenge. That is adhered directly to the luan and you run a good chance of tearing that up during the removal but it can be easily patched.
To remove that we started at the front with a couple of wood / plastic wedges and just worked our way back. It came off in two sections and it only splintered the luan in a few areas. Those those areas were repaired with filler and then covered the entire area with super thin hobby plywood that got a fiberglass resin coating. Not sure all that was needed but the side was was a bit to flexible to tile for my taste so wanted to beef it up. The wall ended up rigid, with no detectable flex, with these extra layers applied and there wasn’t any exposed wood that would cause adhesion problems.
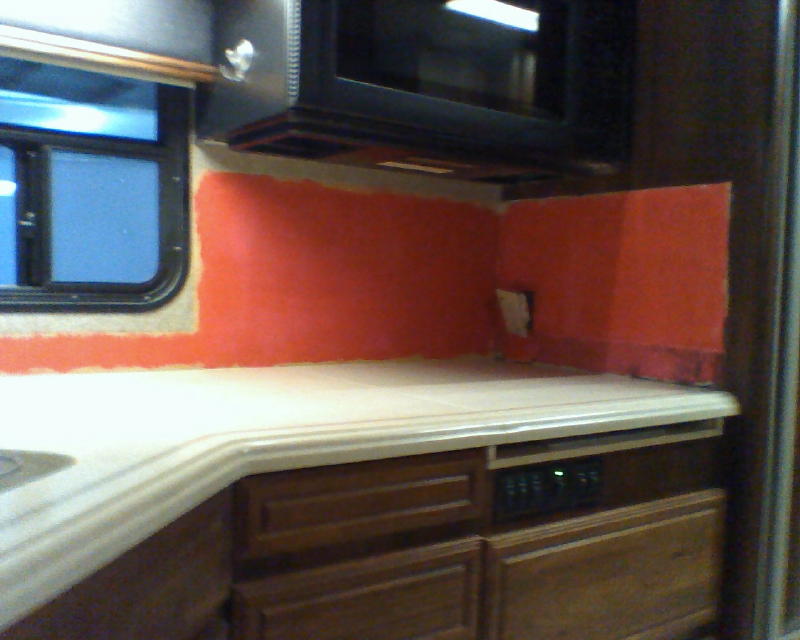
After all this prep and sanding, we rolled on a couple of coats of a crack preventative, waterproof membrane called “Red Guard”. The mastic and grout used are were also formulations with crack preventative.
The new backsplash is tile with some granite inserts and an added listel.